Quantcast
Channel: UOBDII Official Blog
Viewing all 3224 articles
Browse latest View live

Lexia and PP2000 Windows 64 bit install: No Way! Why?

$
0
0

Tips and guides here for the computer numpty who has trouble in Lexia and PP2000 installation. And you will have an idea of why you cannot install PSA software on 64 bit systems.

Lexia and PP2000 Windows 64 bit install: No Way! Why?

Stick to a 32 bit OS for more compatibility with older cars.

Lexia and PP2000 is a 16 bit application and won’t run on a 64 bit OS unless running under a 32 bit OS installed on a Virtual Machine.


in detail…


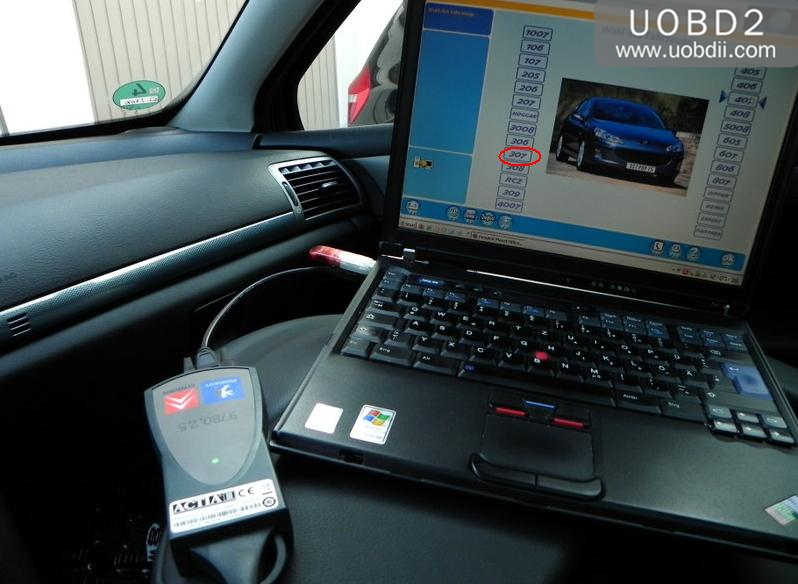
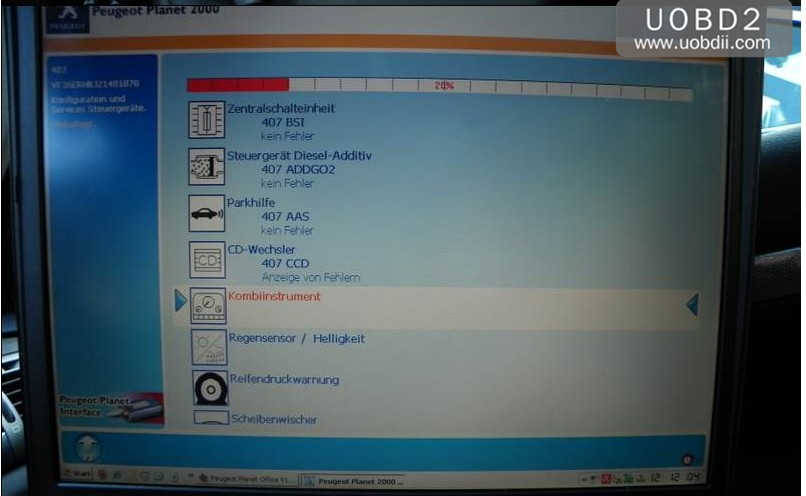
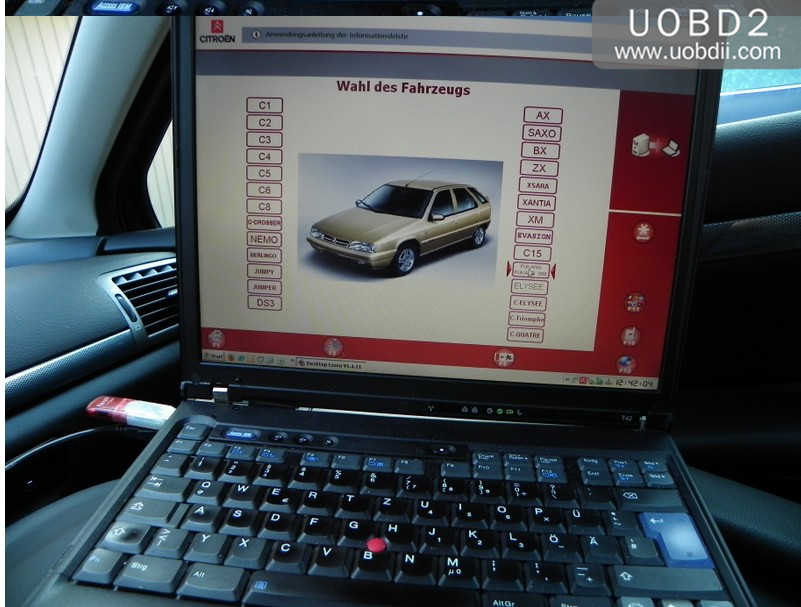
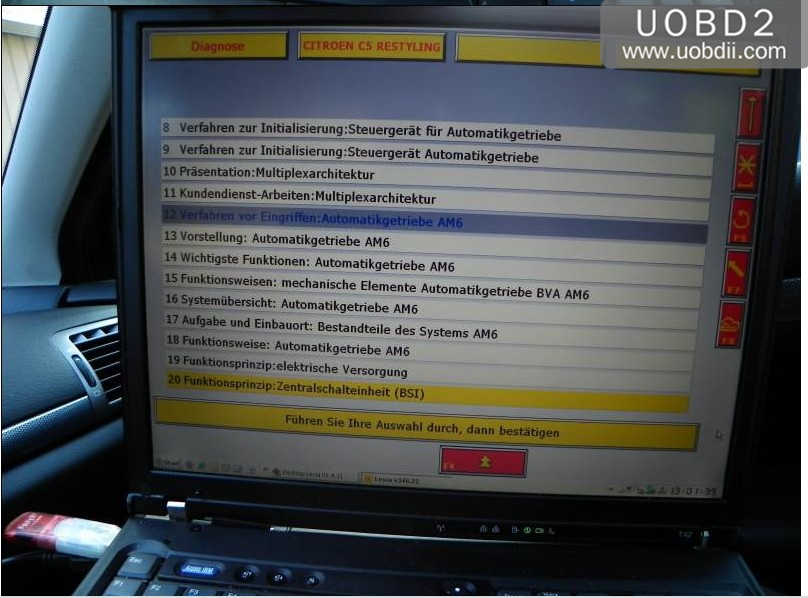
The issue is that Diagbox is the main application for cars post 2006 (ish). It is also the front end for the Lexia and Peugeot Planet software diagnostic applications used for olders PSA cars Pre 2006 (ish) depending on model. The Lexia and PP software are 16 bit applications. 16 bit application software doesn’t run under a 64 bit operating system. The only way to get this to work on a 64 bit operating system, is though a VM (virtual Machine) running a 32 bit operating system . This will require a VM-supported version of the 64 Bit OS, plenty of extra memory to run the VM, a licenced copy of a 32 Bit Operating System to run under the VM etc.

If this sounds like a no no for you, then just install a 32 bit version of Windows 7. The licence keys for both 32 bit and 64 bit versions of Windows 7 are interchangeable, so if you have the licence key for the 64 bit version of Windows 7 (which it would seem you have from your post), the key will work on the 32 bit version, as long as it is the same version (Home, Professional, Ultimate, Enterprise etc.). The Windows ISO installaion files are freely and legitimately downloadable if you don’t have the installation media for the 32 bit OS.

All you need to worry about is making sure you have the 32 bit software drivers for the hardware on your Laptop already downloaded or stored on a flash drive for use later.


There are a couple of things to consider first and to understand:

1Windows XP is of course free to download – however you will still need to purchase a valid licence to activate it – otherwise it will stop working within the 30 day period. I doubt that valid legal licences are now being sold as the operating system has long been de-supported.

2I would instead suggest Windows 7. Again, you will need a valid licence to activate it – regardless of whether using as a stand alone Operating System or as an OS under a Virtual Machine environment under Windows 10 or similar.

3Remember also, that if you require LEXIA specifically (for pre 2006 cars), as opposed to Diagbox, you will not be able to run it under any Windows 10 64 Bit Operating System. The Lexia – specific application (and I suspect Peugeot Planet 2000 also) is written using 16bit code and no 16 bit coded applications are supported under a 64 Bit version of Windows 10.

4If you only need Diagbox to work then this will not be a problem.

5Remember that a VM will need adequate physical hardware and resources such as memory to run – in addition to the host operating system. Laptops are not ideal for this as they do not generally have the resources needed. I suspect you will not be much better off than an older laptop with XP installed that has been upgraded with a bit of extra memory. See point (6)

6One of the single most issues I see with running Diagbox on an older XP laptop is the slowdown / lag of Diagbox. You will very likely find this atttributed to Windows Update. Whenever the service is running (usually a while after startup) it can very easily make Diagbox crawl to a halt. For most people who use an older dedicated laptop just for Diagbox – and don’t clutter it up with other junk, disabling Windows Update can improve speed by 200-500% or more. As Windows XP is no longer supported, there are no more updates being supplied – so this should not be an issue for most.

You can disable it here in XP:
Start>Run>Services.msc>Automaticupdates> Double-Click and click dropdown box, select “Disabled” then click “Stop”, then click Ok.
Also, to speed up boot-time, Start>Control Panel>System>Automatic Updates(tab)>”Turn off Automatic Updates”


How to erase 35080vp: R270 vs. VVDI Prog?

$
0
0

Topic: 35080vp read: R270 programmer or VVDI Prog?


What’s the difference between the EPROM chips as listed:

  1. 35080V
  2. 35080VP
  3. 35080V6


Car year difference:

35080 and 35080v6 are different for example 35080 is in bmw until 2004 and 35080v6 is in newer bmw cars


Data erasing difference:

this eeprom has incremental area which cannot be erased by default.

ETL, xprog, upa are able to erase them by using special way.

M35080, M35080_6 can be erased by upa, xprog and a lot more programmers

On M35080V6 and D80D0WQ you need special programmes like ETL or Codiprog or machines like digiprog, enigma to erase them.

In any case incremental area has to be erased before writing.


How to choose a decent programmer for 35080vp erase:


VVDI Prog: works


review 1:

35080 VP is erase full with vvdi programmer. good luck


review 2:

R270 vp series cip eraser need 5-10 hours

vvdi normal eraser


R270: need luck


review 1: 1-2 hours

R270 OK! Sometimes 1-2 hours.


review2: no luck

Left it 3 days with no luck….

Stopped it myself


review 3: not work

R270 wont do the 35080VP but other it do fine an I do not have blank at the moment


review 4: tried twice

R270 do job very well, sometimes need try for 2 times, because reading stop


review 5: change

for change U also can use 080D0WQ eep


review 6: need pcb rework

R270 can work but the board needs rework.


1- Change the power supply to good quality: 12V 1.5A !
2- Change capacitor :
r270-pcb-rework-for-M35080vp-1

3- Change resistor:
r270-pcb-rework-for-M35080vp-2


And to make R270 better on M35080, please replace the resistor R11 by 200-1K resistor.

r270-pcb-rework-for-M35080vp-3


Other programmers:


Eraser from Tacho.de work in 3 Sek


Tip: 35080 vp eeprom most equipment struggle erasing different results..

dont think 95080 will work in place of 35080 different characteristics of eeprom.

How many ways to repair a BMW FRM2/FRM3 module

$
0
0

The BMW FRM2/FRM3 module can be fixed in many ways,here UOBDII show these ways to repair BMW FRM2/FRM3.Hope it helps!


1.UPA
2.XPROG-M
3.R270
4.ORANGE5
5.VVDI Prog
6.BMW ISTA
7.Mini ACDP


All programmers listed has been tested successfully for FRM fix.

Google will helps you a lot (wiring, tutorial, etc.)


Here, we’ll talk about: which is the best for FRM repair?


Yanhua mini ACDP programmer wins!

That is because, compared with other programmers, mini ACDP is cable to program FRM without writing data from other cars and coding and without soldering. It’s very simple and efficient.


Look here: How does ACDP program FRM?


You need a ACDP programmer and FRM adapter for repair.


Connect the Mini ACDP device and BDM adapter with the FRM unit.

Backup data before operation.

frm-repair-best-easiest-way-1 frm-repair-best-easiest-way-2


Run Mini ACDP app on a mobile

Select BMW->FRM Programming->ICP MC9S12XEQ384 MASK: 3M25J

frm-repair-best-easiest-way-3 frm-repair-best-easiest-way-4


Select FRM Data Recovery (Automatic mode)

frm-repair-best-easiest-way-6

Detect pins and probe connection

frm-repair-best-easiest-way-7

Reading chip data

frm-repair-best-easiest-way-8

Read and display chip data

Check the data. If reads D-Flash as 32K, the FRM module data is corrupted.
If reads EEPROM data as 4K , FRM module data is not corrupted.

frm-repair-best-easiest-way-9

Uploading data

Auto saved D-flash to Yanhua Mini ACDP file folder

Show programming data

frm-repair-best-easiest-way-10

Verifying data

frm-repair-best-easiest-way-11

FRM data recovery completed.


Good to know:

If done other programmers, you’d better equipped with wiring/connection knowledge.


Optional ways to connect:

1.In socket – desolder chip
2.In circuit – BDM points – reverse of PCB – see image attached.
3.Direct – test clips onto pins like Pamona Micro Grabbers or cheaper alternative.


VVDI programmer FRM2 wiring:

VVDI diagram connection for FRM2 with MC9S12XDT256 – 0L15Y

vvdiprog-frm2-wirng-1 vvdiprog-frm2-wirng-2


Xprog FRM3 wiring:


Connections to:
BKGD
RESET
VDDR (5v)
VSS
xprog-repair-bricked-FRM3

BMW E/F scanner V2018.12 (Explorer) free download and installation

$
0
0

BMW E F scanner V2018.12 (Explorer) free download and installation guide and tips.  2018 BMW E/F scanner (Explorer) can perform full capacities incl. BMW Diagnosis, IMMO, Mileage Correction, Coding etc.


2018 BMW E/F scanner (Explorer) free download:

https://share.weiyun.com/5puEb7b

Password: ikmumq

Contributor: the engineer working for www.uobdii.com

Security: 100% safe

Works on 2018 BMW E/F scanner full version

bmw-e-f-scanner-2018

***Everyone knows that buying BMW Explorer would be the right thing to do but it is crazy expensive and while if you can’t afford to invest that kind of money in tools for now, that’s no bad to take a chance on clone tools like this.


Using Tip:

  1. Please ensure the car has enough power supply especially for programming, coding, ISN reset. otherwise, the programming job won’t be done, or the control module get broken.
  2. Don’t set the computer to standby, because the programming will take a long time for example reading ISN code will take over 30 minutes, if the computer is set to standby, the programming job won’t be done, or the control module get broken.


BMW E/ F scanner V2018.12 (Explorer) installation (Youtube)


BMW E/ F scanner V2018.12 (Explorer) installation (Words & images)

2018-bmw-e-f-scanner-driver-installation-01


Copy and paste all zip files and unzip them all on the desktop.


Note: Both “EF 20181203” and “BMW_v018.12.03” folder include BMW explorer software.  In “BMW_v018.12.03” folder, you have to setup driver and software before use. In “EF 20181203” folder,  software is preinstalled and ready to use. MUST RUN “BMW-EXPLORER” AS ADMINISTRATOR!!!


Open the “BMW_v018.12.03” folder

2018-bmw-e-f-scanner-driver-installation-02 2018-bmw-e-f-scanner-driver-installation-03

Run the “BMW_Explorer_v0.18.12.03” software as Administrator


Select “Next” to setup device driver


Accept license agreement


Complete FTDI driver setup.


2018-bmw-e-f-scanner-driver-installation-06 2018-bmw-e-f-scanner-driver-installation-07


Install “WHQL Certified” driver until complete.


Connect BMW E/F scanner to the computer.

2018-bmw-e-f-scanner-driver-installation-08


Open “Device Manager” to ensure if the computer established a good communication with the computer, also the current COM Port.

2018-bm2018-bmw-e-f-scanner-driver-installation-09w-e-f-scanner-driver-installation-09


Run BMW Explorer software on the desktop as Administrator


Select “Setup” and search COM port

2018-bmw-e-f-scanner-driver-installation-10 2018-bmw-e-f-scanner-driver-installation-11

Detect COM Port 5 and confirm it.

Software is installed and ready to use

2018-bmw-e-f-scanner-driver-installation-12


Run a quick self-test first.

2018-bmw-e-f-scanner-driver-installation-13

Open ECU

2018-bmw-e-f-scanner-driver-installation-14

Coding

2018-bmw-e-f-scanner-driver-installation-15

Edit AIF

2018-bmw-e-f-scanner-driver-installation-16

Change VIN

2018-bmw-e-f-scanner-driver-installation-17


RAM/FLASH

2018-bmw-e-f-scanner-driver-installation-18


Besides, you are allowed to read ISN, reset adaptation, register battery, update ECU etc

In the “EF 20181203” folder, you are allowed to directly run BMW EF 201812 software as Administrator and perform quick test and other features.

2018-bmw-e-f-scanner-driver-installation-19

2018-bmw-e-f-scanner-driver-installation-20


Done.

JMD Handy Baby 2 to Decode & Adding New BMW 525 ID46 Key

$
0
0

Here UOBDII share the guide on how to use JMD Handy Baby 2 to decode and add new keys for BMW 525 ID46 Keys.


What You Need?

Handy Baby II 2 Programmer

S-JMD Red Chip or K-JMD Chip


Procedures:

Build connection between Handy Baby 2 and you mobile JMD APP

JMD Handy Baby 2 to Decode & Adding New BMW 525 ID46 Key (1)

Insert the original key into the coil to read key information

JMD Handy Baby 2 to Decode & Adding New BMW 525 ID46 Key (2)

Choose “Handy Baby 1”

JMD Handy Baby 2 to Decode & Adding New BMW 525 ID46 Key (3)

The collect antenna of the Handy Baby II is close to

Close Handy Baby II collection antenna to BMW 525 car slot (ignition switch)

JMD Handy Baby 2 to Decode & Adding New BMW 525 ID46 Key (4)

Insert the original car key into the card slot,lit up dashboard and wait connection complete.

Select “On-line(APP)”

JMD Handy Baby 2 to Decode & Adding New BMW 525 ID46 Key (4)

Calculating…Don’t move the key

JMD Handy Baby 2 to Decode & Adding New BMW 525 ID46 Key (6)

Decode successful.Used JMD S-Chip/K-Chip/ID46 to copy.

JMD Handy Baby 2 to Decode & Adding New BMW 525 ID46 Key (7)

Copy successfully,and if you want to copy next key click “OK” to continue.

JMD Handy Baby 2 to Decode & Adding New BMW 525 ID46 Key (8)

Done!

Mercedes EIS/ESL/ELV cable: How much + Where to get?

$
0
0

Mercedes EIS/ESL/ELV cable on sale:


EIS/ESL cable: confirmed to work with VVDI MB

EIS/ELV cable: confirmed to work with VVDI Mercede


EIS/ESL cable: 75 usd (with free shipping)

vvdi-mercedes-eis-esl-cable-1 vvdi-mercedes-eis-esl-cable-2 vvdi-mercedes-eis-esl-cable-3 vvdi-mercedes-eis-esl-cable-4 vvdi-mercedes-eis-esl-cable-5 vvdi-mercedes-eis-esl-cable-6 vvdi-mercedes-eis-esl-cable-7


BENZ EIS/ESL Cable+7G+ISM + Dashboard Connector MOE001 Full Set BENZ Cable Work with VVDI MB BGA Tool

source: http://www.uobdii.com/wholesale/benz-eis-esl-cable-7g-ism-dashboard-connector-moe001.html


EIS/ELV cable: 89 usd (with free shipping)

vvdi-mercedes-eis-elv-cable-1 vvdi-mercedes-eis-elv-cable-2 vvdi-mercedes-eis-elv-cable-3 vvdi-mercedes-eis-elv-cable-4 vvdi-mercedes-eis-elv-cable-6 vvdi-mercedes-eis-elv-cable-7 vvdi-mercedes-eis-elv-cable-8 vvdi-mercedes-eis-elv-cable-9 vvdi-mercedes-eis-elv-cable-10 vvdi-mercedes-eis-elv-cable-11


Mercedes Locks Platform Test Line for W204 W212 W221 W164 W166
Scope of Application:
The EIS ELV maintenance
Key programmer
Detection key

source: http://www.uobdii.com/wholesale/eis-elv-test-line-for-mercedes.html

OBDSTAR X300 DP Plus Correct Odometer for Maserati Ghibli 2014

$
0
0

This article show a test case on how to use OBDSTAR X300 Plus to correct odometer for Maserati Ghibli 2014.

OBDSTAR X300 DP Plus Correct Odometer for Maserati Ghibli 2014-1

And for more X300 DP Plus test please check here:OBDSTAR X300 Plus test cases,for more odometer correction check:Mileage correction Cases


Procedures:

Connect OBDSTAR X300 DP Plus Programmer to vehicle via OBD,select “Diag Program”

Select “Cluster Calibrate”

Select “MASERATI”

OBDSTAR X300 DP Plus Correct Odometer for Maserati Ghibli 2014-2

MASERATI V30.00

OBDSTAR X300 DP Plus Correct Odometer for Maserati Ghibli 2014-4

GHIBLI

OBDSTAR X300 DP Plus Correct Odometer for Maserati Ghibli 2014-4

GHIBLI 95160

OBDSTAR X300 DP Plus Correct Odometer for Maserati Ghibli 2014-5

Mileage Calibrate

OBDSTAR X300 DP Plus Correct Odometer for Maserati Ghibli 2014-6

This function is available by connecting the server,please ensure the internet connection is normal.

Then input the name of file to save,here input “MSLD0000” and tab “Enter” to continue

OBDSTAR X300 DP Plus Correct Odometer for Maserati Ghibli 2014-8

The current mileage of 4001km(error does not exceed 20KM)? Press ENTER to continue,Press ESC to exit.

OBDSTAR X300 DP Plus Correct Odometer for Maserati Ghibli 2014-8

Now input the mileage value you want,here input “39915”,then tab “Done”

OBDSTAR X300 DP Plus Correct Odometer for Maserati Ghibli 2014-9

Then OBDSTAR X300 PAD2 Plus will prompt you “calibration complete”

OBDSTAR X300 DP Plus Correct Odometer for Maserati Ghibli 2014-11

Check the mileage value “39880”

OBDSTAR X300 DP Plus Correct Odometer for Maserati Ghibli 2014-11

Done!


VVDI Prog+W209/211 ZGW Adapter Read Benz W209 ST12 EIS/EZS

$
0
0

This article show a guide on how to use VVDI Prog and W209 Adapter to read Benz W209 ST EIS.

VVDI Prog+W209211 ZGW Adapter Read Benz W209 ST12 (1)


What Tools You Need?

W209 ST12 EIS/EZS

VVDI Prog Programmer

W209/211 ZGW Adapter


Procedures:

Remove the W209 ST EIS from vehicle and disassemble the shell

VVDI Prog+W209211 ZGW Adapter Read Benz W209 ST12 (2)

Install W209 ST EIS on the W209 ZGW adapter

VVDI Prog+W209211 ZGW Adapter Read Benz W209 ST12 (2) VVDI Prog+W209211 ZGW Adapter Read Benz W209 ST12 (4) VVDI Prog+W209211 ZGW Adapter Read Benz W209 ST12 (4)


Connect 12V power adapter cable to VVDI Prog,and connect to laptop

VVDI Prog+W209211 ZGW Adapter Read Benz W209 ST12 (6)

And build connection between VVDI Prog and W209 ZGW adapter

VVDI Prog+W209211 ZGW Adapter Read Benz W209 ST12 (6) VVDI Prog+W209211 ZGW Adapter Read Benz W209 ST12 (8)


Run the VVDI Prog software on laptop

Then select “Type=4-IMMOBILIZER” “Brand=BENZ” “Chip=EIZ-W209-ST12(ADAPTER)”

VVDI Prog+W209211 ZGW Adapter Read Benz W209 ST12 (9)

EIZ-W209-ST12(ADAPTER) connection diagram

VVDI Prog+W209211 ZGW Adapter Read Benz W209 ST12 (10)

And if you don’t have W209 ZGW adapter,you can select “Chip=EIZ-W209(ST12)” click connection diagram to check the PCB to wire connection.

VVDI Prog+W209211 ZGW Adapter Read Benz W209 ST12 (10)

After you connection build,click “Read” at the tool bar.

VVDI Prog+W209211 ZGW Adapter Read Benz W209 ST12 (12)

And you need wait the process finish

VVDI Prog+W209211 ZGW Adapter Read Benz W209 ST12 (13)

VVDI Prog+W209211 ZGW Adapter Read Benz W209 ST12 (14)

And then click “Verify” button to check if the file is ok.

VVDI Prog+W209211 ZGW Adapter Read Benz W209 ST12 (14)

It will prompt you operation success and check success

VVDI Prog+W209211 ZGW Adapter Read Benz W209 ST12 (14)

And now you can save the original eeprom file you read,and you would better to make a backup before you operations.

VVDI Prog+W209211 ZGW Adapter Read Benz W209 ST12 (17)

Done!


Mercedes VGS Programming: Xentry/DAS Possible?

$
0
0

Does anyone have success with Mercedes VGS programming, using Xentry/DAS?

Yep. it works. SD connect C4 will help code & program the new VGS (transferring old data to new vgs)


Review 1:

it could be done online,..but it takes more than 5 min!

What about 30 minutes,…and first you must wright the EHS number manually,…then to program the ETC module with the present software,..to code it,…then to program the engine ecu with the present software,..to code it too,..and

at the end you have to adapt your gearbox on the road!


please take a look at correction programming menu,..in normal DAS,..forget development menu!

Good luck!


Review 2:

I can do SCN right now from home

Just need a User and password to the head quarter server.


if you have user\pass you can SCN ! i installed lot of .9 bords with EHS but sometimes i install only bord in this case i need to put the EHS number and learn it to the new bord other ways the transmission will jerk , i met also problem with the SCN after i program + SCN the DAS close always for that i renter DAS again and i do the other process ( learn DAS – learn shift position ) manual , sometimes when the RPM sensor defect the DAS automatically lead you to the procedures but in this case DAS store the car vin and you won’t be able to log to the ETC anymore unless you do the procedures step by step .


Review 3:

Confirmed! Have tested by real professionals

xentry-das-vgs-programing-2-212.005 xentry-das-vgs-programing-3-212.005 xentry-das-vgs-programing-171.454 xentry-das-vgs-programing-211.022 xentry-das-vgs-programing-211.220 xentry-das-vgs-programing-212.005-1 xentry-das-vgs-programing-212.005-2 xentry-das-vgs-programing-212.051-0 xentry-das-vgs-programing-212.051-1 xentry-das-vgs-programing-212.205 xentry-das-vgs-programing-212.205-2 xentry-das-vgs-programing-219.322 xentry-das-vgs-programing-221.071

Thanks to uobdii.com

BMW E/F Scanner to Reset BMW FEM/BDC Mileage Guide

$
0
0

BMW Explorer E/F scanner have the function to reset or correct mileage for BMW FEM/BDC.And the main procedures as below:

BMW EF Scanner to Reset BMW FEMBDC Mileage Guide (1)

The reset of the FEM / BDC is divided into several stages

1 Preparation of FEM / BDC thru OBD

2 Preparation of FEM / BDC using programmer (Reading BACKUP)

3 Programming FEM / BDC with BMW-Explorer via OBD

4 Write back BACKUP EEprom  with the programmer

5 Write BACKUP coding (CAFD) via OBD

6 Mileage reset thru OBD


Step 1:

Remove the instrument panel (KOMBI) from the vehicle and use the programmer to edit the mileage.Further it is necessary to perform a quick test , go to the FEM / BDC and click the “Reset mileage” button,The program will check for a supported version of the unit,prepare the unit for the next procedure, and will display the message “Read Eeprom and upload in calc”.

DO NOT CLOSE THE CALCULATOR WINDOW AND THE PROGRAM !!!!! 


Step 2:

Remove the FEM / BDC unit as described HERE. Disassemble the FEM / BDC unit as described in THIS SECTION.

Read 95128 Eeprom (pictured in the upper right corner) using programmer

(Orange Xprog or others that supports EEprom 95128/95256).

Download Eeprom into BMW-Explorer, load Eeprom 95128/95256 and save Eeprom and write it back into the FEM / BDC.


Step 3:

Install the unit on the car in the reverse order of removal, and connect BMW-Explorer via OBD.The car probably will not respond to the key, do not get scared!

Connect to FEM, press “Reset mileage”, Explorer will propose to program the FEM / BDC, agree and wait for the programming to finish.

After successful programming, the program will write to you “Return the saved original Eeprom”, then remove FEM again and using programmer, return the previously read contents of EEprom 95128. Then you can install the unit back to the car.


Step 4:

Write BACKUP coding (CAFD) via OBD


Step 5:

Go into the FEM / BDC control unit with BMW-Explorer and press “reset mileage” button and after 3-5 seconds mileage will be successfully reset.


Install the instrument panel (KOMBI) with the edited new mileage


Sometimes it is possible that after the last manipulation the FEM / BDC will stop responding to the diagnostics, then you need to flash this EEprom into the unit and program the unit with Esys or ISTA-P and start the unit preparation from step 1.

P.S: Follow the instructions and  save your time.

BMW EF Scanner to Reset BMW FEMBDC Mileage Guide (2)

Supported ECU FEM:

swfl_0000155e_004_102_030, swfl_0000155e_004_102_040

swfl_0000155e_004_103_030, swfl_0000155e_004_104_040

swfl_0000155e_007_102_010, swfl_0000155e_008_101_030

swfl_0000155e_008_101_050, swfl_0000155e_008_101_070

swfl_0000155e_011_102_020, swfl_0000155e_012_104_010

swfl_0000155e_012_200_030, swfl_0000155e_014_102_040

swfl_0000155e_015_100_020, swfl_0000155e_015_102_020

swfl_0000155e_015_152_030, swfl_0000155e_015_154_010

swfl_0000155e_016_106_030, swfl_0000155e_016_112_010

swfl_0000155e_016_114_020, swfl_0000155e_017_110_030

Supported ECU BDC:

swfl_00002419_005_016_130, swfl_00002419_005_016_140

swfl_00002419_005_017_092, swfl_00002419_005_018_031

swfl_00002419_005_019_040, swfl_00002419_005_019_101

swfl_00002419_005_019_120, swfl_00002419_005_028_060

swfl_00002419_005_028_160, swfl_00002419_005_028_170

swfl_00002419_005_028_245, swfl_00002419_005_031_110

swfl_00002419_005_031_200, swfl_00002419_005_042_030

swfl_00002419_005_042_050, swfl_00002419_005_042_070

swfl_00002419_005_118_030, swfl_00002419_005_118_050

swfl_00002419_005_118_140, swfl_00002419_042_100_040

swfl_00002419_052_010_030, swfl_00002419_052_030_010

swfl_00002419_052_040_010, swfl_00002419_061_010_030

swfl_00002419_062_010_020, swfl_00002419_071_010_040


How to Solve JLR Mart Tool Frequency Error

$
0
0

Here UOBDII service team have collection some frequency problems of JLR Mart tool asked by our customer and key programmer forums.And here give the solution for them,hope it helps!


Mart tool device unregistered; Mart tool file link unavailable solution, solution to Mart Tool can’t read Jaguar RFA file with vvdipro, Mart Tool network error solution etc.

mart tool-using-tip-05 mart-tool-02


1.Mart tool device unregistered, registered now?

mart tool-using-tip-01

Tip:

1.Connect Mart tool Device to the computer, install driver.

2.For the first time you use Mart tool, open the software and get message “ device unregistered, registered now …” click on “yes” to register (it is bound to the computer after registration, cannot be used for other computers, the computer needs to be networked and the anti-virus software is turned off).


Error 2: Mart tool error “file link unavailable”.


Solution:

Free download this file “mart_tool_2 encrypted 2018.9”

https://mega.nz/#!oQhgkABZ!712ziCtJEnmb4lJIyC_u-17-R1lGuUgpHiLt-WSvhv0

Size:1.6MB


Error 3: Mart Tool can’t read Jaguar RFA file with vvdi pro.
Pictures below.

mart-tool-using-tip-03 mart-tool-using-tip-04


Solution:

You have to read it as secured and follow their other wiring diagram. You have to remove two resistors.

This solves most issues, Virus scanner of, run as admin, get at least 2 laptops, 32 and 64 bit.


Error 4: Mart Tool network error solution

mart tool-using-tip-05


Solution:

Download the Mart tool client to solve it.

https://mega.nz/#!iIAQTIrI!YuALmyLPp9gT6QIYkxSFKRjrVLtzqwbiOqYDTOn6Sj0

Yanhua Digimaster 3 Program Keys for Mercedes Benz W220

$
0
0

Digimaster 3 is known for its odometer correction function,but it is also a automotive key programmer.Here UOBDII share the guide how to use Digimaster 3 to program keys for Mercedes Benz W220


Procedures:

Enter the menu to select “immo”,then select Benz brand

Click “S Class”, choose Automatic mode, you will see there are 3 steps to program the key for Benz W220.

Yanhua Digimaster 3 Program Keys for Mercedes Benz W220 (1)

First step, program EIS, choose 05X32/1D69J to enter the following page.

Yanhua Digimaster 3 Program Keys for Mercedes Benz W220 (2)

De-solder the two CPU according to the diagram, and solder them to the adapters.(to avoid mix up please mark the two CPU before taking them off)

Yanhua Digimaster 3 Program Keys for Mercedes Benz W220 (3)

After read the data it will show the SSID information etc. Choose the key number you want and then click “Write data” to finish the EIS adjust.

Yanhua Digimaster 3 Program Keys for Mercedes Benz W220 (4)

Step 2:DME. Take 95040 for example, check the picture and remove the chip to the adapter, click “Next”.

Yanhua Digimaster 3 Program Keys for Mercedes Benz W220 (5)

After read the data, it will show the ECU information, click “Write data” to finish the ECU programming.

Yanhua Digimaster 3 Program Keys for Mercedes Benz W220 (6)

Step 3:ESL. Check the picture and remove the chip to the adapter, click “Next”.

Yanhua Digimaster 3 Program Keys for Mercedes Benz W220 (7)

click “Write data” to finish this step.

Yanhua Digimaster 3 Program Keys for Mercedes Benz W220 (8)

Step 4:key programming (this step is based on the data of step 1, if not implemented “Step 1” , this step can not be operated). Take YH Key for example. Before program the YH Key please make sure it was registered.

Yanhua Digimaster 3 Program Keys for Mercedes Benz W220 (9)

Choose the key No. to begin key programming.

Yanhua Digimaster 3 Program Keys for Mercedes Benz W220 (10)

Done!


JMD Handy Baby 2 All Key Lost Programming for VW/Skoda 4th Immobilizer

$
0
0

This article show you how to use JMD Handy Baby 2 to perform VW/Skoda 4th Immobilizer system all keys lost programming.Hope it is helpful to your work.


What You Need?

JMD Handy Baby 2

Handy Baby Assistant Adapter

JMD48 Chip


Related Content:

How to use Handy Baby II to copy Toyota /Lexus G key?

How to Register and Active Handy Baby 2 II


Article About VW 4th Immobilizer System Key Programming:

Lonsdor K518ISE and VAG OBD helper program VAG 4th via OBD

VAG OBD Helper & VVDI2 program VW 4th IMMO All Keys Lost via OBD

OBDSTAR X300 DP+ RFID Adapter program key VW 4th 5th IMMO OK

How to program vag 4th 5th IMMO by Xtool X100 PAD 2 full set?


Procedures:

Step 1:Collect Data

Insert new remote key (without chip) into ignition and lighten the dashboard

JMD Handy Baby 2 All Key Lost Programming for VWSkoda 4th Immobilizer (1)

Plug the Handy Baby assistant adapter on OBDII port.

When the assistant make a long beep for 2 seconds and stops for 1 second,the data is collected ,then pull out the assistant adapter.

JMD Handy Baby 2 All Key Lost Programming for VWSkoda 4th Immobilizer (2)


Step 2:Upload Data

Open the JMD APP and connect handy baby 2

JMD assistant sensing area sits on the identification antenna and reads the collected data.

After read successful,choose JMD APP upload

JMD Handy Baby 2 All Key Lost Programming for VWSkoda 4th Immobilizer (3)

Write VIN code

Choose VW or Skoda

Write token to payment (Purchase from a agent)

Upload success

JMD Handy Baby 2 All Key Lost Programming for VWSkoda 4th Immobilizer (4)


Step 3:Download Data and Program New Keys

Connect Handy Baby 2 to laptop and build connection between Handy Baby 2 and JMD Handy Baby Client

After connection built,select “ALL LOST CALC”

JMD Handy Baby 2 All Key Lost Programming for VWSkoda 4th Immobilizer (5)

The device has been connected to star collecting data…

JMD Handy Baby 2 All Key Lost Programming for VWSkoda 4th Immobilizer (6)

After the calculation is successful,the check code will be sent to the registered mailbox

JMD Handy Baby 2 All Key Lost Programming for VWSkoda 4th Immobilizer (7)

Download success!

JMD Handy Baby 2 All Key Lost Programming for VWSkoda 4th Immobilizer (8)

Now download the data to your handy baby 2,select “Download Data”–>”Download PC”

JMD Handy Baby 2 All Key Lost Programming for VWSkoda 4th Immobilizer (9)

Place “C-JMD 48 chip” into the coil,then click “OK” to copy new key

After first key program successfully,you can press “OK” to copy next key.

JMD Handy Baby 2 All Key Lost Programming for VWSkoda 4th Immobilizer (10)

Done!

Program Keys for Indian TATA 24C04 with UPA & TM100 Programmer

$
0
0

This article show a guide on how to use UPA and TM100 Key Programmer to program keys for TATA Indica Vista,Safari Storme,Manza.


What Devices You Need?

UUSP UPA Programmer

TM100 Programmer


Procedures:

Remove ignition switch from vehicle.

Remove the screws from ignition switch

Program Keys for Indian TATA 24C04 with UPA & TM100 Programmer (1) Program Keys for Indian TATA 24C04 with UPA & TM100 Programmer (2)


Separate immobilizer coil from lock

Program Keys for Indian TATA 24C04 with UPA & TM100 Programmer (3)

Remove the screws on the coil

Program Keys for Indian TATA 24C04 with UPA & TM100 Programmer (4)

Open cover of coil carefully

Program Keys for Indian TATA 24C04 with UPA & TM100 Programmer (5)

Now you can get in access to the PCB,and then remove the 24C04 chip from PCB

Program Keys for Indian TATA 24C04 with UPA & TM100 Programmer (6)

Fix 24C04 chip on the adapter

Program Keys for Indian TATA 24C04 with UPA & TM100 Programmer (7)

Connect the 24C04 adapter to UPA programmer,and build connection to laptop

Program Keys for Indian TATA 24C04 with UPA & TM100 Programmer (8)

Run UPA software to read out 24C04 data file,and save it on your laptop.

Program Keys for Indian TATA 24C04 with UPA & TM100 Programmer (8)


Now you need to run TM100 software,and select vehicle brand and model

Program Keys for Indian TATA 24C04 with UPA & TM100 Programmer (10)

Open the file read by UPA software

Program Keys for Indian TATA 24C04 with UPA & TM100 Programmer (11)

And now you can see the old keys already stored in IC

Program Keys for Indian TATA 24C04 with UPA & TM100 Programmer (11)

Select “Key 3”

Program Keys for Indian TATA 24C04 with UPA & TM100 Programmer (13)

And use ID46 chip for new key,and you need to put the ID46 chip into closed to TM100 coil slot.

Program Keys for Indian TATA 24C04 with UPA & TM100 Programmer (14)

Then TM100 software will add the new key information into the file that you read from 24C04 chip.If you need to add next key,you need to save the file as new one.And for next key operation,you need to reload the new file.

After adding keys you want,use UPA software to write the new immobilizer file back into 24C04 chip.And then solder the 24C04 chip back on the ignition switch coil PCB.


Done!Let’s drink beer for your excellent work!

Program Keys for Indian TATA 24C04 with UPA & TM100 Programmer (15)


(Solved) VXDIAG VX Manager license expiration 12/31/2020

$
0
0

Got everything up and running. I noticed the VX Manager license showed an expiration of 12/31/2020. That about right?


Replied:
Yea, about right, and when I was setting up Tis2000 and upgraded the license for it, noticed that it was slightly longer date than the initial nano license to start with when I was setting up T2w. So got a feeling that is only upgrades the license for so long from a given date,, but if you go in later, it will further the license by the same time frame for a later date instead.

The only really downside I see, is in GDS2 for the MDI side of things, and wondering if there is going to be any updates to the cracked version. Hence in GDS2, GM global 2016.4.0 , the latest corvette is the 2016 model, with nothing listed for 2017, nor 2018 models.

With any luck, they get the on cloud version completed for GM, and it will either have the updates, or at least allow you to use the online version for the 2017 and later GM models instead.

If you did not see the cloud version, go to VX manager, to the far right tab, and will bring you up to speed.

in detail…


VX Manager download:

https://mega.nz/#!esxVxIzb!h3CJbcyNG0u1OE_Tam978pygzfuKktQMrRCDcM9E0H8

Install the VX Manger

Install-VX-Manger-1 Install-VX-Manger-2


Connect your device. Open the VX Manager, and click VX Cloud. Then click 云诊断(Cloud Diagnosis)

Install-VX-Manger-3 Install-VX-Manger-4


Sign in, the User name is xinnuoyu, password is xinnuoyu, too.

Install-VX-Manger-5

You will enter to this interface.

Install-VX-Manger-6

Connect VXdiag Nano to your car, click your car brands, then click OPEN CLOUD. Here take Mazda as an example.

Install-VX-Manger-7

You will be connected to the cloud. Mazda IDS software will be there.

Install-VX-Manger-8

Open Mazda IDS, start new session, and choose all other. Try to see whether your car information is correct or not. You can start to use it now!

Install-VX-Manger-9

When you finish using it, close the upper window. Click OK and then left.

Install-VX-Manger-10

If your device is a multi one – VXDIAG multi diagnostic tool, and you want to do other car models. you can click Diagnostic Cloud Apps and choose the model you want.

Install-VX-Manger-11


SEC-E9 key cutting machine & its optional clamps

$
0
0

SEC-E9 key cutting machine and its optional clamps incl. image, name, suitable keys, price etc.

SEC-E9 clamp name Image Suitable keys Details
Single-sided standard key clamps single-sidedstandard-key-clamps-01 for House Keys Details + how to use
HU162T Clamp hu162t-clamp-02 Volkswagen Golf 7, Magotan 2018, Lavida 2018, Phaeton etc. also Audi 2018 new models Details
HU66 Clamp SN-CP-JJ-12 hu66-clamp-03 Sharon, Touareg, Phaeton, Beetle and other Volkswagen series, as well as TT, Q7 and other Audi series, Bentley, Lamborghini, Skoda series, Porsche series, Roewe. Details
Tubular Key Clamps tubular-key-clamp-04 House keys & Motorcycle keys Details + how to use
Ford Tibbe Jaws FO21 Key Clamp  ford-tibbe-jaws-fo21-key-clamp-05 Ford and Jaguar keys Details
HU64 Clamp hu64-clamp-06 Benz series for class C,E and GLK ,Sprinter,Viano, Vito and all new Benz improted cars (including Maybach,Lorinser and Carlsson,class in S and GL,out milling and double side   keys) Details
SN-CP-JJ-01 car-key-clamp-sn-cp-jj-07 1) Major jaw for SEC-E9
2) For car keys fixing and cutting
3) Fix standard keys and laser keys
4) To do calibration must use this clamp firstly
5) Can add other aided fixture on it to complete different types of keys cutting
Details
Dimple House Key Cutting Clamps SN-CP-JJ-02 dimple-house-key-cutting-clamps-sn-cp-jj-08 Details
FO19 LDV Key Clamp SN-CP-JJ-06 sec-se9-ldv-fo19-clamp-09 For Cutting LDV Car Keys. It is put on the main clamp automobile key cutting clamp when used. Details
TOY2 Clamp toy2-clamp-10 for new Toyota and new BYD one-side cut thin laser keys Details
VA2 Clamp SN-CP-JJ-13 va2 clamp-11 for new Renault one-side cut thin laser keys Details

How to Use TMPro2 to Copy VAG ID44 PCF7935

$
0
0

This article show the procedures of how to use TMPro2 to copy VAG ID44 PCF7935.

Preparations:

Transponder Marker Pro2 TMPro2

PCF7935 Chip

Procedures:

You need to connect TMPro2 to laptop and run the software.

Insert key in hole and press Read and recognise transponder button. You can also use F5 button for to do this.

How to Use TMPro2 to Copy VAG ID44 PCF7935 (1)

After then you will get the key information on the screen,include:chip type,chip data and chip page…if particular page is locked or not, etc. If key is capable to be copied, software automatically goes to relative software module (62,63,64,65,145,185,187). Software also shows type of transponder, that must be used for copying of your key.If key is not capable for copying, in left down corner you will see message ‘No data for copying’.

How to Use TMPro2 to Copy VAG ID44 PCF7935 (2)

Note:for copying ID45 keys Peugeot 206/406:For copying Peugeot 206/406 ID45 keys software asks you if to start to extract of secret key or not.

How to Use TMPro2 to Copy VAG ID44 PCF7935 (3)

Prior to copy the key, you have to continue with Yes.During extracting of secret key you MUST NOT remove original key from device until extracting completed.

How to Use TMPro2 to Copy VAG ID44 PCF7935 (4)

Extracting time for ID45 keys can last maximium 10 seconds. At end of procedure you can see vehicle PIN code, if you need to program keys by diagnostic device.

How to Use TMPro2 to Copy VAG ID44 PCF7935 (5)

Note:If you want to copy ID4D Texas crypto keys and ID46 Philips Crypto 2 keys,you need to buy extra cloner unit.

Insert key with needed transponder in TMPro antenna and press Program the transponder button.You can also use F6 button for to do this.

How to Use TMPro2 to Copy VAG ID44 PCF7935 (6)

At end of programming you get ready to start car key.

How to Use TMPro2 to Copy VAG ID44 PCF7935 (7)

VVDI Keytool remote cloning: Fixed code cloning vs Special cloning

$
0
0

Look here: In remote cloning with VVDI key remote tool what’s the difference between Fixed Code & Special Clone?


remote cloning

remote cloning includes hcs/fixed code cloning, non-hcs rolling code cloning and remote editing function


hcs/fixed code cloning:

support common fixed code cloning PT22XX, LX918, HT6P20, etc.

support hundreds of vehicle and garage hcs rolling code remote cloning and generating. generated remote should be re-programmed to received to receiver box

support all xhorse universal remote serials


non-hcs rolling code cloning:

support all fixed code remote cloning

support partial special vehicle models (such as Hornor) remote cloning without repeated code

support partial vehicle non-repeated code hcs type remote direct cloning

* this type only support cloning by xhorse universal wired remote series


remote editing:

support editing PT22XX, LX918, HT6P20, VD5029, AX5326, HT12X, etc.

common fixed code format data and use xhorse universal remote to emulate

support all xhorse universal remote series

vvdi-key-tool-remote-cloning-1 vvdi-key-tool-remote-cloning-2 vvdi-key-tool-remote-cloning-3


Lexia 3 cable review: Test on Citroen and Peugeot

$
0
0

Lexia 3 Chinese interface test:


It works on both my 2002 2.0 HDI and 2004 2.0 HDIs

works OK on the c5 very helpful bloke with remote set up

Lexia will work with the wife’s Pug 107 using Citröen software.


I’ve personally used it on a Xantia V6 Mk2, a 2002 C5 HDi 110 Diesel Automatic and a C4 Picasso (RichardW’s) without any issues so far.


it talks happily to our Peugeot 308 CC


I have only used it on a 308, but i think that the 308 has the same bus configuration as the C5 X7


Have my Peugeot 207 of 2007 diagnosed and updated its ECU.


Talks to my Peugeot 307

lexia-3-psa-review-6 lexia-3-psa-review-7


Works well on Citroen C5

lexia-3-psa-review-1 lexia-3-psa-review-2 lexia-3-psa-review-3 lexia-3-psa-review-4

The Chinese interface…. I’m using the site:http://www.uobdii.com/wholesale/lexia-3-for-citroen-peugeot-with-original-chip.html

lexia-3-psa-review-5

Confirmed! CGDI MB can read/clear/write NEC chips

$
0
0

This mini post show a test report on CGDI Mercedes programmer read,clear,write a NEC chip.And for more CGDI MB programmer test case,please check here:CGDI Benz Test Cases


Procedures:

step 1 dismantle the key and desolder the NEC chip

cgdi-mb-nec-chip-1

step 2 clean the pcb and nec chip before welding back on the board

cgdi-mb-nec-chip-2

step 3 identify the nec chip and weld onto the nec board

cgdi-mb-nec-chip-3

step 4 select the nec adapter and corresponding chip type

cgdi-mb-nec-chip-3

step 5 read key/chip

cgdi-mb-nec-chip-5

step 6 reset

cgdi-mb-nec-chip-6 cgdi-mb-nec-chip-7


step 7 if you have key files already, open/write

cgdi-mb-nec-chip-8 cgdi-mb-nec-chip-9 cgdi-mb-nec-chip-10


success!

step 8 read key/chip to confirm the success of key writing

cgdi-mb-nec-chip-11 cgdi-mb-nec-chip-12


Done!


CGDI MB is able to read and write NEC chips!

Viewing all 3224 articles
Browse latest View live


<script src="https://jsc.adskeeper.com/r/s/rssing.com.1596347.js" async> </script>