Quantcast
Channel: UOBDII Official Blog
Viewing all 3221 articles
Browse latest View live

How to install ODIS-S 5.0.4 ODIS-E 9.0.4 on Win 7 Win 10

$
0
0

Hey Guys, this is ODIS-S 5.0.4 ODIS-E 9.0.4 for you, incl. download links, installation instruction, questions and answers frequently asked.

odis-s-5.0.4-odis-e-9.0.4-images

Download ODIS-Service 5.0.4 ODIS-Engineering 9.0.4:

Free version:

https://mega.nz/#F!51F3WCaa!Kovg-8LI3Qu1ojNAmwrNng

PW: hoangtai

Vehicle coverage: Audi, VW Passenger and Commercial, Skoda, Seat, Bentley, Lamborghini, Bughatti , Man Trucks
Note: you can find find here full 5.0.3 No need for any key and it’s full with full language pack

Tested version:

ODIS S 5.0.4 ODIS E 9.0.4 is newest but not tested yet.

If you want diagnosis with relief, ODIS S 4.4.1 and ODIS E 6.7.5

ODIS S 4.4.1:100% tested

http://www.uobdii.com/wholesale/odis-4-4-1-software.html

ODIS E 6.7.5:100% tested

http://www.uobdii.com/wholesale/vas5054a-odis-engineering-software.html


Steps to install ODIS S 5.0.4 ODIS E 9.0.4 :


Step 1: Install Setup + license and reboot


Step 2: Do not run ODIS

Replace files ( Launcher )

and change Softing 1.20.42

C:\Program Files (x86)\Soft

or

C:\Program Files\soft


Step 3: Run Odis and install PostSetup


link connect online with Geko Online Certificate China :
https://vas.faw-vw.com/logon/LOGONService.asp
https://vas.faw-vw.com/PIN/PINService.asp
https://vas.faw-vw.com/service42/repairhints.asp
https://vas.faw-vw.com/svmvw/svmvwservice.asp
https://vasdp.faw-vw.com/VAS/reportUpdate.action
https://vas.faw-vw.com/rta/service/default.asp

the best online with CPN .


Q: ODIS S 5.0.4 ODIS E 9.0.4 – questions and answers:


Q: would i be able to do immobiliser in europe ?

Why not? But u need certificate or vpn and account geko


Q: how to install certificate?

Beware if any member offers to sell you certificate. As soon as you use it it will be blocked within 24 hours by VAG if you are not one of their dealers.


Q: I did not do the change softing step as I do not see the folder in either of these address. I ran ODIS after mounting the postsetup and completed the update very easy. But when I open it I got the ODS6501E error general database access in the attachment. And the software stuck and nothing is happening. 

the softing folder is in program data, you might have to change your folder view as its hidden.


Q: I managed to install and update the software. What’s next steps ? Do I need to get license to log in to dealers serve? 

After you downloaded all the software did you burn the iso images to disc, I used cdr for the smaller files and then a dvdr for the projects, install the svg viewer and adobe reader first, install the offboard diagnostics second, copy and paste the loader, copy and paste the file from addons folderyou downloaded  into the addons folder into the program folder replacing the one which is there, reboot, put your update disc into your drive, start odis and when the update request comes up point the selection to your dvd drive, you may need to go a folder down, allow the update and it will open the program when its finished, close the program and reboot, if you are going to install the projects then copy the individual folders to your hard drive then start the program, open administration it asks for the location of the project files, it gives you the options of selecting about six of them, add the locations selecting the xml files in each vehicle brand, click save, on the right of the page using the drop down arrows find the update button and it will add the relevant projects into the right place in the program, when its finished you can go back and first reset the file locations and you can add the remaining xml files, update again then reboot again, job done, good luck.


Q: do you have the latest odis for now which is v5.0.4?

When you extract Odis S 5.0.4 its already included in the zip file

odis-5.0.4-unzip


Q: Expiry date?

A: Year 2030


Q: it is written that keygen is missing. Can you give any install manual for making this version of ODIS-E work and why do we need files, such as “Windows Update”, “VAS5054 сборка” and “Vehicle Mapping”?

A: There is no need for keygen. Download it using Utorrent and everything is there. Some files are no need just incase some user never did update on there PC. So, they might need that.


Q: can any one tel me the steps for instalation?

A: you can google it or youtube it.


Q: what version of postsetup ODIS Engineering 9.0.4? and  ODIS-Service 5.0.4 ?

A: once you download it u can see the postsetup version there.


Q: why do we need files, such as “Vehicle Mapping”?

A: This is most wanted file for Odis-E. It shows what project to choose for current car.


Q: the soft installs well, the problem I have when wanting to open the program is ODS9031E infrastructure. Online connection VW. Mirror server 2

A: If this happens during installation of post setup, try to choose English US.


Q: for what brands is this???  include bentley, bugatti, lamborghini???

A: For all 9x brands……..


Q: Anybody else got the antivirus notification

A:

Quote:

Trojan:Win32/Occamy.C


inside of:


Quote:

\03. Launcer+license+plugins 5.0.4.rar->Launcer+license+plugins 5.0.4\OffboardDiagLauncher.exe


Q: Install for Odis E worked like a charm, but did anybody else experienced that the postsetup for Odis S takes ages and ages?

A: Odis-E always takes around 5-10 mins to installed the postsetup but the Odis-S takes always around 30-40 mins (for all the brands)………
Odis-E is fast because using only the basic simply diagnostics GFS (guided functions) since other is his role…………


Q: The postsetup file seems very small compared to earlier versions of ODIS(E).  Is it complete?

A: It is smaller because is the correct one and not like all the other and modded/home made with craps………
The Odis-E PS always was maximum 800mb……….


Q: How does the odis HW ID work. if I start it, nothing happens.

A: Actually when you start HW ID this app makes special code which helps to create a correct license.dat file.
You just need to start this file to load all nessessary info into clipboard.


Q: I get an error message in ODIS E:
“Error reading the license file. Could not parse certificate
java.io.IOException: Empty input
This license is invalid”

A: You not applied (replaced) the required cracked files or if you made this then you using bad license file……..


Q: Can I install it on the WIN10 system?

A: need luck if with a clone vas 5054. most said No, but i installed under win 10 x64 with clone 5054 and everything working fine, im just use another PID


Q: An error with one of the software components was detected. The ODIS Service installation will be removed again. Uninstalling the vehicle connection (VW MCD, PDU, API) will be attempted first. This may take several minutes.

A: Unistall all the microsoft VC++ and then start your installation………
So now you must uninstall the half’s that installed and then to restart your installation………


Q:  where to put ODX files?

A: If you did not add any projects with copy paste or unzip to folder C:\ODIS-DIAG-MODULES-ENGIN\MCD-PROJECTS-Engineering\DSVR-ProdiMCD, you can add it easy.if you have ultra iso app ,mount project iso file to virtual cd rom.in every car mark folder you see many zip files with projects and one odx index file.Start engineering launcher. go to the directory what you see in picture

odis-e-9.0.4-install

and press select button and select your virtual Cd rom directory what you have. And select folder and odx file in your folder what you need …Its like adress to directory with project zip files..and application understand where it can update odx files. then press save button.and go to configuration, you can see it right side in the picture. then press odx update button, you  will see open new window with list with projects then press start.It is update and restart the program and its done.


Q: anyone have problem with 2 different language?

odis-5.0.4-two-languages

A: During my recent work on a Skoda Rapid, after scanning and going into GFF, the language changed from English to Deutsche. However, the ODIS version was 4.3 so maybe even in this version, some special function still are in the original language.


the problem is for the beginning with the installation.. if you don’t select nothink on language, it select automaticly  german language.. I installed again and select English Gb and is working fine!


Have fun!


Xhorse Dolphin cuts Honda HON66 all key lost by code successfully

$
0
0

Xhorse Dolphin can cut Honda HON66 all key lost by code successfully, here we go.


Tool to use:

New Honda HON66 key

IOS phone or Android Phone.

Xhorse Condor Dolphin key cutting machine

xhorse_dolphin_key_cutting_machine_honda_hon66_cut_by_code-01


Tap “Setting” to pair Bluetooth.

xhorse_dolphin_key_cutting_machine_honda_hon66_cut_by_code-02 xhorse_dolphin_key_cutting_machine_honda_hon66_cut_by_code-03


Tap “All key lost”.

xhorse_dolphin_key_cutting_machine_honda_hon66_cut_by_code-04


Choose “Honda”.

xhorse_dolphin_key_cutting_machine_honda_hon66_cut_by_code-05


Enter the code “K730” and tap “Query”.

xhorse_dolphin_key_cutting_machine_honda_hon66_cut_by_code-06


Choose “HON66EHP”.

xhorse_dolphin_key_cutting_machine_honda_hon66_cut_by_code-07


Clamp type.

M2-A Clamp Tip align position 2.

xhorse_dolphin_key_cutting_machine_honda_hon66_cut_by_code-08


Tap “Cutting key”.

xhorse_dolphin_key_cutting_machine_honda_hon66_cut_by_code-09


Continue.

xhorse_dolphin_key_cutting_machine_honda_hon66_cut_by_code-10


Cutting key.

xhorse_dolphin_key_cutting_machine_honda_hon66_cut_by_code-11 xhorse_dolphin_key_cutting_machine_honda_hon66_cut_by_code-12 xhorse_dolphin_key_cutting_machine_honda_hon66_cut_by_code-13 xhorse_dolphin_key_cutting_machine_honda_hon66_cut_by_code-14


Clean the clamp.


Take out the key to test if it is working.

xhorse_dolphin_key_cutting_machine_honda_hon66_cut_by_code-15


Done.


www.uobdii.com

VVDI MB vs Simon Touch MB Clinic vs Abrites vs Others

$
0
0

Need advice!

VVDI MB vs CGDI MB vs Simon Touch MB Clinic vs Abrites vs Other tool, what tool is advised for work with Mercedes-Benz (Keys, EZS, ELV, Cluster….) key programming?

mercedes benz key programmer


AVDI: very good support

I have SimonTouch mb nec full and AVDI and VVDI MB
SimonTouch is very poorly supported, many problems arise in the work and many functions do not work because the MB clinic is still only an advertisement, they don’t sell it yet, a very raw product
AVDI is very good support and really everything works from the stated, very good product.
VVDI MB is also not a bad product, but support from the Chinese is slow. The only negative is the use of tokens.


Simon Touch: very fast and very useful

I use Simon touch MB tool and also i have the AVDI i use them both for my job and both are working well for me the option that i dont find in MB tool i do it with AVDI and the option like enabling ESL that doesnt exist on AVDI i use it on MB tool, brief i use MB tool to program Simon touch emultors and ESL or to enable also i do alot of keys and get the password from key, also i work on AVDI to extract password from EIS.
About MB clinic its a very nice and powerful tool that will do a lot of job for me for future i will but it as they said end of march.

after my experience with Simon touch support i rly like the way that they work because its very fast and very useful and friendly staff for support on skype for free.
i used VVDI but has several issues so i stopped working on it (ps: issue on my job), and also i like Simon touch prices are cheap concerning what i need to do.

This is all i can write for you and tell you what i use other than that you have to see whats your need and want.


MB Instrument: work with ESL

If you need to work with ESL, then it is better to use MB Instrument. It implements a factory command algorithm for working with NEC chips,  unlike simontouch have power interference with  which sometimes leads to a malfunction of the NEC chip.


These functions do not work for simontuoch:
EIS reading by IR – Password from any EIS (Motorola/NEC with or without existing Key)
NEC keyless read/erase/write on adapter board.
All key by IR Password read – All Key versions/Keyless/BGA.
ISM Resetting by OBD/CAN to the factory state without loosing of SCN coding.
ECU Renew Engine control units online.

As well  simontouch does not erase the Chinese mb ir keys, you can wait as long as you like, but it does not erase them, unlike the abrites erase them off very quickly


CGDI MB Programmer : work perfect 1 to 1 VVDI MB

Friend buy one CGDI MB and work have variant without TAX i have this tool work perfect 1 to 1 VVDI MB
again repair ELV NEC make keys have function RENEW and WORK 100% testing
Simon Touch —– before time i buy one tool support not have support i have problem with W211 for key i write in 10.30-11.00 email (suport is only with email ) after 12h have solution for my problem but car go to other servis before 5h
AVDI perfect tool but price is….not real price expensive tool for pass mercedes need you 20 min to 1h wotk but very slow
buy one CGDI MB and work
make key for 10 min
make virgin module for 2 min
not have tax not have other
have support with 24h skype
for me this tool is perfect tool low money lot functions !!


VVDI MB BAG Tool: good feedback and functional

I want to thank everyone for the contribution and opinions about the MB tools on the market.
I also saw CGDI MB, it seems a good tool but not find so many feedback, but the price is really inviting

– MB Clinic, if work and do all the functions they say, is a really powerful tool but, on this post saw some different feedback.
– AVDI i think is out, too much money and saw now an update to do keys from 1998-2004… Maybe not so powerfull.
– VVDI MB good feedback and do the job, problem with tokens and support. Price is expensive but ok, if do all they say, seem a powerful tool also.
– CGDI MB the price is really inviting but outweighs the risk? Recent tool, low price…

Again, thanks for all the opinions, sure there are more people with the same doubt and will have in this post some answers. I hope to keep this topic alive for future people with the same issue.

VW GOLF MK6 All lost keys – OBD procedure with VVDI2?

$
0
0

This mini post is sent by our custmer on VVDI2 commender test on VW Golf MK6 all key lost programming,hope it help!

GOLF MK6 All lost keys - OBD procedure with VVDI2

Procedure: (vvdi2 on GOLF MK6)

Remove cluster
Read eeprom under the dials
24c32 or 24c64
Load dump into programmer
It will Generate service dump
Use that dump to get CS and PIN
Code key and remote


what year ??

2010


all keys lost?

yes, done a few


through vvdi2?

yes. Without removing cluster. South african market. Same as Euro cars


what’s the procedure?

Remove cluster. Read eeprom. Some machines don’t need solder just plug into back with pogo pin but not too difficult


what’s key tool can do it?

Obdstar x300 dp plus can do this via obd

Condor Mini PLUS for Hyundai Grand i10 Key Decoding & Key Cut by Code

$
0
0

Topic: use Xhorse Condor Mini PLUS for Hyundai Grand i10 Key Decoding & Key Cut by Code in 10035r/min.

condor-mini-plus-cut-key-for-hyundai-ix35-01


Choose “Key duplication”.

condor-mini-plus-cut-key-for-hyundai-ix35-02


Search “Hyundai”, just tap “H” and “Hyundai” can be easily found out.

condor-mini-plus-cut-key-for-hyundai-ix35-03


Scroll down and search “ix35”, also easily find out.

condor-mini-plus-cut-key-for-hyundai-ix35-04


LM (09 -11).

condor-mini-plus-cut-key-for-hyundai-ix35-05


Select key type.

condor-mini-plus-cut-key-for-hyundai-ix35-06


Key cut.

condor-mini-plus-cut-key-for-hyundai-ix35-07


Confirm learning parameter adjustment.

condor-mini-plus-cut-key-for-hyundai-ix35-08


This is cutting platform.

condor-mini-plus-cut-key-for-hyundai-ix35-09


Let’s cut by code. Tap “Search” to search “p0544”.

Query complete (P0544).

condor-mini-plus-cut-key-for-hyundai-ix35-10 condor-mini-plus-cut-key-for-hyundai-ix35-11 condor-mini-plus-cut-key-for-hyundai-ix35-12


Choose “Key database” and search the letter H to choose “Hyundai”.

condor-mini-plus-cut-key-for-hyundai-ix35-13


Confirm.

condor-mini-plus-cut-key-for-hyundai-ix35-14

Confirm key code “P0001 -P2500”.

condor-mini-plus-cut-key-for-hyundai-ix35-15


Choose “Cut”.

condor-mini-plus-cut-key-for-hyundai-ix35-16


Start cutting.

condor-mini-plus-cut-key-for-hyundai-ix35-17


Cutting speed is higher than “10030r/min”, Condor mini plus machine is running much faster than condor mini.

condor-mini-plus-cut-key-for-hyundai-ix35-18


Take out the key from the clamp and compare the new key with the original one in the shape.

condor-mini-plus-cut-key-for-hyundai-ix35-19


Insert the new key into the ignition to start car.


Done.


www.uobdii.com

Mercedes 221 ME9.7 SCN coding online with vxdiag Benz C6

$
0
0

Mercedes Benz 221 with control unit ME9.7 perform online SCN coding with VXDIAG VCX Benz interface successfully. Here we go for step by step procedure.


Need:

Online SCN coding account

VCX Benz interface (BEZN C6 or VXDIAG Multi diagnostic tool with Benz software)

benz-221-me97-scn-coding-online-with-vcx benz-01


One computer with win7 8 10

Video Guide Here:


Procedure:

Run Xentry newest version.


Passenger cars W211 by automatically scanning.

benz-221-me97-scn-coding-online-with-vcx benz-03 benz-221-me97-scn-coding-online-with-vcx benz-04


Press “F2” to determine the data.

benz-221-me97-scn-coding-online-with-vcx benz-05


Again, click on”F2″ to determine the data.

DAS is initialized communication layer.

benz-221-me97-scn-coding-online-with-vcx benz-06


Get the IMPORTANT NOTE on you should ensure enough power supply.

benz-221-me97-scn-coding-online-with-vcx benz-07


Click on “Quick Test” and “F3”.

benz-221-me97-scn-coding-online-with-vcx benz-08


Click on “ME 9.7”, then “F3” after reading the safety notes.

benz-221-me97-scn-coding-online-with-vcx benz-08 benz-221-me97-scn-coding-online-with-vcx benz-10


Click on “F1” to back to click on “Control Unit adaptation”.

Choose “Variant coding”.

benz-221-me97-scn-coding-online-with-vcx benz-11 benz-221-me97-scn-coding-online-with-vcx benz-12


Click on “SCN coding” then “F3”.

benz-221-me97-scn-coding-online-with-vcx benz-13


Login with your user name and password.(Online SCN Coding one time service)

benz-221-me97-scn-coding-online-with-vcx benz-14 benz-221-me97-scn-coding-online-with-vcx benz-15 benz-221-me97-scn-coding-online-with-vcx benz-16


The 221 ME9.7 SCN coding has been completed successfully, choose “F2” to continue.

You can also choose print the test report.

benz-221-me97-scn-coding-online-with-vcx benz-17 benz-221-me97-scn-coding-online-with-vcx benz-18


Click on “ESC” to exit VXC Benz software.

benz-221-me97-scn-coding-online-with-vcx benz-19


Done.

Posche Piwis 3 Original and Clone – What’s the difference?

$
0
0

What’s the difference between Piwis 3 original and clone:

The genuine and copy differ in hardware only.

They share the same functions and features.


look here:

original piwis tester 3:

Porsche-piwis-3-original

clone piwis 3:

vxdiag-porsche-piwis-3-china clone

source: http://www.uobdii.com/wholesale/vxdiag-vcx-doip-porsche-piwis-iii.html


Why you should have a Porsche Piwis 3:

  • vehicle coverage up to 2018: 911, Macan, Cayeme, Panamera, Boxter Cayman
  • Fast and stable connection Simulation mode ( diagnostic session without VCI connection )
  • Support online immobilizer programming
  • New DoIP diagnostic technique based on Ethereum for post-2017 Porsche
  • Developer mode enabled


What’s the difference between Piwis 2 and Piwis 3:

PIWIS Tester III covers all new Porsche models like new Panamera 971, Cayenne 9Y0, Cayman 981 GT4 clubsport, etc., which are not supported by PIWIS II at all and will never be supported in the future. PIWIS Tester III also supports full range of diagnostics functions for all the Porsche models which have ever been released.


What can you do with Piwis 3 v37.250.015:

  • Diagnostics application is used for communication with control units. You can search for, identify, code and control program units, read out the event memory, execute complex processes, change drive links and execute routines.
  • Guided fault finding (GFF) generates a test plan for a fault code. This test plan shows the best sequence for carrying out tests. GFF compiles a list of recommended tests, documents and wiring diagrams
  • Actual values/input signals functions displays you the actual values and input signals of control units
  • Drive links/tests function displays the drive links of control units, allows you to change the parameters of these drive links and run test routines for individual control units
  • Maintenance/repairs function group – use this function to call up control unit-specific processes that cannot be implemented generically from the ODX data
  • Coding/programming function group – use this function to write coding values. Values can be coded automatically or set manually. This function group includes (Automatic coding, Manual coding, Customer-specific settings and Factory settings) coding modes
  • Logging – use this function to activate logging for diagnostics, guided fault finding (GFF) and measuring equipment applications. Temporary and permanent working log can be created
  • Filter – use this function to limit the view of the control units installed in the vehicle. In the diagnostic application you can create, edit, activate, deactivate or assign filters
  • Wiring diagrams application is the representation of physical connections and layouts of circuits
  • Measuring equipment interface is used for DC and AC voltage measurement, direct and alternating current measurement, diode testing, resistance measurement, continuity/open circuit testing, showing voltage, current and resistance over time (oscilloscope function)


Which Porsche model and year can be done with Piwis 3:

Piwis 3 is confirmed to work with

all Porsche from 1998-2018:
Porsche 911(997) (991)
Boxster/Cayman (987)
Cayenne up to MY 2010
Cayenne from MY 2011
Panamera

Especially the latest models:
Paramera (971) 2018
Caynenne (92A) 2018
Macan (95B) 2018
911 (991) 2018
and other old models

piwis-3-car-list-1 piwis-3-car-list-2


Any successful tests on Porsche with Piwis 3?

Look here: test on Panamera 971 (after 2017)

porsche-piwis-3-download-1 porsche-piwis-3-download-2 porsche-piwis-3-download-3 porsche-piwis-3-download-4 porsche-piwis-3-download-5 porsche-piwis-3-download-6 porsche-piwis-3-download-7 porsche-piwis-3-download-8 porsche-piwis-3-download-9 porsche-piwis-3-download-10

porsche-piwis-3-download-11

porsche-piwis-3-download-12 porsche-piwis-3-download-13 porsche-piwis-3-download-14 porsche-piwis-3-download-15 porsche-piwis-3-download-16 porsche-piwis-3-download-17 porsche-piwis-3-download-18 porsche-piwis-3-download-19 porsche-piwis-3-download-21 porsche-piwis-3-download-22

source: http://www.uobdii.com/wholesale/vxdiag-vcx-doip-porsche-piwis-iii.html

VAS5054A infineon review: 16F40F is slower than 32F40F

$
0
0

Is the QC Mark label to camouflage the specs of the infineon?

There are 2 different vas5054a for sale- one vas5054a comes with 32F40F and the other comes with 16F40F.


32F40F (on Chinese VAS5054A)
On-Chip Memory Modules – 2 Kbytes On-Chip Dual-Port RAM (DPRAM) – 4 Kbytes On-Chip Data SRAM (DSRAM) – 6 Kbytes On-Chip Program/Data SRAM (PSRAM) – 256 Kbytes On-Chip Program Memory (Flash Memory)

orginal-vas5054a-32F40F-infineon

16F40F (on original VAS5054a)
On-Chip Memory Modules – 2 Kbytes On-Chip Dual-Port RAM (DPRAM) – 4 Kbytes On-Chip Data SRAM (DSRAM) – 2 Kbytes On-Chip Program/Data SRAM (PSRAM) – 128 Kbytes On-Chip Program Memory (Flash Memory)
orginal-vas5054a-16F40F-infineon

32F40F better than specs
16F40F original
16F20F bad return or sell for parts.


The result is

16F40F is slower than 32F40F.


A bit ridiculous! But the clone with 32F40F does run much faster than the genuine with 16F40F

If you just look for a working unit, either genuine or clone, VAS5054A with 32F40F can be a good one. it’s tested successfully, confirmed to work no issues with odis service 4.4.1 and odis engineering 6.7.5

sp33-c-vas-5054a-green-pcb-1 sp33-c-vas-5054a-green-pcb-1 sp33-c-vas-5054a-green-pcb-1 sp33-c-vas-5054a-green-pcb-4 sp33-c-vas-5054a-green-pcb-5

source: http://www.uobdii.com/wholesale/best-quality-vas-5054a.html


Diatronik reviews: H8SX SRS UART Repair, Toyota Renesas etc works

$
0
0

Diatronik OBD Tool reviews: H8SX SRS UART Repair works, Diatronik DTR Toyota SRS 2016 Renesas read flash by OBDII; Diatronik erase flash for Toyota Renesas H8SX successfully etc.


Part 1: H8SX SRS UART Repair

Repairing ECU and connection.

h8sx-srs-uart-repair-01 h8sx-srs-uart-repair-02 h8sx-srs-uart-repair-03 h8sx-srs-uart-repair-04


Part 2: Diatronik DTR Toyota SRS 2016 Renesas read flash by OBDII.


1)Connection.

diatronik-dtr-toyota-srs-2016-renesas-read-flash-by-obdii-01


2)Diatronik DTR Toyota SRS 2016 Renesas read flash by OBDII.

diatronik-dtr-toyota-srs-2016-renesas-read-flash-by-obdii-02


3). Read flash start in –

diatronik-dtr-toyota-srs-2016-renesas-read-flash-by-obdii-02 diatronik-dtr-toyota-srs-2016-renesas-read-flash-by-obdii-04


4). Reading flash to erase and then move to boot mode.

diatronik-dtr-toyota-srs-2016-renesas-read-flash-by-obdii-05 diatronik-dtr-toyota-srs-2016-renesas-read-flash-by-obdii-06

5)Double tap to edit text flash erased.

diatronik-dtr-toyota-srs-2016-renesas-read-flash-by-obdii-07


Part 3: Diatronik erase flash for Toyota Renesas H8SX successfully.

1)Connection.

diatronik-erase-flash-for-toyota-renesas -h8sx-01


2)Diatronik erase flash for Toyota Renesas H8SX.

* After erase flash, we get this error, it’s normal, it’s part of procedure to make sure that we have done.

diatronik-erase-flash-for-toyota-renesas -h8sx-02 diatronik-erase-flash-for-toyota-renesas -h8sx-03


More will be updated.

www.uobdii.com

Fcar FOBD OBD2 Adapter carlist for OBDII, Service reset & HUD

$
0
0

Fcar FOBD OBD2 Adapter, working together with one Android / IOS phone, has the abilities of OBDII diagnostic, service reset and HUD. This post offers Fcar FOBD car list.

fcar fobd-01


Part 1: Fcar FOBD OBDII diagnostic car list

Europe: Audi, Benz, BMW, Citroen, Fiat, Land Rover, Mini, Opel, Porsche, Peugeot, Renault, Scion, Saab, Seat, Skoda, Smart, Sprinter, Subaru, VW, Vauxhall


Asia: Acura/Honda, Daewoo, Hyundai, Isuzu, Kia, Lexus, Infiniti, Mazda, Mitsubishi, Nissan, Suzuki, Toyota, Cherry, Geely, Great Wall, Zotye


America: Chrysler, GM, Jaguar, Volvo, Ford


Attach 4 images on Fcar FOBD OBDII diagnostic functions:

fcar_fobd_obd2_adapter-diagnostic-function-01 fcar_fobd_obd2_adapter-diagnostic-function-02 fcar_fobd_obd2_adapter-diagnostic-function-03 fcar_fobd_obd2_adapter-diagnostic-function-04


In Russian language:

fcar_fobd_obd2_adapter-diagnostic-function-05


Part 2: Fcar FOBD service reset car list

Fcar FOBD adapter has the service reset capability for a multi-brand car brands including:

ACURA, AUDI,BENZ BMW,CHRYSLER CITROEN DAEWOO,FORD,FIAT GM HONDA,HYUNDA NFNT ISUZU JAGUAR KA LAND ROVER LEXUS MAZDA MN, MITSUBISHI,NISSAN,OPEL,PORSCHE,PEUGEOT,RENAULT SAAB,SCION,SEAT,SKODA,SMART,SPRINTER, SUBARU, SUZUKI, TOYOTA, VAUXHALL, VOLVO, VW, CHERY, GEELY,GREATWALL ZOTYE.


Fcar FOBD manual oil service reset car list

***Support the oil service reset manually, the front page 1 to 2 without black shadow is tested working fine, the left pages with black shadow will be updated soon.

service-reset-carlist-of-fcar_fobd_obd2_adapter-01 service-reset-carlist-of-fcar_fobd_obd2_adapter-02 service-reset-carlist-of-fcar_fobd_obd2_adapter-03 service-reset-carlist-of-fcar_fobd_obd2_adapter-04 service-reset-carlist-of-fcar_fobd_obd2_adapter-05 service-reset-carlist-of-fcar_fobd_obd2_adapter-06 service-reset-carlist-of-fcar_fobd_obd2_adapter-07 service-reset-carlist-of-fcar_fobd_obd2_adapter-08


Part 3: HUD real display

Dynamic display of engine operating conditions (HUD mode).


The real display when driving.

fcar_fobd_obd2_adapter-hud-01 fcar_fobd_obd2_adapter-hud-02 fcar_fobd_obd2_adapter-hud-03 fcar_fobd_obd2_adapter-hud-04


Real test reports will be updated.


Thanks!

Actia Multi Diag 2018 download FREE + How to install

$
0
0

Free download actia multi diag interface 2018 software and Windows 7 installation instructions.


Actia 3.2018 43.06: https://mega.nz/#!QNskhKqY!q93QYap0xNayDMhO1Y0DRpf_OkpkYJQEgC0vnrPzfOM

CRACK FIX: https://mega.nz/#!YYhwGSKb!hAQaG7RunQLdoG7njQ1-FLp7HiYLX0CYqe53kEOrEXY

older version Actia 1.2018 42.09: https://mega.nz/#!croCEKIQ!7PHYKUAWkVqKBfc1DTzmQtJUEcYx9iQ0KsNLXrYi2ew

VCI 033918


Security: unknown, not tested by professionals yet


Good to know: you need luck with actia multi diag interface china clone

For sake of security and convenience, you’d better to have actia reliable

here are all tested versions, confirmed to work perfectly

actia multi diag 2016:

http://www.uobdii.com/wholesale/multi-diag-access-j2534-pass-thru-obd2-device-latest-version.html

actia multi diag 2015:

http://www.uobdii.com/wholesale/i-2015-multi-diag-access-j2534-pass-thru-obd2-device.html

actia multi diag 2014:

http://www.uobdii.com/wholesale/i-2014-multi-diag-access-j2534-pass-thru-obd2-device.html

actia multi diag 2013:

http://www.uobdii.com/wholesale/multi-diag-access-j2534-pass-thru-obd2-device.html

actia multi diag 2011:

http://www.uobdii.com/wholesale/new-high-quality-multi-diag-access-j2534-pass-thru-obd2-device-v2011.html

actia-multi-diag-interface-2

FACT:

It works with any Actia interface either genuine or clone as long as the PIC chip is flashed properly. For 1st generation yellow you need to reflash PIC12F629 (link for guide bellow), as for 2nd generation XS 2G (silver/black) you need to reflash 16F630 (I will look for a guide for this one). They all use the same software and drivers from this INFO file. I went from a clone 1st gen to a genuine 2nd gen on the same laptop, same software without changing anything. I strongly advise people to buy a genuine 2nd gen since it’s got a powerful program behind with all functions and furthermore you can use it as a Passthru device (it has J2534-1 and J2534-2) with various dealer software. You hit 2 birds!


First of all, you must modify or buy a modified clone. The procedure is the same on all Actia devices, either clone or genuine or 1st or 2nd generation.

1st generation yellow VCI: Link for guide if your chip PIC12F629 is not modified : https://mhhauto.com/Thread-Multidiag-2017-III-SP4-Hex-for-Pic

2nd generation silver XS 2G: I did not find a proper guide now, all I know is that you have to reflash PIC16F630.


Installation instructions:


– WORKS ONLY ON 32BIT (TESTED ON WINDOWS 7 SP1 X32)


@@@@@@@@@@INTERNET MUST BE OFF@@@@@@@@@@@


  1. run ACTIA_NET_BLOCK.bat (Run as administrator if possible)
  2. run Activation MAJ MD 033918/keyUpdate (Run as administrator if possible)
  3. Install Actia Multidiag Standard Profil (if the case, use S/N: 033918 instead of xxxxxxx) (I selected country: France and simply changed language after installation)

RESTART COMPUTER after installation finished

  1. Go to C:\ACTIA\Portal
  2. Remove Wget.exe
  3. Go to control panel -> uninstall or change a program -> there are 3 drivers made by ACTIA. Remove all 3 drivers.
  4. Install I+ME-Actia-PassThru-XS2G-Driverpack-2.8.1.14.exe


Then: (supplier told me it is optional, I have done it anyway)

  1. Go to C:\ACTIA\Portal\chrome\multidiag\content\scripts
  2. Open in a text editor file multidiag.js
  3. Go to line “var showWarningPT1Window=true” and make this line like
  4. “var showWarningPT1Window=false”


Then: Run the application, connect VCI to car and to laptop’s USB, try to make a diagnostic on a car and it should detect a new hardware. If it does not recognizes it, then you have to update it manually via Start menu->right click on computer->Manage->Device Manager->Other devices->Right click on Unknown device->Update driver software->Browse my computer for driver->”C:\Actia\Drivers VCI\PT1G”


If you want to update from older version, simply uninstall old version and make sure you follow the steps again completely (including removing the 3drivers)


Note: it should appear each time when you diagnose that your VCI is old and blablabla, just click continue and it connects to the car

Note2: My supplier told me that it might not be 100% compatible with all cars as it is the old interface and does not do the multiplexing like the newer one. I tested on a few cars from 2000 to 2015 and for 300euro it is worth adding to collection!

Note3: On 2nd gen XS 2G it should be recognized it automatically, it will not display any messages and will work much faster and stable.


FOR FURTHER COMPATIBILITY WITH HONDA HDS, JLR SSD, NISSAN CONSULT, TOYOTA TECHSTREAM ETC.                    Visit fantomel’s collection:


ACTIA-MULTIDIAG PART1:

https://mega.co.nz/#F!XYQ0FBBI!eW_ZAaLsrK1VHfHPdQAwGA


  1. Actia Multi-Diag I 2009 v.16.21
  2. Actia Multi-Diag I 2010 v.19.10
  3. Actia Multi-Diag III 2010 v.21
  4. Actia Multi-Diag II 2011 v.23.07 + Vivid WorkShop
  5. Actia Multi-Diag III 2011 v.24.01 + Service Pack 3 v.24.31
  6. Actia Multi-Diag I 2012 v.25.13
  7. Actia Multi-Diag II 2012 v.26.08.1 + Service Pack 2 v.26.25 + Vivid WorkShop
  8. Actia Multi-Diag III 2012 v.27.06 + Service Pack 2 v.27.21 + Vivid WorkShop
  9. Actia Multi-Diag I 2013 v.27.31 + Vivid WorkShop
  10. Actia Multi-Diag II 2013 v.28.08 + Service Pack 1 v.28.11
  11. Actia Multi-Diag III 2013 v.29.04+Service Pack 1 v.29.11+Service Pack 2 v.29.21
  12. Actia Multi-Diag IV 2013 v.30.06+Service Pack 1 v.30.11+Service Pack 2 v.30.21
  13. Actia Multi-Diag I 2014 v.31.09+Service Pack 1 v.31.11+Service Pack 2 v.31.21 + Vivid WorkShop
  14. Actia Multi-Diag II 2014 v.32.05+Service Pack 1 v.32.11
  15. Actia Multi-Diag I 2015 v33+Service Pack 1 v.33.11+Service Pack 2 v33.21+Vivid WorkShop
  16. ALL KEYGENS FROM v.19 TO v.32


ACTIA-MULTIDIAG PART2:

https://mega.co.nz/#F!WUEnXK7I!M8Wg4MHBX0jLFTeRBoXz1w


  1. Actia Multi-Diag CD versions 6.1,6.3&7.3
  2. Actia Multi-Diag Trucks 2011
  3. Actia Multi-Diag I 2015 v.33.06+Service Pack 1 v.33.11+Service Pack 2 v33.21+Vivid WorkShop + KG
  4. Actia Multi-Diag II 2015 v.34.07+Service Pack 1 v.34.11+Service Pack 2 v.34.21
  5. PassThru programs,drivers and instructions on how to install them.
  6. Added Original MDO adapters pinouts

[Image: 105zjlt.png]

  1. Actia Multi-Diag III 2015 v.35.09+Service Pack 1 v.35.11+Service Pack 2 v.35.21
  2. Actia Multi-Diag I 2016 v.36.05+Service Pack 1 v.36.11+Service Pack 2 v.36.21+Service Pack 3 v36.31+Service Pack 4 v36.41
  3. Jaltest Trucks that has same interface as Actia Trucks versions 2013.3.1.1 and 2014.1.1.1


note: read the pdf files to know your tool better and to make proper choices, specialy for passthru programs.


password if needed: fantomelthanks to fantomel, bouizanne, zdsSF, Twist

source: https://mhhauto.com/Thread-ACTIA-MULTI-DIAG-COLLECTION-2009-2010-2011-2012-2013-2014-2015-2016


Just in case, be sure you have these programs as well.

https://support.microsoft.com/en-gb/help/2977003/the-latest-supported-visual-c-downloads

https://download.microsoft.com/download/6/E/4/6E48E8AB-DC00-419E-9704-06DD46E5F81D/NDP472-KB4054530-x86-x64-AllOS-ENU.exe

https://java.com/en/download/manual.jsp


Final note:

As a personal experience, the 1st generation Actia is quite limited on newer Euro5+ cars, used on a variety of cars.  But for example it was the only one that could adapt pilot injection on a peuget boxer 2.2hdi among genuine delphi,kts,launch; on a BMW F30 328i it had all the functions and parameters as other testers I own. The second generation though it is something else. It connects much faster and you feel safe working with it.

How to use VIDENT iAuto700 all system diagnostic & service tool?

$
0
0

All-system all-makes diagnostic & service tool VIDENT iAuto700 user manual: capabilities & car list, multi-languages, update, registration, software download etc.


Why VIDENT iAuto700 instead of the other all-makes scanners?

1.Has both OBDII diagnostic capability and service reset special functions on 52 makes in total.

2.16 languages are available incl. English, French, German, Spanish, Italian, Dutch, Polish, Swedish, Simplified Chinese, Traditional Chinese, Japanese, Korean, Portuguese, Hungarian, Russian, Thai.

3-year update online for free.

4.Cheap. about 200USD.


Here we go one by one.

Free download VIDENT iAuto700 user manual


1.VIDENT iAuto700 capabilities: 

OBD2 diagnostic:

All system diagnosis including engine, transmission, ABS, Airbag, instrument, steering wheel, etc.

vident-iauto700-obd2-diagnosis-01


Service reset:

oil light/service reset, EPB and Battery configuration.

vident-iauto700-obd2-diagnosis-02


Target users:

workshops, technicians and enthusiasts


2.Free download VIDENT iAuto700 car list

Covers 52 American, Asian and European vehicle makes, including the car and light duty truck with diesel engine and gasoline engine.


For Diagnostic:
Chrysler, Ford, GM, Brazilian GM, Acura, Daewoo, Honda, Holden, Hyundai, Infiniti, Isuzu, Kia, Lexus, Mazda, Mitsubishi, Nissan, Perodua, Proton, Scion, Subaru, Suzuki, Toyota, Abarth, Alfa-Romeo, Audi, Bentley, BMW, Bugatti, Citroen, Dacia, Fiat, EU Ford, Jaguar, Land Rover, Lancia, Maserati, Maybach, Mercedes Benz, Mini, Opel, Porsche, Peugeot, Renault,Rolls-Royce, Saab, Seat, Skoda, Smart, Sprinter, Vauxhall, Volvo, Volkswagen

Oil Light Service:
Acura, Abarth, Alfa Romeo, Audi, Aston Martin, BMW, Bentley, Bugatti, Citroen, Chrysler, Dacia, Ferrari, Fiat, Ford, GM, Honda, Hyundai, Infiniti, Isuzu, Jaguar, Kia, Lancia, Lexus, Mazda, Maserati, Mitsubishi, Nissan, Scion, Suzuki, Fiat, Lancia, Land Rover, Mercedes Benz, Mini, Opel, Peugeot, Porsche, Renault, Rolls-Royce, Saab, Seat, Skoda, Scion, Subaru, Suzuki, Smart, Sprinter, Toyota, Vauxhall, Volkswagen, Volvo

EPB Functions:
Abarth, Acura, Alfa Romeo, Audi, BMW, Bentley, Bugatti, Chrysler, Citroen, Daewoo, Fiat, Ferrari, EU Ford, Ford, GM, Honda, Hyundai, Jaguar, Kia, Land Rover, Lancia, Lexus,Maybach, Maserati, Mercedes Benz, Mini, Opel, Peugeot, Porsche, Roewe, Rolls Royce, Renault, Saab, Scion, Seat, Skoda, Toyota, Vauxhall, Volkswagen, Volvo

Battery Configuration:
Audi, BMW, Citroen, Ford, Infiniti, Jaguar, Land Rover, Lexus, Mini, Mitsubishi, Nissan, Peugeot, Seat, Skoda, Toyota, Volvo, VW

3.VIDENT iAuto700 default language is English, how to change the language I need i.e Spanish?

The answer is you can offer the machine serial number, then the Vident tech support will reset Spanish language for you, then you can switch the language in the Language setting.


4.How to register VIDENT iAuto700?

Step 1: find out the VIDENT iAuto700 serial number and password for registration.

Please connect the VIDENT iAuto700 scanner with a computer with the USB cable provided to boots up it. Select “Setup” on the menu, then “About” and you can see “Product serial number” and password.

Take the user S/N# 7000315001361 for example.

vident-iauto700-registration-01 vident-iauto700-registration-02 vident-iauto700-registration-03


Step 2: login the official site to register.

http://www.videnttech.com/register/step_two.html

As required, to input user ID, password, first name & last name, Country, phone, email and captcha etc.

vident-iauto700-registration-04

Or you can download the “iAuto700 software Update client” to install on your computer to register. Firstly click on “Update client and manuals” and then “iAuto 700”.

vident-iauto700-registration-05


5. Can I download the files of TF card from the official site?

The answer is to install ” iScanzilla” using the CD packed with the machine, then to download the files into the TF card.


6. How to update VIDENT iAuto700 software and print the data?

VIDENT iAuto700 is 3-year free update online.


Procedure:

To apply software updates to the tool you will need a Windows PC/Laptop and an TF Card Reader.

1.Software Update

1.1 Step One- Install the Update Client

1.Visit www.videnttech.com to download the update client from

http://www.videnttech.com/support/

update-vident-iauto700-software-and-print-the-data-01

2.The file downloaded will be a compressed zip file. Open that file and run the installer inside it.

Alternatively, you can install the update client from the CD that comes in the product package.


1.2 Step Two – Create Your Vident Account.

Firstly you need to create an account with Vident.

1.Once installed, boots up the iScanzilla software, click the Register button.

update-vident-iauto700-software-and-print-the-data-02

2.Fill out the registration form and submit.

update-vident-iauto700-software-and-print-the-data-03


Alternatively, you can click the Sign Up button on the right upper side of our website to create an user account.


1.3 Step Three – Register Your product

1.When logged in iScanzilla, click the ‘Register Products’ icon.

update-vident-iauto700-software-and-print-the-data-04

2.On the ‘S/N Registration’ tab, put a tick in the box marked ‘001’ then enter the product’s serial number & password, and click

Submit.

Please connect the scan tool with computer through the USB cable, select Setup > About to check the Serial Number and ‘Register

Password”.

update-vident-iauto700-software-and-print-the-data-05

3.A confirmation box should be shown confirming successful registration.

Alternatively, you can register the product in the member center when logged in on our website.

update-vident-iauto700-software-and-print-the-data-06

1.4Step Four – Update the Software

1.Now close the iScanzilla software, remove the TF card from your tool (making sure the tool is turned off first!) and connect it to the

PC via an TF card reader.

2.Once Windows has detected the TF card, run the iScanzilla software and login again. click the ‘My Updates’ button. After a few

seconds, a list of the available software updates will appear.

update-vident-iauto700-software-and-print-the-data-07


Ensure that the correct serial number is displayed in the drop-down list.

3.Click the Update button to download and install available updates.

update-vident-iauto700-software-and-print-the-data-08


Please note: the update process can take a long time. If your tool has not been updated recently, it may take a few hours for the

update process to complete. Once the update has completed, don’t forget to ‘safely remove’ the SD card in Windows before

unplugging it, to avoid the possibility of data corruption.

2 Renewals

If your free updates ran out, your tool will continue to function – it will not ‘time out’ – but you will no longer be able to access the

update servers. Should you wish to continue updating your tool, you will need to purchase an update package. Please go to our

website and log in to process the purchasing.


3 Printing Data

It’s very easy to print out the test result through iScanzilla.

1.Click the Button located on the upper side of iScanzilla. You can enter the print screen without logging in iScanzilla.

update-vident-iauto700-software-and-print-the-data-09

2.All data saved/stored in the TF card would appear on screen.

update-vident-iauto700-software-and-print-the-data-10

3.Tick a piece of data to either review it or print it out.

update-vident-iauto700-software-and-print-the-data-11


That’s all

Thanks

Mercedes-Benz Xentry.OpenShell.XDOS 2019.03 Free Download

$
0
0

Post supplies Mercedes-Benz Xentry.OpenShell.XDOS 2019.03 (19.3.6) free download source and reliable source.


Newest Xentry V2019.03 is for Mercedes Star diagnosis,  DAS XENTRY  V2019.03 software is available with hdd or ssd version. 2019.03 Mercedes star diagnosis with  EPC,WIS ,Vediam, Dtc, Starfinder win 7 software with new mercedes starfinder online software and mercedes das xentry 2019.03.


V2019.03 Xentry download:

Link 1. free XENTRY DAS OPENSHELL ( 03-04/2019 ) – Mega

XDOS (03.2019) Smallville.rar

XENTRY Diagnostics Open Shell 03-04 2019-Torrent.rar


OLD Key & New Key is working but Not 100%
This version need ; 2221-45 & 3.91 Error Fixed Solution

Other need ; DAS Blacklist Fixed Solution + DAS License 0 Fixed Solution

Windows 7-8-10 x86 & x64 System SUPPORT NOW

OLD key activation information
– This your RISK %100
– Blocked SCN Access Acount
– Xentry & DAS  System Error
– always it need 2221-45 fixed & 3.91 fixed solution

*Note: the above source is from cartechnology.co.uk, I’m not responsible for any risk, please use it at your own lucky.


Link 2: Tested and working version

SSD version

HDD version

Software Version: 2019.03

Update: HDD back to update, or purchase new HDD replacement

PC Requirements: Dell/ Lenovo/ Panasonic etc.

CPU: Intel Core 2 Duo Processor or equivalent, i5 CPU is much better, 2.2GHz or faster core speed

RAM: 4GB RAM minimum

Language available: English, Croatian, Czech, Danish, Dutch, Finish, French, German, Greek, Hungarian, Italian, Japanese, Korean, Polish, Portuguese, Romanian, Russian; Spanish, Swedish, Turkish, Chinese

Star Diagnosis Xentry Software coverage:Works on Mercedes vehicles, included: Cars, Buses, Trucks, Sprints, Smarts etc. till 2019

Compatible Hardware:

1. Star Diagnosis SD Connect MB Star C4

MB SD C4

2. MB Star C5 star diagnosis tool for Benz car and truck

star c5

3. MB Star C6 DoIP

benz c6

Xentry diagnostic complete powerful software:

xentry-software-v2019-03-for-mercedes-benz-01 xentry-software-v2019-03-for-mercedes-benz-02 xentry-software-v2019-03-for-mercedes-benz-03

EPC software diagnostic for Mercedes Benz.

xentry-software-v2019-03-for-mercedes-benz-04 xentry-software-v2019-03-for-mercedes-benz-06 xentry-software-v2019-03-for-mercedes-benz-05

WIS/ASRA software diagnostic for Mercedes Benz.

xentry-software-v2019-03-for-mercedes-benz-06

Xentry software V2019.3 workable car brands.

xentry-software-v2019-03-for-mercedes-benz-07 xentry-software-v2019-03-for-mercedes-benz-08 xentry-software-v2019-03-for-mercedes-benz-09 xentry-software-v2019-03-for-mercedes-benz-10

How much do you know CNC key cutting machine?

$
0
0

Look here: CNC key cutting machine overview


Part 1: What is CNC machining?

Part 2: How to do CNC machine programming

Part 3: How many types of CNC machines?

Part 4: What’s can you do with CNC machines

Part 5: What’s the disadvantage of CNC machine programming?

Part 6: Which CNC key machine should i have?


in detail…


Part 1: What is CNC machining?

CNC machining is a manufacturing process in which pre-programmed computer software dictates the movement of factory tools and machinery. The process can be used to control a range of complex machinery, from grinders and lathes to mills and routers. With CNC machining, three-dimensional cutting tasks can be accomplished in a single set of prompts.

Short for “computer numerical control,” the CNC process runs in contrast to — and thereby supersedes — the limitations of manual control, where live operators are needed to prompt and guide the commands of machining tools via levers, buttons and wheels. To the onlooker, a CNC system might resemble a regular set of computer components, but the software programs and consoles employed in CNC machining distinguish it from all other forms of computation.

cnc-key-cutting-machining-1

Things to Learn About CNC Machining

When a CNC system is activated, the desired cuts are programmed into the software and dictated to corresponding tools and machinery, which carry out the dimensional tasks as specified, much like a robot.

In CNC programming, the code generator within the numerical system will often assume mechanisms are flawless, despite the possibility of errors, which is greater whenever a CNC machine is directed to cut in more than one direction simultaneously. The placement of a tool in a numerical control system is outlined by a series of inputs known as the part program.

With a numerical control machine, programs are inputted via punch cards. By contrast, the programs for CNC machines are fed to computers though small keyboards. CNC programming is retained in a computer’s memory. The code itself is written and edited by programmers. Therefore, CNC systems offer far more expansive computational capacity. Best of all, CNC systems are by no means static, since newer prompts can be added to pre-existing programs through revised code.


Part 2: How to do CNC machine programming


In CNC, machines are operated via numerical control, wherein a software program is designated to control an object. The language behind CNC machining is alternately referred to as G-code, and it’s written to control the various behaviors of a corresponding machine, such as the speed, feed rate and coordination.

Basically, CNC machining makes it possible to pre-program the speed and position of machine tool functions and run them via software in repetitive, predictable cycles, all with little involvement from human operators. Due to these capabilities, the process has been adopted across all corners of the manufacturing sector and is especially vital in the areas of metal and plastic production.

For starters, a 2D or 3D CAD drawing is conceived, which is then translated to computer code for the CNC system to execute. After the program is inputted, the operator gives it a trial run to ensure no mistakes are present in the coding.

Open/Closed-Loop Machining Systems

Position control is determined through an open-loop or closed-loop system. With the former, the signaling runs in a single direction between the controller and motor. With a closed-loop system, the controller is capable of receiving feedback, which makes error correction possible. Thus, a closed-loop system can rectify irregularities in velocity and position.

In CNC machining, movement is usually directed across X and Y axes. The tool, in turn, is positioned and guided via stepper or servo motors, which replicate exact movements as determined by the G-code. If the force and speed are minimal, the process can be run via open-loop control. For everything else, closed-loop control is necessary to ensure the speed, consistency and accuracy required for industrial applications, such as metalwork.

cnc-key-cutting-machining-2

CNC Machining is Fully Automated

In today’s CNC protocols, the production of parts via pre-programmed software is mostly automated. The dimensions for a given part are set into place with computer-aided design (CAD) software and then converted into an actual finished product with computer-aided manufacturing (CAM) software.

Any given work piece could necessitate a variety of machine tools, such as drills and cutters. In order to accommodate these needs, many of today’s machines combine several different functions into one cell. Alternately, an installation might consist of several machines and a set of robotic hands that transfer parts from one application to another, but with everything controlled by the same program. Regardless of the setup, the CNC process allows for consistency in parts production that would be difficult, if not impossible, to replicate manually.


Part 3: How many types of CNC machines?

The earliest numerical control machines date to the 1940s when motors were first employed to control the movement of pre-existing tools. As technologies advanced, the mechanisms were enhanced with analog computers, and ultimately with digital computers, which led to the rise of CNC machining.

The vast majority of today’s CNC arsenals are completely electronic. Some of the more common CNC-operated processes include ultrasonic welding, hole-punching and laser cutting. The most frequently used machines in CNC systems include the following:

CNC Mills

CNC mills are capable of running on programs comprised of number- and letter-based prompts, which guide pieces across various distances. The programming employed for a mill machine could be based on either G-code or some unique language developed by a manufacturing team. Basic mills consist of a three-axis system (X, Y and Z), though most newer mills can accommodate three additional axes.

cnc-key-cutting-machining-3

Lathes

In lathe machines, pieces are cut in a circular direction with indexable tools. With CNC technology, the cuts employed by lathes are carried out with precision and high velocity. CNC lathes are used to produce complex designs that wouldn’t be possible on manually run versions of the machine. Overall, the control functions of CNC-run mills and lathes are similar. As with the former, lathes can be directed by G-code or unique proprietary code. However, most CNC lathes consist of two axes — X and Z.

Plasma Cutters

In a plasma cutter, material is cut with a plasma torch. The process is foremost applied to metal materials but can also be employed on other surfaces. In order to produce the speed and heat necessary to cut metal, plasma is generated through a combination of compressed-air gas and electrical arcs.

Electric Discharge Machines

Electric-discharge machining (EDM) — alternately referred to as die sinking and spark machining — is a process that molds work pieces into particular shapes with electrical sparks. With EDM, current discharges occur between two electrodes, and this removes sections of a given work piece.

When the space between the electrodes becomes smaller, the electric field becomes more intense and thus stronger than the dielectric. This makes it possible for a current to pass between the two electrodes. Consequently, portions of a work piece are removed by each electrode. Subtypes of EDM include:

  • Wire EDM, whereby spark erosion is used to remove portions from an electronically conductive material.
  • Sinker EDM, where an electrode and work piece are soaked in dielectric fluid for the purpose of piece formation.

In a process known as flushing, debris from each finished work piece is carried away by a liquid dielectric, which appears once the current between the two electrodes has stopped and is meant to eliminate any further electric charges.

Water Jet Cutters

In CNC machining, water jets are tools that cut hard materials, such as granite and metal, with high-pressure applications of water. In some cases, the water is mixed with sand or some other strong substance. Factory machine parts are often shaped through this process.

Water jets are employed as a cooler alternative for materials that are unable to bear the heat-intensive processes of other CNC machines. As such, water jets are used in a range of sectors, such as the aerospace and mining industries, where the process is powerful for the purposes of carving and cutting, among other functions.

cnc-key-cutting-machining-4


Part 4: What’s can you do with CNC machines


As plenty of CNC machine video demonstrations have shown, the system is used to make highly detailed cuts out of metal pieces for industrial hardware products. In additional to the aforementioned machines, further tools and components used within CNC systems include:

  • Embroidery machines
  • Wood routers
  • Turret punchers
  • Wire-bending machines
  • Foam cutters
  • Laser cutters
  • Cylindrical grinders
  • 3D printers
  • Glass cutters

When complicated cuts need to be made at various levels and angles on a work piece, it can all be performed within minutes on a CNC machine. As long as the machine is programmed with the right code, the machine functions will carry out the steps as dictated by the software. Providing everything is coded according to design, a product of detail and technological value should emerge once the process has finished.


Part 5: What’s the disadvantage of CNC machine programming?


CNC machining is not exactly a foolproof process. In some instances, either a work piece or the machine itself could be directed in a harmful way. When this happens, a crash might occur, whereby tools or machine parts end up broken. The tools that could get damaged by a crash may include the vices or clamps that hold the work piece in place. When damage occurs within the machine, it could range from minor screw breakage to serious structural deformity.

The fact is, CNC equipment lacks the sentience to know exactly which distances are too far. Therefore, the tools must be exactly programmed in order to work without fault. If a program code is miscalculated, a CNC machine could be driven outside its physical bounds and cause an internal collision. Even though most of today’s CNC machines are manufactured with parameter boundaries, these inputs can be manipulated by operators.

Likewise, CNC tools are oblivious to a given environment. While certain CNC machines are equipped with spindle load sensing, others lack this feature. In the latter case, the software must be coded properly to ensure nothing goes off parameter, otherwise a crash would be the likely outcome. Even if a CNC machine is equipped with load sensors, a crash could still occur. When a tool function goes astray, it’s up to the operator to rectify the situation.

Crash Prevention on Different Types of CNC Machines

With the installation of encoder-disk position sensors, the possibility of a crash can be detected in advance and thwarted. Alternately, torque sensors can help determine whether a CNC machine is moving as intended and also detect unwanted cutting.

In garage CNC systems, tools are reliant on the rotational precision of stepper motors for the correct number of degrees. To monitor the tool position, the pulses that go to the stepper must be counted, because in most cases, there’s no form of alternate monitoring.

On industrial CNC machines, closed-loop controls are employed, whereby the control always knows the axis position. If properly controlled, the potential for crashes is significantly lowered, though it’s still the responsibility of programmers to see that codes are inputted accurately for utmost safety.

cnc-key-cutting-machining-5

Over the last two decades, CNC software has advanced to where a vast range of machine tools — axes, clamps, fixtures, spindles, turrets — can be based precisely on 3D solid models. With those specs programmed into the code, it’s easier to determine whether a crash will occur with a particular cycle.


Part 6: Which CNC key machine you should buy?

I personally would strongly recommend that you MUST find a man of his words trust in, then buy that machine. Better with tech support.


If youre a newbie to key cutting at a good price, i would recommend that you look for a used machine from a reputable brand. The Miracle A9 , Silca Futura , JMA Multicode or Keyline Ninja Total are all machines with similar capabilities. Finding a used one , if possible from a distributer , makes most financial sense. You will have better access to support , cutters and updates.


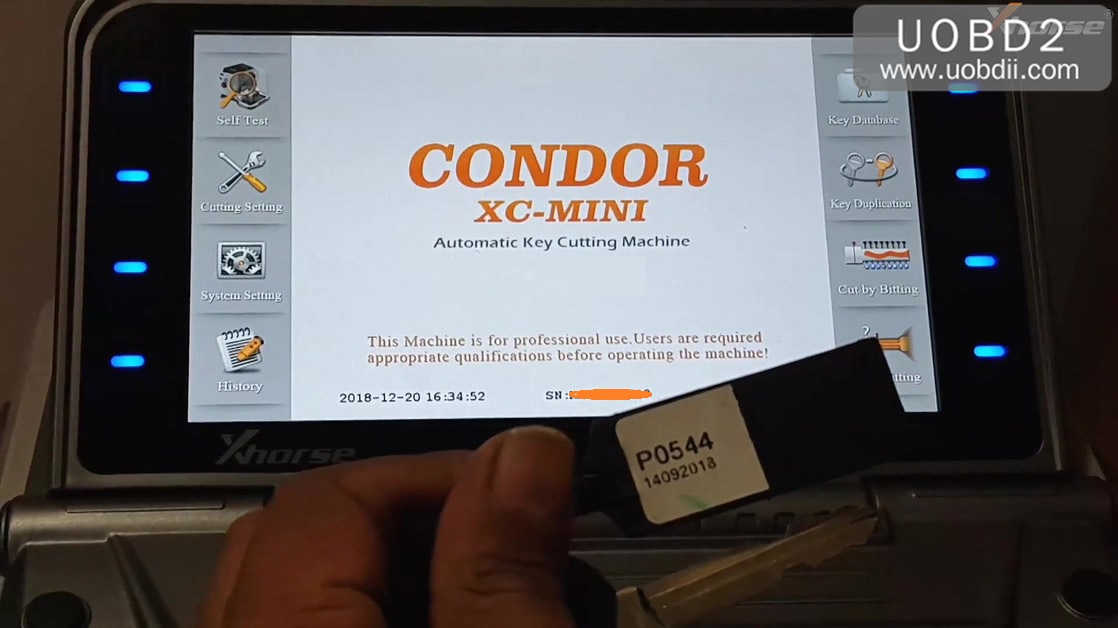
But, if you have no budget limit, that’s good. Miracle A9, Xhorse Condor mini and SEC-E9 are all good options. (Personally, Condor mini would be the best investment. It’s a Xhorse original device and repairs , service and updates are going to be possible. Also , there is good resale value.) Here’ s a summary of key cutting machines – read it. It’s from real pros. It will help you.


condor xc-mini (plus) is a good budget machine , more suited to the workshop than mobile due to size and weight. it has some bugs , some issues and some gaps , but the quick and easy update for lifetime plus wonderful function are the scoring points. this for what it costs, on the whole a decent machine for the money.

miracle A7 is a reliable machine , has a few bugs but reliable as a
light use machine , ideal mobile on a van and space saving .

Viper is a
heavy machine and can play up in cold , but is a great heavy duty machine that will give a lifetime of reliable use and receives lifetime updates and as Silca is normally up to date.

Ninja laserexcellent machine , nothing better for me on sx9 keys , laguna 3 , megane 3 , new clio cards using 1234Q5678H series and decoding and cutting clio 3 keys , fast reliable cutting that allows you to pick various styles of cut as well as adjust to half cuts etc , the software can take getting used to due to the functions available on it , adds cylinder keys to your services too , its a well built machine that is like silca updated for life free.


So, Condor mini vs Miracle A7 vs X6 key cutter vs Viper machine vs Ninja laser:
Most key cutting machines will cut a tibbe key on a clamp , but none will in my view cut a perfect tibbe key , a stand alone option will always cut a better key and far quicker too .

I have all of the above machines , so have hands on and regular experience with each machine and use them all , i like them all over the next for certain functions and all do different jobs for me , viper will always be my baby as it was my first , but ninja laser is catching it up fast my only gripe is viper is 30 second boot time , ninja laser is 4 minutes to boot up , but these 2 are in a league of their own

condor xc-mini plus key machine is a far superior machine to the x6 key cutter, the x6 is a starter machine for very light use and build quality is poor in comparison , i had an x6 to play with for a few months , i wouldnt buy one having gone hands on with it , condor will last longer and be more reliable of the 2 , its at least being supported and updated which is a big plus and is a far superior build quality to the x6 which at best is a hobby or starter machine .
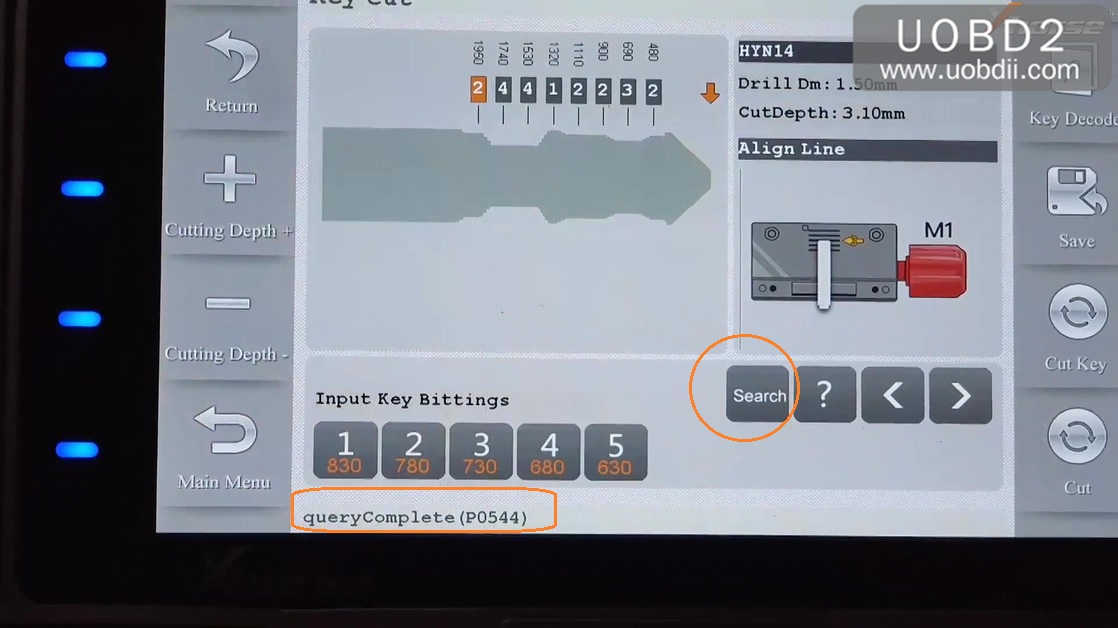
it isnt always 100% accurate , but the find biting function on condor is useful if you dont have instacode to hand , and is a useful addition that makes the condor more useful.


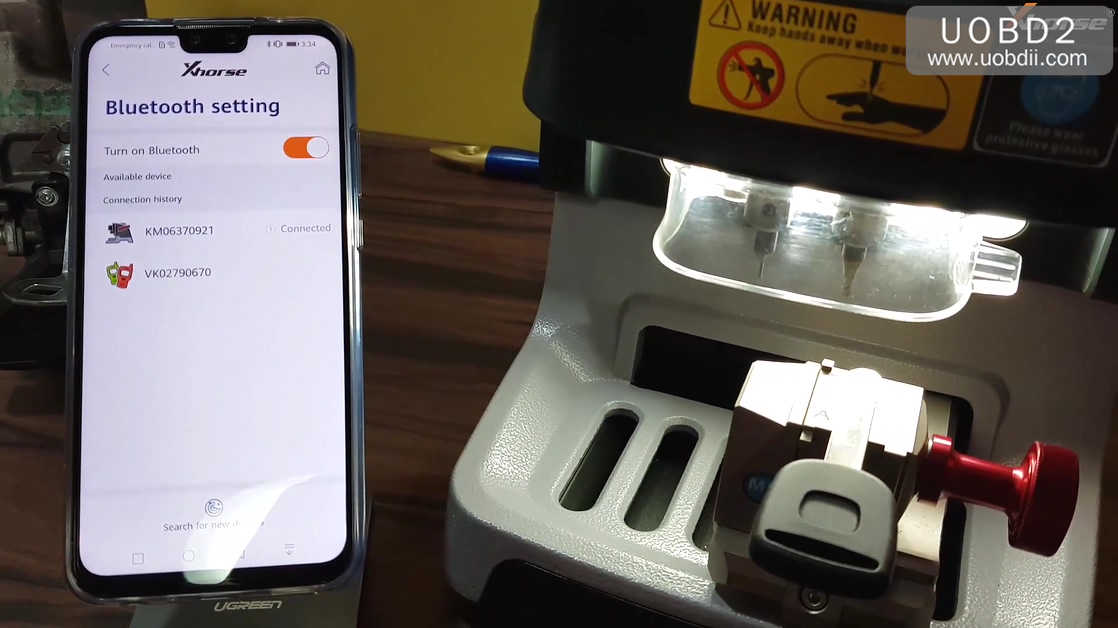
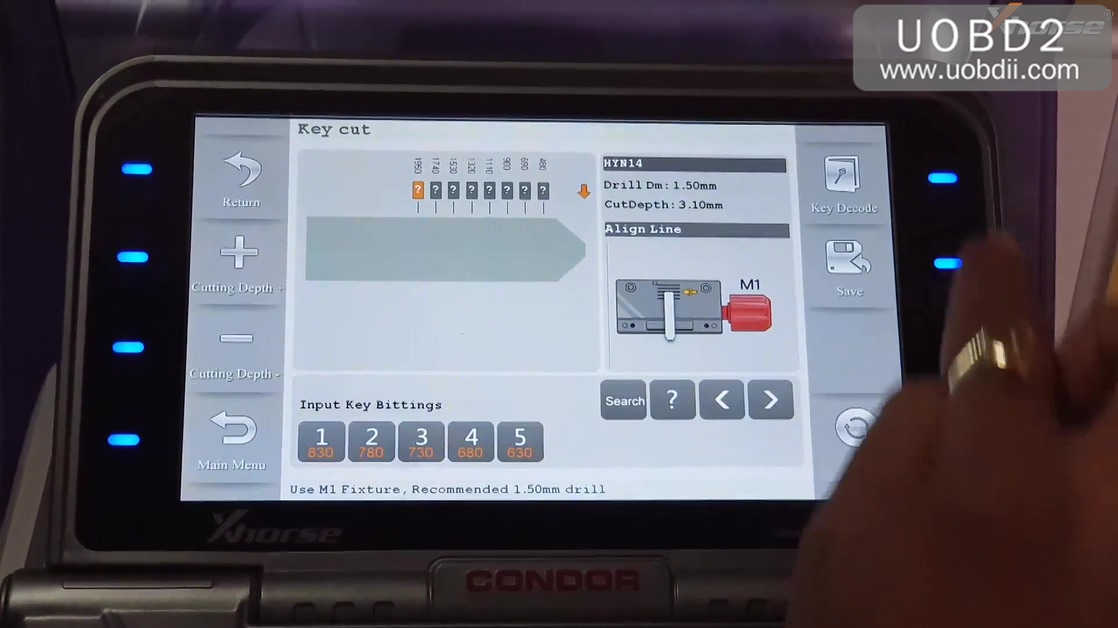
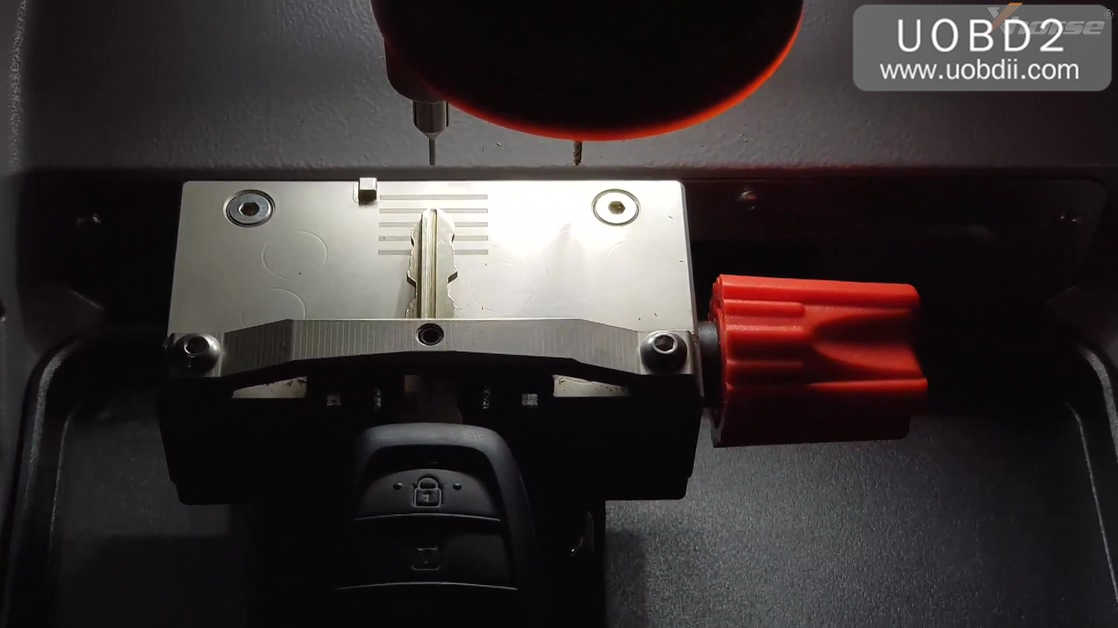
Below is what i tested with Condor machine.

Do Toyota TOY43 all key lost, save you a lot of time
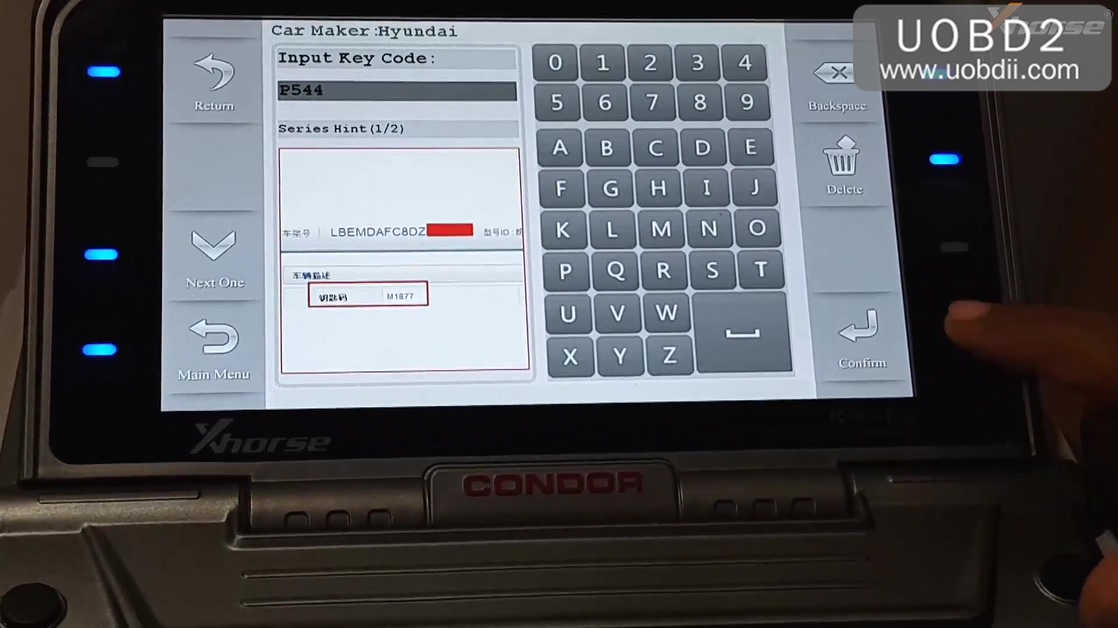
Cut Suzuki, Mazda (key tooth in ignition lock more than door lock) all key lost, simply by enter the key code
Do Hyundai, Kia, Peugeot, and Citroen all key lost, directly program keys
HU101 works fine, HU92 works fine.
HU66 OK, have to do two passes on each side to get the key to work, same with hu100.
Fix the problem that other key cutting machines cut domestic Honda key not accurately


But it is a pity that there is no solution for Renault emergency blade yet


Note that a simple mechanical key duplicator for cylinder and automotive (not laser) key is a small investment , and will pay for itself. It should be the logical first tool.


After that , a mechanical dimple (and laser) key duplicator may be the next device to buy. I believe these will become commonly available on the used market , because of all the all-in-one machine currently sold.

If you’re in the UK , a bit key duplicator should also be high on the wish list. There are machines that combine bit and cylinder key cutting. That might make sense if


If you should invest into “specialty” key machines (Abloy / Tibbe , tubular , …) depends on the demand in your area. Some shops may have no demand for tubular , but if your town happens to have a Harley dealership , they will be pouring in.

If you are still just starting the business , this will probably be too early to tell.

Xhorse Mini Key Tool Software Installaion & Registration Guide

$
0
0

In this article UOBDII.COM will show the procedures of how to install Xhorse mobile APP and register Xhorse Mini Key Tool.Hope it helps!


Procedures:

Open Google Play and search for Xhorse app

Xhorse Mini Key Tool Software Installaion & Registration Guide (1)

Click “INSTALL” button to install Xhorse APP

Xhorse Mini Key Tool Software Installaion & Registration Guide (2)

After installation completing,click to open the APP

Xhorse Mini Key Tool Software Installaion & Registration Guide (3) Xhorse Mini Key Tool Software Installaion & Registration Guide (4) Xhorse Mini Key Tool Software Installaion & Registration Guide (5)


Power on Xhorse Mini Key Tool

Xhorse Mini Key Tool Software Installaion & Registration Guide (6)

Click the “Select” button on the app

Xhorse Mini Key Tool Software Installaion & Registration Guide (7)

Now Xhorse app will find the your Mini Key Tool by bluetooth,click the device you power on just now.

Xhorse Mini Key Tool Software Installaion & Registration Guide (8)

And here you need to select Mini Key Tool database language,here select English,and click “OK” to continue

Xhorse Mini Key Tool Software Installaion & Registration Guide (9)

Now your Mini Key Tool have connected to the Xhorse APP.

Xhorse Mini Key Tool Software Installaion & Registration Guide (10)

Then it will prompt you to update the database,click “Update” to continue

It will take you several minutes to update database,and after database updating successfully,click “OK” to continue.

Xhorse Mini Key Tool Software Installaion & Registration Guide (11)

Then click “Me” button

Xhorse Mini Key Tool Software Installaion & Registration Guide (12)

Click “Please login” to register

Xhorse Mini Key Tool Software Installaion & Registration Guide (13)

Select “Area code” and enter your cell phone number,then click “Sent”

After then you will receive a “security code”,enter this code,the click “Login”

Xhorse Mini Key Tool Software Installaion & Registration Guide (14)

The it will require you to enter your password twice,then cick sumit button

Xhorse Mini Key Tool Software Installaion & Registration Guide (15)

Now your Mini Key Tool have registered!

Xhorse Mini Key Tool Software Installaion & Registration Guide (16)

Done!


Chrysler Jeep Dodge diagnostic & program: wiTECH or DRB III

$
0
0

Here supply wiTECH and DRB III function list which help you learn which to use to diagnose and program Chrysler,Jeep, Dodge, Ram, SRT, Fiat etc.

chrysler-witech-vci-pro-kit-view-02


So, here comes two questions:

Question 1: Where to have DRB III emulator? I want it to communicate with 2006 Chrysler town and country

The answer is to have wiTECH VCI Pod V13.03.38, which comes with DRB III emulator and can work stably offline.

This is the full package:

Vehicle to Diagnostic Tool Reference Chart-01

Source: http://www.uobdii.com/wholesale/chrysler-diagnostic-tool-witech-vci-pod.html


Question 2: Which hardware is compatible with clone wiTech software?

wiTech software is confirmed no issues with the Witech Micropod2. It can perform Chrysler Diagnostics and Programming.

You could use the clone for online diagnosis or new Chrysler cars.

If you have an account, you also are able to do online programming.


But the DRB III emulator is not always contained in its CD: Someone feedback he tried 2 Micropods, one did have no DRBIII functionality at all and the second did have DRBIII functionality, but only for the engine and transmission module (CAN bus) and no other modules (K Line).

(Solved) FORScan Win10 Error: “Windows cannot open this file” when download Extended License

$
0
0

This is for the error message: “Windows cannot open this file” on Windows 10 when download Forscan extended license


I use WIN XP on my Laptop. NO problems with Extended License…

But I see some people got problems with WIN 10 …

The error message can be: “Windows can not open this file”

I installed Forscan on my PC running WIN 10…and yes there is a Problem with actuating the extended license…

This is what I did…

Download the extended license…make a new folder and name it License. Put the extended license .key file in to that folder.

Go to Windows (C:) and find the FORScan Folder… Mine was in Program Files (x86)

Paste the ” License Folder ” in to FORscan…

Or: Right click on ForScan shortcut, Properties, Open File location…put License Folder in there.

Next:

Open the FORscan program

forscan-Extended-license-download-1

Click on [ Load License Key ] and this should take you here..

forscan-Extended-license-download-2

Open License Folder and take it from there…

When done it should look like this:

forscan-Extended-license-download-3

Forscan crack without license issues: http://www.uobdii.com/wholesale/els27-forscan-scanner-for-fordmazdalincoln-and-mercury-vehicles-102175.html

How to do Autel J2534 pass thru CIP programming for all Vehicles

$
0
0

How to solve: Autel J2534 pass thru FOR EVERY YEAR, MAKE AND MODEL


Man! I finally figured it out!

Autel J2534

CIP (Coding Individualization and Programming), using Autel Maxisys J2534 pass thru FOR EVERY YEAR, MAKE AND MODEL — can be done!


First, my bad experience with Autel customer service. I messaged Autel by email, and I was surprised on how fasted there responded, but they didn’t even help me out. A 10/10 for customer reply but a 0/10 for help!  But anyways here their first email I sent them and here what they said

“Dear customer,

Thanks for your feedback!

Please kindly be noted that programming ECU on Japanese cars is not developed yet. ”


Then I ask them when will  the Japanese cars be available they said “No plan to develop programming ECU for Honda, Toyota, Nissan, Acura, Etc.”


Then I ask them what cars are available they said “Most of the Bmw and Benz cars.”


So basically I felt like I got rip off because them calm they can do programming, CIP, etc. on all most every car that is stated in their youtube videos. They should have a list of all the cars, and manufacturers who Autel supports.


So with the  MaxiSys Elite and  MaxiSys Pro if you have the J2534 ECU Programming Device you can program or do the ECU update. (BUT NOT THROUGH AUTEL ON ALL CARS ECU) you will have to contact the manufacturer site of that vehicle that you plan to do the Flashing.


THINGS YOU NEED!

  1. AUTEL J2534 ECU Programming Device


  1. AUTEL J2534 ECU Programming Device Cable to connect to a Laptop to the J2534 ECU Programming Device Via the USB port


  1. a “WINDOWS” laptop. because none of the automotive manufacturers makes software for Apple Computer ( P.S you can run Boot camp on your mac to install windwows 10. but windows 7 and windows XP isn’t supported on boot camp)


  1. Many automotive manufacturers programs run on Windows 10 (MANY BUT NOT ALL). If the program fails or isn’t working correctly, you need a (WINDOWS 7 OR WINDOWS XP operating system it’s usually stated in their requirements what is supported and what is not).   (the automotive manufacturers try to make the most money they can get so that why SOME automotive manufacturers company don’t update their flashing programs to the latest operation system like Windows 10 etc. beacuse they don’t want to spend thousand if not even millions to updated everything and testing and debugging)


  1. The Internet with excellent wifi connection ( if your wifi goes out due to a bad or weak internet connection while updating, programming, etc. a car ECU you can fry, brick the ECU) so make sure you have an excellent internet connection.


  1. Jump box or anything to charge the vehicle battery while updating, (if the car battery  dies while an ECU updated you can fry, brick, break, etc. the ECU)


  1. You will need to “BUY A SUBSRCITION” from the manufacturer website of that vehicle you’re going to do to have access to the flashing software, and from there you can download their software.(EACH MANIFUACTURE has their own website with their own flashing software. So yes you need to buy a subscription for every different car year and model. For every manufacturer out there to be able to do different vehicles) Don’t worry they all offer different plans so lets so your woking on a car for a one time use they offer different plans pick whatever plans suits you. They have one day from $10-$25 to a year from $1,250-$1,800+.


MANIFUCATEERS  WEBSITES FOR FLASHING SOFTWARE/SUBSCRIPTIONS LINKS


“Acura, Honda” :   http://www.serviceexpress.honda.com/


“Audi” :   http://erwin.audiusa.com


“BMW”:   http://www.bmwtechinfo.com/


“Chrysler, Dodge, Jeep, Eagle, Plymouth”:   http://www.techauthority.com/


“Ferrari” :   http://www.ferraritechinfo.com


“Ford, Lincoln, Mercury” :   http://www.motorcraftservice.com/


“GM – Buick, Cadillac, Chevrolet, GMC, GEO, Hummer, Oldsmobile, Pontiac, Saturn” :   http://www.gmtechinfo.com/


“Hyundai” :   http://www.hmaservice.com


“Infiniti” :   http://www.infiniti-techinfo.com


“Isuzu” : http://www.isuzutechinfo.com/


“Jaguar” :  http://topix.jaguar.jlrext.com/topix/i18n/index


“Kia” :    http://www.kiatechinfo.com


“Land Rover” :   http://www.landrovertechinfo.com/


“Lexus” :    http://techinfo.lexus.com


“Maserati” :   http://maseratitechinfo.com


“Mazda” :   http://www.mazdaserviceinfo.com/


“Mercedes-Benz”  :   http://www.startekinfo.com/


“Mini” :     http://www.minitechinfo.com/


“Mitsubishi” : http://www.mitsubishitechinfo.com/


“Nissan” :  http://www.nissan-techinfo.com


“Porsche” : https://techinfo2.porsche.com/PAGInfosystem/VFModuleManager?Type=GVOStart


“Saab” :    http://epsiportal.com/Site/


“Subaru” :   http://techinfo.subaru.com


“Suzuki” :    http://www.suzukipitstopplus.com


“Toyota, Scion ” :    http://techinfo.toyota.com/


“Volkswagen” : http://erwin.vw.com


“Volvo ”  : http://www.volvotechinfo.com/


***!DISCALMAER!: I HAVE NOT TESTED EVERY MANIFUCUTE WEBSITE, AND CAN’T TELL YOU IF THE AUTEL J2534 ECU PROGRAMING DEVICE IS COMPABLIE WITH THERE SOFTWARE. I TRIED MANY MANIFUCUTE WEBSITE AND SEEMED TO WORK FINE SO FAR.!***


***PLEASE IF YOU TRY ONE THESE UPDATES, FLASHING ETC, PLEASE POST IF IT WAS COMPLAIBLE WITH THE  AUTEL J2534 ECU PROGRAMING DEVICE SO OTHER CAN VERIFY THAT IT WORKS***


***REMEMBER AUTEL SUPPORTS MOST OF THE BMW AND BENZ CARS SO NO NEED TO BUY AN SUBSCRTION FROM THOSE MANIFUCTERS.***


WEBSITE FLASHING SOFTWARE THAT IS COMPATIBLE WITH  AUTEL J2534 ECU PROGRAMING DEVICE CONFIRMED (I will try to post the websites flashing software that worked with Autel if not please post down below that it did work.)


  1. “Acura, Honda” :   http://www.serviceexpress.honda.com/


  1. ….


will update….

How to Program BMW CAS4+ All Key Lost by CGDI BMW

$
0
0

This article I want to show you how to program new keys for BMW CAS4+ all key lost by CGDI BMW Programmer.Hope it helps!


Devices You Need?

CGDI BMW Programmer

CGDI Pro 9S12

CG-100 Prog


Procedures:

Step 1:Read CAS4+ Immobilizer Data

Remove CAS4+ module from vehicle

How to Program BMW CAS4+ All Key Lost by CGDI BMW (1)

Disassemble cover and take out PCB

How to Program BMW CAS4+ All Key Lost by CGDI BMW (2)

Run CG Pro software,and follow the software wire connection diagram to build connection between CG Pro 9S12 and CAS4+ module

How to Program BMW CAS4+ All Key Lost by CGDI BMW (3) How to Program BMW CAS4+ All Key Lost by CGDI BMW (4) How to Program BMW CAS4+ All Key Lost by CGDI BMW (5)


Operate CG Pro software to read out and decrypt immo data,then save the data on your laptop

Note:Don’t forget to make backup before operation.


Step 2:CG-100 read ECU data

Run CG-100 software,and select “ECU”

How to Program BMW CAS4+ All Key Lost by CGDI BMW (6)

Select “BMW E series”à” MEVD1724(N20)”

How to Program BMW CAS4+ All Key Lost by CGDI BMW (7)

Then follow the software wire diagram to connect CG-100 to MEVD1724(N20) ECU

How to Program BMW CAS4+ All Key Lost by CGDI BMW (8)

Click “Read EEPROM”

How to Program BMW CAS4+ All Key Lost by CGDI BMW (9)

After reading ECU data successfully,save the ECU data file on your laptop.

How to Program BMW CAS4+ All Key Lost by CGDI BMW (10)

CG-100 will show ISN and VIN

How to Program BMW CAS4+ All Key Lost by CGDI BMW (11)

Note:CG-100 full version support this function.


Step 3:CGDI BMW Program Keys

Connect CGDI BMW to laptop and run CGDI BMW software and select “CAS4 Key Match”

How to Program BMW CAS4+ All Key Lost by CGDI BMW (12)

Select “Load CAS Data”

How to Program BMW CAS4+ All Key Lost by CGDI BMW (13)

Note select the immo data you save on step 1 to load

How to Program BMW CAS4+ All Key Lost by CGDI BMW (14)

Then CGDI BMW software will show relevant information

How to Program BMW CAS4+ All Key Lost by CGDI BMW (15)

Select the key position that need to be configured,then click “Generate dealer key”,and the select the way to input “ISN” code,here select “With the engine data,the next step is to load the engine data”

How to Program BMW CAS4+ All Key Lost by CGDI BMW (16)

Now load the ISN file you saved in step 2

How to Program BMW CAS4+ All Key Lost by CGDI BMW (17)

Input a blank key into CGDI BMW slot,and click “OK” to start programming

How to Program BMW CAS4+ All Key Lost by CGDI BMW (18)

After programming successfully,it will prompt you new key programming successfully.

How to Program BMW CAS4+ All Key Lost by CGDI BMW (19)

To end by test this new key on your BMW.

How to Program BMW CAS4+ All Key Lost by CGDI BMW (20)

How to install VIDA2014D on Windows 8.1 / 10 Pro / Core x86 / x64 PC?

$
0
0

– This instruction is to install VIDA2014D from an .iso image (or from a folder) on a PC with Windows 10 x86-x64 of all options and versions (as of 03/01/2018). Suitable for Windows 8 all versions and versions.
– In Windows 7, installing in the usual way – running \ Install \ DVD \ Vida_dvdheader \ Main \ setup.exe
– If you have an image without the Russian language (and you need it) – unpack the image with any archiver into a folder (for example, VIDA2014D), download the archive at the end of the post, create a ru-RU folder in VIDA2014D \ DB , put the downloaded servicerep_ru-RU archive into it . zip , you can start the installation.
– If the PC has 2GB of RAM, the hard disk is 20GB (3GB and 30GB for 2014D) and less, you need to unpack the image and make the appropriate changes to the \ VIDA2014D \ Install \ DVD \ Vida_dvdheader \ Compinfo.ini file , in the Win7MinValue lines = we write 512 , in Win7Recommend = we write 5000000 (or we erase one digit at the end), we save.
– If the PC is failed due to unsuccessful attempts to install different versions of VIDA – you need to prepare for a new installation, clean up the OS (uninstall the VIDA, SQL components, delete the remaining folders, delete the remaining keys in the registry).

Method 1

1 . Training.
You do not need to install anything else, except as specified in this manual. Also, there is no need to disable / stop any of the default components in Windows 10 (protector, firewall, etc.).
a ) Install .NET Framework 3.5 from:
– Control Panel – Programs and Components – Enabling or disabling Windows components
In the Windows Components window , mark the .NET Framework 3.5 , then OK , the .NET Framework 3.5 will load and install, you may need to restart. If it is already installed earlier – go to the next item.
b ) Insert the image into the virtual drive (in Windows 10 it is present by default) by double clicking on VIDA2014D.iso .
Open the image folder in the explorer.
c ) Run cmd from the administrator from the open folder with the image VIDA2014D:
– File – Open Command Prompt – Open Command Prompt as Administrator
Until the end of the installation, DO NOT close the cmd window, we will need it TWO times.

install-vida-2014d-on-windows-8-1-10-01

2 Installation and configuration of Microsoft SQL Server 2008 R2 .
– Copy / paste into the cmd window and press Enter :

“3PP” Products / SqlExpress / HIDECONSOLE / ENU / QS

– Wait until the installation is complete. You can check the correctness of the last installation in:
– Start – All Applications – Microsoft SQL Server 2008 R2 – SQL Server Installation Center – Tools – Installed SQL Server features discovery report
The default browser opens with a report. We look – in the table there are two lines (at the end of No it should be so), close the SQL Server Installation Center .

install-vida-2014d-on-windows-8-1-10-02

3 Installing VIDA2014D .
– Copy / paste BOTH lines in the cmd window and press Enter :

set __compat_layer = WIN7RTM
“Install \ DVD \ Vida_dvdheader \ Main \ setup.exe”

– Select VIDA All-in-one .
– Select only ONE language (you can set TWO languages ​​and switch them – see Method 2 ).
– Accept the license agreement.
– Select the installation path. It is recommended to leave the default C: \ VIDA. Time setting takes from 10 minutes (modern PC and SSD) to 40 minutes or more (weak PC and slow HDD). You can monitor it in the Task Manager for the activity of the alba process. At the end of the installation, 4 icons will appear on the desktop.
– Select in the pop-up Internet window, then Save , then Close , and Close again.
– Refuse to reboot.
– Close the cmd window.
4 Treatment and first launch.
– Run New patch (link at the end of the post). After applying the patch (tablet), VIDA Monitor should start, after some time a green arrow instead of a yellow arrow should appear on its icon in the tray.
– In the pop-up window of the regular firewall, select Allow access for Java .
– Launch VIDA with the VIDA All-in-One icon on the desktop (or in the Start menu, or through the right-click menu on the VIDA Monitor icon in the tray).
– If Internet Explorer prompts you to select and enable add-ons – turn it on.
– Enter in the Username : 4 field for the Europe region (others – 1, 2, 3).
– Wait for IsoView to load.
– Go to the Vehicle Profile tab, enter the VIN code. Must open car.
– Disable VIDA eUpdate in the Task Manager on the Startup tab, line Java ™ Platform SE binary . You can also disable VIDA Monitor from startup and launch it as needed from the shortcut in Start – VIDA . Adobe Reader XI , which was installed with VIDA, can be deleted (if you use another pdf application or are not needed). Of the four shortcuts that appeared on the desktop after installing VIDA, only VIDA All-In-One is needed, the other three can be deleted (they are in the Start menu application list).
– Done, you can use.

install-vida-2014d-on-windows-8-1-10-03

Image 3: The arrow on the icon should be green.


Method 2 (recommended)

– At the bottom of the post there is a link to the resource where you can download the finished version with adaptation to the latest Windows 10 update and the ability to use two languages ​​- Russian and English. It contains an easy way to install using cmd files (you don’t need to enter anything manually). Everything you need to install and normal operation on Windows 10 already exists in the downloaded disk image (.iso).

Solutions to common problems

————————————————– ——————
VIDA Monitor server does not start … After a while, a red icon appears on the icon ? perhaps another Windows 10 update is to blame. Download the archive with the jdk folder, unload VIDA Monitor, delete the jdk folder from C: \ VIDA , unpack the downloaded one into C: \ VIDA , then reboot the PC. The archive with the necessary, to solve this problem, can be downloaded at the end of the post (my repack already contains this JDK!).
————————————————– ——————
VIDA Monitor server does not start (JDK is updated or my repack!) … A window appears with a message about the busy 80 m port … It is necessary to determine who occupied the port and release it. Run cmd from admin, type netstat –ao . In the Local Address column, find the line with the 80 m port, looks like 127.0.0.1: 80 . We look at its PID , in cmd we enter cmd tasklist | find “****” (instead of **** – PID). We see the culprit. Or you can do this – launch the Task Manager , go to the Details tab, the required process can be found by the value of the process ID column (the PID that was found in cmd ). Immediately in the Task Manager, you can complete / disable this process (and immediately check the launch of VIDA Monitor).
a) The port is occupied by Skype – in the Skype settings you can change the port (or delete if not needed).
b) Port occupied by IIS service – disable it in the Control Panel – Programs and Features – Enable disabling Windows components .
c) … etc.
————————————————– ——————
VIDA Monitor server does not start – is there a sign in the icon ?
a) Unload VIDA Monitor .
b) In the C: \ VIDA \ System \ Log folder, delete all contents except the Diagnostics folder (delete its contents if there is one).
c) Launch VIDA Monitor , wait ?
d) In the folder C: \ VIDA \ System \ Log, look at what the last lines are written in VidaMonitor.log .
d) … depends on what is written there 😎
————————————————– ——————
VIDA Monitor Server is starting up – a yellow arrow remains on the icon …
a) Unload VIDA Monitor .
b) In the C: \ VIDA \ System \ Log folder, delete all contents except the Diagnostics folder (delete its contents if there is one).
c) Launch VIDA Monitor , wait 5-10 minutes …
d) In the folder C: \ VIDA \ System \ Log, look at what the last lines are written in VidaMonitor.log .
d) … depends on what is written there 😎
————————————————– ——————
– After launching the VIDA All-In-One icon, Internet Explorer opens with a blank page and http: // localhost / Vida in the line …
In Browser properties – Security – Local intranet – Sites – Additionally , add the following node to the zone: paste http: // localhost (remove the space after http), then Add, Close, Ok, Apply . Close Internet Explorer and try again to start VIDA All-In-One .
————————————————– ——————
Username field is not active … The tablet did not work, apply again carefully observing all the conditions (you can temporarily disable the antivirus), then restart the PC. .
————————————————– ——————
– When entering the VIN-code it writes access denied … Check and enter the VIN-code MANUALLY (NOT through copy / paste).
————————————————– ——————
– After starting, in the field Communication tool – ” cross ” or ” crossed out circle ” … You need to run the reg.files from \ Install \ Utils on the image / disk with VIDA EnableIEHostingx86.reg or EnableIEHostingx64.reg (for x64 OS).
IE should be closed! Archive with the necessary files to solve this problem can be downloaded at the end of the post.
————————————————– ——————
– In the module diagram, no module is selected (not clickable), the site diagrams are very small and nothing is selected …
This often happens on tablets with a screen resolution of 1080P and above (the default scaling is 150%). To work with VIDA, set the Parameters – Display resolution to 720P (1280 * 720) and scaling 100% .
————————————————– ——————
– On the start page of VIDA I enter in the Username : 4 field (and others – 1, 2, 3), the download indicator passes but does not allow to enter further … The old tablet has ended, at the end of the post there is a solution.
————————————————– ——————
Connecting and installing DiCE

If you plan to use DiCE:
– Connect the device to the vehicle’s OBD connector (or power it at 5-12 V / 1-2 A with a suitable power supply, the dice will NOT receive power via USB!).
– Connect it to the USB connector of the PC.
– Wait until the device is installed in Windows.
– Run VIDA, make sure the installed DiCE is in the “Communication tool” field.
Is done.
If you want to use DiCE on bluetooth (you must first connect via USB!), Run (corresponding to the OS bit depth) the reg file and search / add BT devices in the OS. Instructions with the necessary registration files for connecting via Bluetooth and the driver for using DiCE without VIDA can be downloaded at the end of the post.
To test the instrument, use the standard utility of DiCE Diagnostic in – Start – All Applications – DiCE .

Installation of EWD schemes in VIDA

In order for EWD schemes to be accessible from VIDA , you must copy the contents of the Rus folder from the EWD disk (image) to:
\ VIDA \ jboss \ standalone \ deployments \ VidaEar.ear \ VidaWeb.war \ wiring_diagrams \ Rus
If there is no Rus folder on the EWD disk / image, copy the contents from, for example US_Eng , everything is clear in the schemes and in English 😉 You need to copy to the Rus folder, if VIDA is in Russian (if there is no such folder, create one). Then restart VIDA Monitor.
Is done.
Located in Information – Troubleshooting – Wiring Diagrams .
– At the bottom of the post there is a link to the resource where you can download the EWD .

install-vida-2014d-on-windows-8-1-10-04

Image 4: EWD 2014D


VIDA access over the network

To make VIDA available over the network, you need to stop VIDA Monitor, change the line in the file:
VIDA \ jboss \ standalone \ configuration \ standalone.xml
<interface name = “public”>
< inet-address value = “$ {jboss.bind.address: 127.0.0.1}” />

</ interface>

on:
<interface name = “public”>
< any-ipv4-address />

</ interface>

Then run VIDA Monitor (or reboot the PC). On another PC, you need to install the accompanying software – IsoView and the driver DiCE (if needed there). From this PC (in the local network, VPN, etc.) in IE, enter the address of the PC from the VIDA – * IP of the computer * / Vida (for example, 192.168.1.25/Vida) or create a shortcut with the object “C: \ Program Files \ Internet Explorer \ iexplore.exe ” * computer IP * / Vida.
Is done.

How to delete profiles of cars that have already been read / entered

Run the file:
\ VIDA \ db \ dbutils \ clearDatabase.bat from the disk / image or from the folder installed by VIDA.
Is done.
ALL profiles and data of read machines will be deleted! Individually delete is not possible. After, you need to reapply the pill .

install-vida-2014d-on-windows-8-1-10-05 install-vida-2014d-on-windows-8-1-10-06


Visual guide for those who first use VIDA and DiCE for diagnostics

If you plan to do the diagnostics yourself, on this site Volvo technical information has a lot of useful information – do not be lazy to read it Thank SergVolvo
The manual page in the Diagnostics section, direct link to
Self-diagnose slide show with DiCE and VIDA .

http://www.uobdii.com/wholesale/low-cost-vida-dice-for-volvo.html

That’s all

Thanks.

Viewing all 3221 articles
Browse latest View live


<script src="https://jsc.adskeeper.com/r/s/rssing.com.1596347.js" async> </script>