Quantcast
Channel: UOBDII Official Blog
Viewing all 3193 articles
Browse latest View live

Lonsdor KH100 reviews on what work and how to do?

$
0
0

uobdii.com engineer will answer some questions on Lonsdor KH100 Remote Key Programmer in this post, including,and for KH100 beginner guide,here:Lonsdor KH100 User Guide:How to Use,Registration,Activation


1.How to use “Identify Copy” function?

2.How to use “Access Control Key” function?

3.What chip Lonsdor KH100 can simulate?

4.What chip Lonsdor KH100 can generate?

5.What key Lonsdor KH100 can generate?

6.Lonsdor KH100 can identify coil and how?

7.Lonsdor KH100 can detect remote frequency and how?

8.Lonsdor KH100 has special features

9.How to update Lonsdor KH100


lonsdor-kh100-identify copy-00

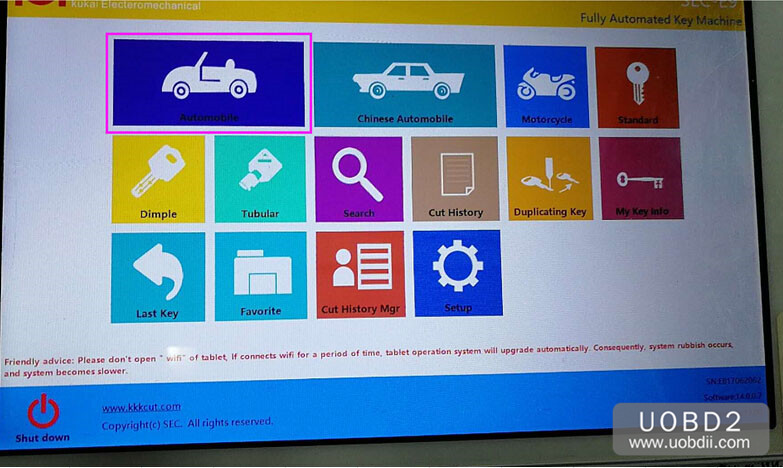
Lonsdor KH100 function menu:

Identify Copy

Access Control Key

Simulate Chip

Generate chip

Generate key

Identify Coil

Remote Frequency

Special Function

Settings

1.How to use “Identify Copy” function?

lonsdor-kh100-identify coil-01 lonsdor-kh100-identify copy-02 lonsdor-kh100-identify copy-03


2.How to use “Access Control Key” function?

Enter this menu, follow system prompts to operate (as shown).

lonsdor-kh100-ic-card-id-card-04 lonsdor-kh100-ic-card-id-card-05


3.What chip Lonsdor KH100 can simulate?

Simulate 4D chip

Simulate 46 chip

Simulate 48 chip

Put Lonsdor KH100’s antenna at the ignition switch(as shown), choose the corresponding chip

type to simulate.

lonsdor-kh100-simulate chip-06 lonsdor-kh100-simulate chip-07


4.What chip Lonsdor KH100 can generate?

4D

46

48

T5

7935

8A

4C

Others


Put the above chip into the induction slot(as shown), choose the corresponding chip to operate according to the prompts.

Note: some chip data will be covered and locked.


5.What key Lonsdor KH100 can generate?

Menu:

Generate Remote (Generating various type)

Generate smart key

lonsdor-kh100-generate key-10


1) Lonsdor KH100 generates Remote

Buick

Ford

GMC

Hammer

Cadillac

Chrysler

Lincoln

Chevrolet

Audi

BMW

Benz

VW

Jaguar

Land Rover

Opel

Skoda

Volvo

Honda

Toyota

Lexus

Suzuki

Mazda

Luxgen

Nissan

Acura

Kia

Baojun

Beiben H

Baic

Besturn

BYD

Changhe

Maxus

Dongfeng

Southeast

PLC

Steel Ma

Steel Lea

lonsdor-kh100-generate key-10 lonsdor-kh100-generate remote-12 lonsdor-kh100-generate remote-13 lonsdor-kh100-generate remote-14 lonsdor-kh100-generate remote-15


Enter [Generate key]->[Generate remote], choose the corresponding vehicle type to

generate remote control(as shown) according to different regions.

lonsdor-kh100-generate remote-16


2) Lonsdor KH100 generates smart key

Jeep

Baic

BYD

Buick

Dodge

Southeast

Geely

Cadillac

Maserati


Enter [Generate key]->[Generate smart key] menu,choose the corresponding vehicle

type to generate smart key/card(as shown) according to different regions.

lonsdor-kh100-generate smart key-18


Put KH100 antenna close to the pre-determined position. If signals are identified, the device will continuously make sounds.

lonsdor-kh100-generate smart key-19


6.Lonsdor KH100 can identify coil and how?


1 Search smart induction area

Connect remote key with remote connector, Put KH100’s antenna close to the

pre-determined position. If inductive signal is identified, the device will continuously

make sounds, please check if the position is right(as shown below).

lonsdor-kh100-identify-coil-20


②Detect IMMO

Connect remote key with remote connector, Put KH100’s antenna close to key

identification coil, and use key to turn ignition ON. When KH100 buzzer beeps, it means

signal is detected.

lonsdor-kh100-identify-coil-21 lonsdor-kh100-identify-coil-22


7.Lonsdor KH100 can detect remote frequency and how?

Enter this menu, put remote control at the device’s induction area to detect remote frequency.

lonsdor-kh100-remote-frequency-23 lonsdor-kh100-identify-coil-22


8.Lonsdor KH100 has special features

Detect Infrared signal

Toyota smart key (Unlock Toyota smart key)

Garage door

Fixed code remote copy

Fixed code remote editing

and more…

lonsdor-kh100-special features-25


1) Detect infrared signal

Put remote control at the infrared signal detection area, press the remote’s button

once. When the light on KH100’s screen is on, it indicates there is infrared signal,

otherwise there is no signal(see below pic).


lonsdor-kh100-special features-26

(signaled)


lonsdor-kh100-special features-27

(no signal)


2) Unlock Toyota smart key

Put in smart key, click OK to operate.

lonsdor-kh100-special features-28

lonsdor-kh100-toyota-smart-key-29


Enjoy


9.How to update Lonsdor KH100?

Enter settings menu, and connect the device to network, then choose [check for

updates], one-click online upgrade.


Lonsdor KH100 on sale

http://www.uobdii.com/wholesale/lonsdor-kh100-key-remote-programmer.html


Possible to WiTech software with J2534 interface?

$
0
0

It is possible to run WiTech software with J2534 interface (Drewtech Cardaq Plus) ?
It is possible to emulate the Micropod 2?


I have used witech j2534 software.

You can sign up for it thru witech aftermarket.

There’s a youtube video of it, that shows you how to set it up.

And I use mine with a snap on passthru pro 3.


Here’s how to sign up… For aftermarket users ONLY


To register a J2534 device, navigate to the wiTECH Account Manager URL and login. https://submgr.am.fcawitech.com/login.htm

witech-j2534-register-1

Navigate to the bottom of the Subscriptions page and select “Register a Tool”

witech-j2534-register-2

Select the dropdown arrow and select J2534.

witech-j2534-register-3

DO NOT enter your J2534 device serial number in this field. You must download the J2534 application to get the serial number of the J2534 application you want to register. Select the “download the wiTECH 2.0 J2534 Application” link

witech-j2534-register-4

Select “Download J2534 MSI Installer” to download.

witech-j2534-register-5

Once it is downloaded, run the J2534 install application. Windows 10 is currently the only officially supported operating system for the J2534 application.

witech-j2534-register-6

Follow the on-screen prompts to install the J2534 application.

witech-j2534-register-7

Once the install has completed, launch the wiTECH 2.0 J2534 application.

witech-j2534-register-7

Select the “Help” tab and then “About wiTECH2.”

witech-j2534-register-9

Copy the serial number information.

witech-j2534-register-10

Return to the Register a Tool page and enter the serial number in the serial number text box, then select “Request Approval.”

witech-j2534-register-11

Once you submit for approval, you will receive a notification within 1 to 2 business days to confirm if the J2534 device has been approved.

If your device has been approved you will receive an email and it will then be associated to your account. It will be visible on the Subscriptions page upon purchase of a subscription.

 You can now assign your J2534 device once you purchase a subscription and an Okta account activation email will be mailed to you for logging into wiTECH 2.0.


Good to know:

Here, you’re advised to use witech software with Micropod 2, genuine or china clone.

That is the best, Micropod 2 interface.

Look here:

In the video, witech is verified to work good with Mircropod 2 china clone.

Solution to Xhorse VVDI2 not connected by OBD2 error

$
0
0

Offer DIY solution to the error that Xhorse VVDI2 is not connected by OBD2.

Thanks to jodge (DK Veteran).


Error:

VVDI2 is no longer connected by OBD2, it has been short to negative.

This component was burned (make smoke), I took it and at least UDS protocol is working, I did not test in Kline

vvdi2-not-connected-by-obd-solution-01 vvdi2-not-connected-by-obd-solution-01 vvdi2-not-connected-by-obd-solution-03


jodge’s solution:


Please replace A2SHB component.

vvdi2-not-connected-by-obd-solution-04


Part Number : A2SHB

Function : N-Channel 1.25-W, 2.5-V MOSFET

Package : SOT23 Type

Manufacturers : Vishay, NXP

Image :

vvdi2-not-connected-by-obd-solution-05


Description

N-channel enhancement mode field-effect transistor in a plastic package using TrenchMOS technology.

Pinout

vvdi2-not-connected-by-obd-solution-06


Features

  1. TrenchMOS™ technology
    2. Very fast switching
    3. Logic level compatible
    4. Subminiature surface mount package.

Application

  1. Battery management
    2. High speed switch
    3. Low power DC to DC converter.


You try it at your own lucky.


Xhorse VVDI2 tech support is always available at www.uobdii.com.

Key programming, cutting, cloning for US market, which tool?

$
0
0

What would be the best purchases for the US Market not much European cards where I’m at although we do have of course with a budget of $15K to be able to do the most (key programming, cutting, cloning, etc)

Key programming, cutting, cloning for US market, which tool?

For key cutting when you want to take it with you then X6, when you want to use it in a shop then Miracle or Condor. Condor Dolphin only then, when you buy VVDI Benz, just to collect the extra free calculations. Also SEC-E9 CNC Automated Key Cutting Machine.


Key cloning and universal remotes:
VVDI key tool and/or Keydiy X2 – depends on your needs. The Keydiy is (as far I see) a must have, so I think this could be a good solution.


Dump programming:
VVDI Prog and Orange5 as eprommers, Tango for transponder programming – and as backup a TMPro2 without modules just to have the option to save your @ss in the last minute for big money.

OBD programming: Lonsdor made me a lot of ‘American cars, so that’s a must have. For everything else AVDI and obdstar.

That’s enough to start your business, and everything else you will see.


Next paragraphs are for details of the above-mentioned tools.


1Xhorse’s VVDI Key tool: A must have
This is the alternative answer of XHorse to the Keydiy stuff. To be honest this programmable universal remote idea is so good as it could be, that’s why they made another type for the same task. The first thing is compared to the Keydiy X2, what’s the next generation tool of KD after Mini, 200 & 900 is the fact, that this revolver-looking toy has a big color display, and can be used without smartphone and internet – however this abilities are usable too. The main advantage compared to a KD900 is the fact, that this tool can clone transponders, and renew used remotes too. Yes, this renewing option is strongly limited, but is much more than nothing, and can come very often handy: just get a new housing for the remote, and make money from the garbage. The transponder cloning is good from some pov it is better than Handy Baby and X2, because it has free G and H chip functions. You need only 2 types of transponders for cloning: CN3 & LKP02. As far you don’t try to clone ID48. This toy forces you to clone all ID48s as a 96 bit one via internet, and you know that this function isn’t for free…
Maybe it offers less type of remotes as the KD does, but covers the mostly needed models. Sadly they aren’t compatible with each others, so you have to decide between KD or VVDI stockings, but my answer to this problem was that I have only B01 type remotes in my car with this tool, and KD stuff in the shop.
As I said earlier, this is a must have tool, you can get it from $260 with 5 programmable remotes.


2Tango:
Another must have.
It is modular like AVDI or TMProII, with limited free functionality for each manufacturers. The whole BMW package is free, so you have to get it if you have to deal with Beemers. To be honest it has lots of weak points, but the documentation what is included makes it worth to pay for: pictures of the devices what you have to look for, sometimes with location and unmount pics; list of the transponders what you can use to the chosen task; the name of the chip what you have to deal with. Packages are from 50€, you get the activation code in e-mail very fast, but can depend on your dealer. So much from the good side, let’s see the weak points: It comes often, that you can’t open the .bin files for their name, just have to find out where the program accepts it. For example: Yaris as Corolla, Insignia as Camaro, Cordoba as Polo, Picanto as C’eed, aso. It gives some well-known problems: can’t do anything with the RB8 controllers, aso. It is a bit uncommon, that it wants to be updated always, but who cares, it goes fast enough via smart phone too.
However: you have to buy this to be able to do your work, so take a deep breath, and pay: 1200€ for the basic sw+hw.


3Lonsdor:

I can’t really say if it is worth of its price, or not. I think I got a broken OBD-cable with the tablet, thats why it sometimes works, some times stops with connection error. Have to deal it with the seller, but thats another story. The tool is easy to use, has a lots of functions, in many places with screenshots how it should work. Not a cheap toy ($1400 with the Toyota pack), but I think it could be a good tool for the daily use (when you already bought it). Needs internet connection (at least once a week to check for updates) for some actions.
To be honest I’ve spent a lot of times to test it for DK, and I think it promises a lot, but now it is too weak in knowledge for this money. But if you already have it, you can hope that they will work on updates harder as a rock.
Update: It seems to be working now (at least with smart key cars). The making of a smart key for a ’14 Dodge Charger was fast & easy: the only trick was that I had to chose Journey from the wehicle list. Pin reading and programing was done in 2 mins.
’13 Jaguar XJ: smart key programing in 2 mins
’14 Jaguar XK: chanceless (only Abritas knows this car today)
’13 Megane III Ph2: no pin reading, asks for pin to be able to do programming.
’11 Clio III Ph2 Grand Tour: Nothing. No communication.
2 pcs Astra H: No pin; 4 pcs Astra G: No pin; and a Corsa C: no pin.
’17 Mustang Shelby GT350: It was harder to get out the rubber pad from the cup holder, than the programing itself. Smart key added in 1 min.
’04 Clio II Ph2 30 sec without pin
’10 Megane III Ph1 RS under one minute with hands free cards
’08 Dodge RAM 1500: it toke 5 mins to catch that it has to be programed as it were younger than 2012. With that setting under a minute with pin extraction.
’07 E60 Beemer: The customer had a chinese folding key with 315 MHz and he paid for just the trying – we told him that it won’t work – the only thing was that we had to re-activate the original keys. I think it can be done when you use the factory diamond 868 MHz keys.
’13 Dodge Charger smart key OK
’15 Ford Edge remote key OK, under 2 mins.
’04 & ’06 Megane II: under a minute, normal cards
’15 Dodge Challenger: under 2 mins OK
Won’t work with the Transit Connect variants (small furgons), neither Custom, Passenger, Tourneo. Tried only 5 of ’em from 2006 to a 2016 Eco Flex – no communication, or connection lost after reading the VIN. You can try it as Focus and Fiesta too – the result will be the same. I’ve made the programming mostly with the SKP900.
’15 Chrysler Town & Country under 30 secs with pin extraction
’11 Ford Transit (Normal big one) under 2 mins with AKL solution
Strange, but true: If you chose AKL @ Transit, then you can program only one key too, the difference is that the remote controller will be disabled, and the immo LED won’t switch off, but you can start the car. Tested @ my mates transit, worked fine with only one key fine for 3 days, then was the second key added, because he hated to open the backdoor with two turns to open direction on the driver’s door. When I added the second key, the remote began to work again (was added before teaching key).

I think it is a good tool if you have to deal with smart keys – if pin is needed


4VVDI Prog:
The best 2nd eprommer what you can get (for moderate price). Mostly used for Beemer and Benz in our shop. Not too expensive, but easy 2 use. I bought it when we had difficulties with a Beemer and the problem was solved in no time. Has good pictures for in-circuit-use, and needs less connectors as the O5 for the daily use. A bit uncommon look, but you can find everything if you look with open eyes Free updates and compatibility with all other X-Horse product. With free shipping costs $400, thanks to its origin no clones are available.


Conclusion:

This post aims to help make right decision what to have for a locksmith. Especially if you are new in the car keys world and you are getting informed well before spending money ….


Credits to @PocketHero (DK Veteran)

Key programmer for Clio IV-Captur: Renolink, CANCLIP, Londor K518

$
0
0

Do you know any cheap key programmer for Renault Clio IV and Captur?

Here are some options, cost-effective


1.Renolink

Renolink can program keys to Renault Clio IV and Captur.

renolink-renault-key-programmer-clio-captur

Here are the reviews:

– I’m using Renolink…very useful!

– Yes me too. Renolink, ecu tool, and can clip will do the job

– I’ve made Dacia 2018, and a few Laguna3,Megane 3,in a few seconds of work. plus with Renolink you can erase impact data in airbags, disable TPMS, SBR, ESP, virginize bcm/uch, change vin code in units, and much more….it’s a very good tool but requires a very good knowledge of systems,and it’s half in english-half in french!


– I use it for:

Renault clio 3 2008, DCM 1.2 Ecu mileage change-OK

Renault twingo 2 2008 dashboard mileage change-Ok

Renault megane 2 2008 key card programming-OK

Renault megane 3 2009 ecu km SID 305 mileage-OK

Renault megane 3 2012 ecu km SID 307 mileage-not OK, read Ok, write km changed successuful but didnt change


– good tool airbag clear crash full 2017+ uch and key and read pin good just km change little bad not supported new 4 series and ecu change km.


– On some versions software airbag unit RSAT4 Logan2/Sandero2 ph1/FL, SPC processor, LED failure on dash not getting off, no failure indication present, reset button stays grey ( inactive )

I am not fond of resetting airbag units but if you want do this, beware.


– Renault Laguna 3, 1.5dci, manual trans., 2011, we change instrument cluster and we have ERROR PROG fault on dash…

I made this job with Renolink. It’s easy to do this, because has a lot of functions. It’s special tool for Renault.


– Virgin DAE on modus 2005. Ok.
injector code kangoo 2002 ok.


2.AVDI

Avdi can akl for captur i tested personal.


3.Renault ECU tool

Renault ecu tool very good


Clio IV and Captur are covered:

  • CLIO II Ph1 – Key Learning, Configuration, Reset BMT to VIRGIN
  • CLIO II Ph2-5, KANGOO, TRAFIC, MASTER, VIVARO, MOVANO (-’07) – Read/Write EEPROM 93C66, Key Learning, Change VIN, Reset UCH to VIRGIN, Learn UCH
  •  CLIO III / MODUS – Key Programming, Change VIN, Learn ECM in protected mode, Learn BCM, Reset BCM to VIRGIN
  • CLIO III – Card/UCH/ECM/ESCL Learning, Change VIN, Reset UCH to VIRGIN
  • CLIO IV (2012+)- Card Programming, Change VIN, Reset HFM to VIRGIN, Learn ECM / ESCL/HFM in protected mode
  • CLIO IV ELECTRIC POWER ASSISTED STEERING (JTEKT DAE/PAS) – Clear Immo Code, Change VIN by OBDII
  • MODUS / CLIO III ELECTRIC POWER ASSISTED STEERING (TRW DAE/PAS) – Clear Immo Code, Change VIN by OBDII, erase DF002 from 24C16 dump, repair CRC (IMPROVED!)
  • CLIO IV Ph2 / CAPTUR Ph2 AIRBAG (CONTINENTAL 985100475R with R7F7010133) – Erase CRASH DATA by OBDII / direct connection


4Lonsdor K518

I’m using Lonsdor K518. works for a lot Renault.


Clio IV and Captur = Bold

Payable = Mark in Red

RENAULT\Select from type\Smart key\IMMO2 Program smart key,Collision recovery,
RENAULT\Select from type\Smart key\IMMO1 Program smart key,Collision recovery,
RENAULT\Select from vehicle\Fluence\2008 –

\Smart key

Immobilization ,
RENAULT\Select from vehicle\Clio\1997-1999 Set IMMO unit,Initialize new immobilizer ,
RENAULT\Select from vehicle\Clio\2000-2008 VIN with VF1*B Immobilization ,
RENAULT\Select from vehicle\Clio\2006-2012 VIN with VF1*R\With smart Program smart key,
RENAULT\Select from vehicle\Clio\2006-2012 VIN with VF1*R\Without smart Immobilization ,
RENAULT\Select from vehicle\Espace\2002- VIN with VF1*K\2 buttons Smart key,
RENAULT\Select from vehicle\Espace\2002- VIN with VF1*K\3 buttons Smart key,
RENAULT \Select from vehicle\Kangoo\1999- 2002\Type 1 Set IMMO unit,
RENAULT \Select from vehicle\Kangoo\1999- 2002\Type 2 Set IMMO unit,Initialize new immobilizer ,
RENAULT \Select from vehicle\Kangoo\2003- 2008 VIN with VF1*C Immobilization ,
RENAULT\Select from vehicle\Koleos\2008- 2010 VIN with VF1*Y Smart key,
RENAULT\Select from vehicle\Laguna\- 2007/2007 VIN with VF1*G\2 buttons Smart key,
RENAULT\Select from vehicle\Laguna\- 2007/2007 VIN with VF1*G\3 buttons Smart key,
RENAULT\Select from vehicle\Laguna\2007- 2011 VIN with VF1*T Smart key,
RENAULT\Select from vehicle\Master\-2003 Set IMMO unit,Initialize new immobilizer ,
RENAULT\Select from vehicle\Master\2003- 2010 VIN(VF1*D) Immobilization ,
RENAULT \Select from vehicle\Maxity Read BCM,Program remote,Delete remote,
RENAULT\Select from vehicle\Megane\2002- 2008 VIN with VF1*M Smart key,
RENAULT\Select from vehicle\Megane\02- 08(93YLM) Smart key,
RENAULT\Select from vehicle\Megane\2008 – Immobilization ,
RENAULT\Select from vehicle\Scenic\2002- 2006, VIN with VF1*M Smart key,
RENAULT\Select from vehicle\Scenic\2006- 2009, VIN with VF1*M Smart key,
RENAULT\Select from vehicle\Scenic\2008- 2011 Immobilization ,
RENAULT\Select from vehicle\Modus\2004- 2012 VIN with VF1*P\Without smart Immobilization ,


RENAULT\Select from vehicle\Modus\2004- 2012 VIN with VF1*P\With smart Smart key,Program remote,Delete remote,
RENAULT \Select from vehicle\Safrane\2008- VIN with VF1AB\Smart key Smart key,
RENAULT\Select from vehicle\Scala\2011- Read BCM,Immobilization ,Program remote,Delete remote,
RENAULT\Select from vehicle\Trafic\2002- VIN with VF1*L Immobilization ,
RENAULT\Select from vehicle\Trafic\-2002 Set IMMO unit,Initialize new immobilizer ,
RENAULT \Select from vehicle\Twingo\-2007 VIN with VF1*O\Type 1 Set IMMO unit,
RENAULT \Select from vehicle\Twingo\-2007 VIN with VF1*O\Type 2 Set IMMO unit,Initialize new immobilizer ,
RENAULT \Select from vehicle\Twingo\2007- VIN with VF1*N Immobilization ,
RENAULT\Select from vehicle\Velsatis\2002- 2010 VIN with VF1*J\2 buttons Smart key,
RENAULT\Select from vehicle\Velsatis\2002- 2010 VIN with VF1*J\3 buttons Smart key,
RENAULT\Select from vehicle\Wind\2010- VIN with VF1*N Immobilization ,
RENAULT\Select from vehicle\Safrane\(KNMG4) 2009-\Ignition Read BCM,Immobilization ,Program remote,Delete remote,
RENAULT\Select from vehicle\Koleos\2010- 2016 VIN with VF1*Y Program smart key,Collision recovery,
RENAULT\Select from vehicle\Latitude Immobilization ,
RENAULT\Select from vehicle\Scenic\1999- 2002 Read PIN code,Program key,
RENAULT\Select from vehicle\Scenic\-2008 Program key,
RENAULT\Select from vehicle\Twingo\Twingo I Ph3.\2001-2006 Add key,
RENAULT\Select from vehicle\Symbol\Symbol.\Type 1 Add key,
RENAULT\Select from vehicle\Thalia\Thalia.\Type 1 Add key,
RENAULT\Select from vehicle\Trafic\Trafic II Ph2. Add key,
RENAULT\Select from vehicle\Master\Master. Add key,
RENAULT\Select from vehicle\Primastar\Primastar. Add key,
RENAULT\Select from vehicle\Clio\Clio II Ph2. Add key,
RENAULT\Select from vehicle\Kangoo\Kangoo I. Add key,
RENAULT\Select from vehicle\Symbol\Symbol.\Type 2 Program key,
RENAULT\Select from vehicle\Thalia\Thalia.\Type 2 Program key,
RENAULT\Select from vehicle\Dacia\Duster\2010-2012 Program key,
RENAULT\Select from vehicle\Laguna\Laguna II. Add key,
RENAULT\Select from vehicle\Espace\Espace IV. Add key,
RENAULT\Select from vehicle\Velsatis\-2005. Add key,
RENAULT\Select from vehicle\Laguna\Laguna II Ph2. Add key,
RENAULT\Select from vehicle\Espace\Espace IV Ph2. Add key,


RENAULT

RENAULT\Select from vehicle\Velsatis\2005-. Add key,
RENAULT \Select from vehicle\Clio\CLIO III.\Without smart Add key,
RENAULT\Select from vehicle\Modus\Modus.\Without smart Add key,
RENAULT \Select from vehicle\Clio\CLIO III.\With smart Add key,
RENAULT\Select from vehicle\Trafic\Trafic II Ph3.\2010-2014 Add key,Revise VIN code,Clear fault code,
RENAULT\Select from vehicle\Master\Master III\2010-2015 Add key,Revise VIN code,Clear fault code,
RENAULT\Select from vehicle\Kangoo\Kangoo II.\2007-2012 Add key,
RENAULT\Select from vehicle\Twingo\Twingo II.\2007-2014 Add key,
RENAULT\Select from vehicle\Wind\2010- 2013. Add key,
RENAULT\Select from vehicle\Laguna\Laguna III.\2007-2015 Add key,
RENAULT\Select from vehicle\Megane\Megane III.\2009-2015 Add key,
RENAULT\Select from vehicle\Fluence\2009- 2015. Add key,
RENAULT \Select from vehicle\Koleos\2008 -. Add key,
RENAULT\Select from type\All\Type 0 Add key,
RENAULT\Select from type\All\Type 1 Add key,
RENAULT\Select from type\All\Type 2 Program key,
RENAULT\Select from type\All\Type 3 Add key,
RENAULT\Select from type\All\Type 4 Add key,
RENAULT\Select from type\All\Type 5 Add key,
RENAULT\Select from type\All\Type 6 Add key,
RENAULT\Select from type\All\Type 7 Add key,Revise VIN code,Clear fault code,
RENAULT\Select from type\All\Type 8 Add key,
RENAULT\Select from type\All\Type 9 Program key,
RENAULT\Select from type\All\Type A Add key,
RENAULT\Select from vehicle\Scenic\Scenic Add key,
RENAULT\Select from type\All\Type B Read PIN code,Program key,Recover backup data,
RENAULT\Select from vehicle\Trafic\Trafic III (4A)\2014-\System 1 Read PIN code,Program key,Recover backup data,
RENAULT\Select from vehicle\Clio\Clio IV.\2012- Program key,Recover data,
RENAULT\Select from vehicle\Captur Program key,Recover data,
RENAULT\Select from vehicle\Symbol\2013- 2018 Program key,Read PIN code,Read key count,
RENAULT\Select from vehicle\Avantime\2001-2003 Add key,
RENAULT\Select from vehicle\Dacia\Logan\2013- Program key,Read PIN code,Read key count,


RENAULT\Select from vehicle\Trafic\Trafic III (4A)\2014-\System 2 Program key,
RENAULT\Select from vehicle\Twingo\Twingo III. Read PIN code,Recover backup data,Program key,
RENAULT\Select from vehicle\Kangoo\Kangoo II.\2007-2012(VFI*W) Add key,Revise VIN code,Clear fault code,
RENAULT\Select from vehicle\Espace\2015-

\Smart key

Program smart key,Make dealer key,
RENAULT\Select from vehicle\Megane\Megane CC.\-2008 Program key,
RENAULT\Select from vehicle\Espace\2015-

\Mechanical key

Program key,Make dealer key,
RENAULT\Select from

vehicle\Megane\Megane Ⅳ.\2015-\Smart key

Program smart key,Make dealer key,
RENAULT\Select from

vehicle\Megane\Megane Ⅳ.\2015-

Program key,Make dealer key,
RENAULT\Select from vehicle\Scenic\Scenic

Ⅳ.\2015-\Mechanical key

Program key,Make dealer key,
RENAULT\Select from vehicle\Scenic\Scenic

Ⅳ.\2015-\Smart key

Program smart key,Make dealer key,
RENAULT\Select from vehicle\Dacia\Dokker\2012- Program key,Read PIN code,Read key count,
RENAULT\Select from vehicle\Dacia\Duster\2013- Program key,Read PIN code,Read key count,
RENAULT\Select from vehicle\Dacia\Solenza Add key,
RENAULT\Select from vehicle\Dacia\Lodgy\2013- Program key,Read PIN code,Read key count,
RENAULT\Select from vehicle\Dacia\Sandero stepway\2006-2011 Add key,
RENAULT\Select from vehicle\Dacia\Sandero\2007-2012 Add key,
RENAULT\Select from vehicle\Dacia\LOGAN\2004-2012 Add key,
RENAULT\Select from vehicle\Dacia\Sandero\2013- Program key,Read PIN code,Read key count,
RENAULT\Select from vehicle\Dacia\LOGAN(MA1LS)\2006-2009 Add key,


V2018.3 Multi-Diag Access J2534 coverage -up to 2018 year cars

$
0
0

V2018.3 Multi-Diag Access with J2534 Pass-Thru OBD2 Device update and covers lots of cars up to 2018 year. VCI: O33918


V2018.3 Multi-Diag Access coverage:

For Abarth

For Alfa Romeo

For Audi

For Autobianchi

For BMW

For Chevrolet

For Chrysler

For Citroen

For Dacia

For Daewoo

For Daihatsu

For DS

For Fiat

For Ford

For Honda

For Hyundai

For Infiniti

For Isuzu

For Iveco

For Jaguar

For Jeep

For Kia

For Lada

For Lancia

For Land Rover

For Lexus

For Maybach

For Mazda

For Mercedes

For MG

For Mini

For Mitsubishi

For Nissan

For Opel

For Peugeot

For Porsche

For Renault

For Renault Samsung

For Rover

For SAAB

For Seat

For Skoda

For Smart

For Ssangyong

For Subaru

For Suzuki

For Toyota

For VW

For Volvo

For Zastava


Video demo:


V2018.3 Multi-Diag Access J2534 European cars coverage for example (up to 2018 year) :

For Alfa Romeo

multi-diag-access-j2534-2018-3-coverage-01


For Audi

multi-diag-access-j2534-2018-3-coverage-02 multi-diag-access-j2534-2018-3-coverage-03


For BMW

multi-diag-access-j2534-2018-3-coverage-04 multi-diag-access-j2534-2018-3-coverage-05


For Citroen

multi-diag-access-j2534-2018-3-coverage-06 multi-diag-access-j2534-2018-3-coverage-07


For Ford

multi-diag-access-j2534-2018-3-coverage-08 multi-diag-access-j2534-2018-3-coverage-09


For Infiniti

multi-diag-access-j2534-2018-3-coverage-10


For Jeep

multi-diag-access-j2534-2018-3-coverage-11


For Land Rover

multi-diag-access-j2534-2018-3-coverage-12


For Mercedes

multi-diag-access-j2534-2018-3-coverage-15 multi-diag-access-j2534-2018-3-coverage-16


For Mini

multi-diag-access-j2534-2018-3-coverage-17


For Opel

multi-diag-access-j2534-2018-3-coverage-18

multi-diag-access-j2534-2018-3-coverage-19

For Peugeot

multi-diag-access-j2534-2018-3-coverage-20 multi-diag-access-j2534-2018-3-coverage-21


For Porsche

multi-diag-access-j2534-2018-3-coverage-22


For Renault

multi-diag-access-j2534-2018-3-coverage-23 multi-diag-access-j2534-2018-3-coverage-24 multi-diag-access-j2534-2018-3-coverage-25


For Renault Samsung

multi-diag-access-j2534-2018-3-coverage-26


For Seat

multi-diag-access-j2534-2018-3-coverage-27

Also IBIZA IV (2008 – 2015)


For Skoda

multi-diag-access-j2534-2018-3-coverage-28


For Smart

multi-diag-access-j2534-2018-3-coverage-29


For VW

multi-diag-access-j2534-2018-3-coverage-30 multi-diag-access-j2534-2018-3-coverage-31 multi-diag-access-j2534-2018-3-coverage-32


For Volvo

multi-diag-access-j2534-2018-3-coverage-33 multi-diag-access-j2534-2018-3-coverage-34 multi-diag-access-j2534-2018-3-coverage-35


V2018.3 Multi-Diag Access with J2534 Pass-Thru OBD2 Device is available at:

http://www.uobdii.com/wholesale/multi-diag-access-j2534-pass-thru-obd2-device.html

Free download and install Actia XS 2G on WIN7 X64 (Quote)

$
0
0

This is the installation guide for Actia XS 2G (2nd generation).


INTERNET OFF! TESTED ON WIN7 X64. WORKS ONLY ON X64.


You need the latest drivers for Actia. I installed them from 43.06 version

link here: https://mega.nz/#!QNskhKqY!q93QYap0xNayDMhO1Y0DRpf_OkpkYJQEgC0vnrPzfOM


XENTRY 12.2018 PASSTHRU FILES:

https://mega.nz/#!kZJSGYZa!q_8C0WgdHfmKLU14EERSEMzb_uteBO9p83-fWKNkwwA


1.prepare windows sp1 x64 as an administrator, UAC (user control) off.

– for Xentry Diagnostic Passthru use x64 only


2.Mount Xentry Passthru iso to virtual drive. Run “start.exe”. Finish. Restart


3.Extract medicines & replace. it will replace xentry missing pictures, dll for old keys loader, fix 2221-45 error, 3.91 error and install das license 0 day fix.


4.double click file “old key loader for configassist or startkeycenter 64bit.reg” in medicines and click “yes” to upload it to the registry. with this, now old key can be accepted by xentry.


5.Run configassyst to enter Xentry license key (mine gets valid only with internet off. after I succesfully put the key, I do not run configassyst with internet ON, otherwise the key get erased, but there is a fix for this as well for SCN online, which I do not have)


6.Prevents xentry’s key deleted and get “no access authorization code” when diagnosing while online.


a.X4711 Methods.

Purpose: Introduce by Rocinante in 2012. It prevents xentry’s key being deleted and it is SAFE FOR SCN Online Coding


Xentry Internal Error (3.17)-3.175 “no access authorization code” after xenty diagnose while online


COPY C:\ProgramData\LicDir\lic_key_2.dat to the desktop, rename it to lic_key_2.x4711, and make this file READ ONLY

MOVE it back into the directory C:\ProgramData\LicDir\.

make sure the lic_key_2.dat file IS NOT read only while lic_key_2.x4711 file READ ONLY…

DAS Ignition On/Off enabler


purpose: after coding or offline programming, DAS asks to ignition the vehicle off.

1.you do ignition vehicle off, but DAS is not recognized it and still asks ignition off.

2.when you want to use the floating menu on/off, and it is grey


Solution:


copy IgnitionEnabler.exe to desktop, when you need, just run it and it will definitely activate/enable the floating ignition on/off menu in DAS.


VCI 033918


Download full version 3.2018 + updated SP4 43.41.

Link for latest full version: Actia 3.2018 43.06:

https://mega.nz/#!QNskhKqY!q93QYap0xNayDMhO1Y0DRpf_OkpkYJQEgC0vnrPzfOM

Link for update version 3.2018 SP5 43.51: http://spd.multi-diag.com

Link for CRACK FIX:

https://mega.nz/#!YYhwGSKb!hAQaG7RunQLdoG7njQ1-FLp7HiYLX0CYqe53kEOrEXY


Link for older version Actia 1.2018 42.09:

https://mega.nz/#!croCEKIQ!7PHYKUAWkVqKBfc1DTzmQtJUEcYx9iQ0KsNLXrYi2ew


FACT:

It works with any Actia interface either genuine or clone as long as the PIC chip is flashed properly. For 1st generation yellow you need to reflash PIC12F629 (link for guide bellow), as for 2nd generation XS 2G (silver/black) you need to reflash 16F630 (I will look for a guide for this one). They all use the same software and drivers from this INFO file. I went from a clone 1st gen to a genuine 2nd gen on the same laptop, same software without changing anything. I strongly advise people to buy a genuine 2nd gen since it’s got a powerful program behind with all functions and furthermore you can use it as a Passthru device (it has J2534-1 and J2534-2) with various dealer softwares. You hit 2 birds!


First of all, you must modify or buy a modified clone. The procedure is the same on all Actia devices, either clone or genuine or 1st or 2nd generation.

1st generation yellow VCI: Link for guide if your chip PIC12F629 is not modified : https://mhhauto.com/Thread-Multidiag-2017-III-SP4-Hex-for-Pic

2nd generation silver XS 2G: I did not find a proper guide now, all I know is that you have to reflash PIC16F630.


Installation instructions  – WORKS ONLY ON 32BIT (TESTED ON WINDOWS 7 SP1 X32)

@@@@@@@@@@INTERNET MUST BE OFF@@@@@@@@@@@


1.run ACTIA_NET_BLOCK.bat (Run as administrator if possible)

2.run Activation MAJ MD 033918/keyUpdate (Run as administrator if possible)

3.Install Actia Multidiag Standard Profil (if the case, use S/N: 033918 instead of xxxxxxx) (I selected country: France and simply changed language after installation)

RESTART COMPUTER after installation finished

4.Go to C:\ACTIA\Portal

5.Remove Wget.exe

6.Go to control panel -> uninstall or change a program -> there are 3 drivers made by ACTIA. Remove all 3 drivers.

7. Install I+ME-Actia-PassThru-XS2G-Driverpack-2.8.1.14.exe


Then: (supplier told me it is optional, I have done it anyway)

1.Go to C:\ACTIA\Portal\chrome\multidiag\content\scripts

2.Open in a text editor file multidiag.js

3.Go to line “var showWarningPT1Window=true” and make this line like

3. “var showWarningPT1Window=false”


Then: Run the application, connect VCI to car and to laptop’s USB, try to make a diagnostic on a car and it should detect a new hardware. If it does not recognizes it, then you have to update it manually via Start menu->right click on computer->Manage->Device Manager->Other devices->Right click on Unknown device->Update driver software->Browse my computer for driver->”C:\Actia\Drivers VCI\PT1G”


If you want to update from older version, simply uninstall old version and make sure you follow the steps again completely (including removing the 3drivers)


Note: it should appear each time when you diagnose that your VCI is old and blablabla, just click continue and it connects to the car

Note2: My supplier told me that it might not be 100% compatible with all cars as it is the old interface and does not do the multiplexing like the newer one. I tested on a few cars from 2000 to 2015 and for 300euro it is worth adding to collection!

Note3: On 2nd gen XS 2G it should be recognized it automatically, it will not display any messages and will work much faster and stable.


Just in case, be sure you have these programs as well.

https://support.microsoft.com/en-gb/help/2977003/the-latest-supported-visual-c-downloads

https://download.microsoft.com/download/6/E/4/6E48E8AB-DC00-419E-9704-06DD46E5F81D/NDP472-KB4054530-x86-x64-AllOS-ENU.exe

https://java.com/en/download/manual.jsp


PASSTHRU:

XENTRY passthru 12.2018 (x64 only):

https://mhhauto.com/Thread-Xentry-Passthru-12-2018-with-Actia-XS-2G-GUIDE-STEP-BY-STEP


Forscan: https://mhhauto.com/Thread-FORScan-2-3-20-2-3-19-2-3-18-free

Final note:

As a personal experience, the 1st generation Actia is quite limited on newer Euro5+ cars, used on a variety of cars.  But for example it was the only one that could adapt pilot injection on a peuget boxer 2.2hdi among genuine delphi,kts, launch; on a BMW F30 328i it had all the functions and parameters as other testers I own. The second generation though it is something else. It connects much faster and you feel safe working with it.


Finished._______________________________________________________________________


Credits to @AfXv237 (mhhauto senior member).


V2018.3 Multi-Diag Access J2534 Pass-Thru OBD2 Device on sale

http://www.uobdii.com/wholesale/multi-diag-access-j2534-pass-thru-obd2-device.html

Solution to kess v2 2.47 clone reading give checksum error

$
0
0

Offer the solution to kess v2.47 5.017 clone reading Renault clio 4 1.5 dci but after finish reading give checksum error and shutdown program.

i install c++ 2005/2008/2010, netframe work and try on windows xp 32 and windows 8 32.

kess v2

Possible reasons and solutions:

  1. Possible that your car is already moded. Try search for Ksuite cks off executable, then it will be readed with no cks. Or try other tool.

Ksuite cks off executable free download:

https://mega.nz/#!wUZDySgL!3Ppd8kDL0Aq1QlwDI9fKZ64PhUZ2a6k0NcKjiwKHhKA

Password: hjfsdjkfsdjkfjskdfsjkjksf486
Before using it, make a Copy of old exe file somewhere.

Thanks to @ mancioks (DK Veteran) for his contribution.


PS: Make backup of your actual ksuite.exe before using this.
Just can rename it before. Tested working


If cs corrected by winols and then write file without calculate from kess.


You can try read with checksum off in kess, sometimes it helpes.

it mod files checksum is calculated by winols or other software then will be ok.
If cks not done by software, write it back with Ksuite cks enabled.


  1. I did many of this edc17c42 with kess 4.036 and kess 5.017 without any problem…power supply connected to the car for 13v.


Question:

Is it possible to disable the automatic checksum of kess?


Answer:

disable checksum no…but i think that you can move away the dll’s from his folder and check if the software start and work doing ID and reading on a car to test


Finally.

I solved this problem for dll files. i change dll folder and try it. it is work. i read and write the file without any problem.


What I did:

change dll inside dll folder.

i apply all and i try read clio4, vito etc. i dont have a problem for this


Free download: DLL.RAR

Attached the file. copy to ksuite 2.47 folder and yes to all. it is all


Enjoy.


Thanks.


How to use New Type HU66 Lock Pick and Decoder? (Videos)

$
0
0

New Type HU66 Lock Pick and Decoder, as the name suggest, is able to open and read data (same as Lishi 2in1) as fast as 10 Seconds. That’s why an increasing number of locksmiths are purchasing it. Besides it has no TRAINING REQUIRED.


use-new-type-hu66-lock-pick-and-decoder-01


Video demo:


Open the cover, and you will the data slice which can be moved. But it has to be back to No.1 position.

use-new-type-hu66-lock-pick-and-decoder-02 use-new-type-hu66-lock-pick-and-decoder-03


Put the guiding slice to the front.

use-new-type-hu66-lock-pick-and-decoder-04


Insert HU66 into the lock cylinder.

use-new-type-hu66-lock-pick-and-decoder-05


Put the guiding slice to the back using the automatic set.

Turn left and turn right.

The door is open, close the door and turn HU66 to the right.


Decoding: which is used to enter the key cutting machine to cut new key.

use-new-type-hu66-lock-pick-and-decoder-06


Again, put the guiding slice to the front and insert to lock cylinder, open the door and close the door.


This is a simple operation guide.


New Type HU66 Lock Pick and Decoder is available at:

http://www.uobdii.com/wholesale/new-type-hu66-lock-pick-and-decoder.html

How to get car key data for cutting keys with SEC-E9 key machine

$
0
0

There are 3 ways to get auto key information with SEC-E9 key cutting machine


Key data can be gor by:

IC card

car model

key blank


in detail…


How to get key data by IC card on SEC-E9 key machine:


1 go to “search” on the home page

sec-e9-key-machine-enter-key-data-ic-card-1

2 press “KCode” and input the IC card you know, then “search”

sec-e9-key-machine-enter-key-data-ic-card-2

3 go to “Menu” and read “Info”

sec-e9-key-machine-enter-key-data-ic-card-3

4 check the data if they are what you want or not

sec-e9-key-machine-enter-key-data-ic-card-4


How to get key info by model on SEC-E9 machine:


1 go to “Automobiles”

sec-e9-key-machine-enter-key-data-model-1

2 select a car make – model – year

sec-e9-key-machine-enter-key-data-model-2 sec-e9-key-machine-enter-key-data-model-3 sec-e9-key-machine-enter-key-data-model-4


3 read key info

sec-e9-key-machine-enter-key-data-model-5


How to get key data by key blank on SEC-E9 key cutting machine


1 go to “Search”

sec-e9-key-machine-enter-key-data-key-blank-1

2 input the key blank, then search

sec-e9-key-machine-enter-key-data-key-blank-2

3 then you can get the key data

sec-e9-key-machine-enter-key-data-key-blank-3

Xentry Openshell XDOS 07.2019 Acronis Image + Pactch + Keygen

$
0
0

07.2019 Xentry diagnosis openshell is updated to 25.15.2.1.


Links to download 07.2019 Xentry yourself:

Xentry acronis image: https://www.cartechnology.co.uk/showthread.php?tid=52360

Xentry 07.2019 patch: https://www.cartechnology.co.uk/showthread.php?tid=52294

Xentry 07.2019 native install + keygen: https://cartechnology.co.uk/showthread.php?tid=52099

Unknown security; it’s your own risk

07.2019-xentry-xdos-download


Links to download 05.2019 Xentry:

Xentry 05.2019 SSD: http://www.uobdii.com/wholesale/v2019.5-mb-sd-connect-c4-c5-ssd.html

Xentry 05.2019 HDD: http://www.uobdii.com/wholesale/v2019.5-mb-sd-connect-c4-c5-hdd.html

NO risk!! 100% tested with sd connect c4 multiplexer

05.2019-xentry-xdos-download


System requirements: HDD or SDD 250 Gb, 8GB RAM, Windows 10 64bit

Interface language: multilanguage

Description: Image of programs for diagnostics, coding and programming of cars


XENTRY 07.2019 CHECK LIST:


Developer Kit ✔

DAS Password Free Special Functions✔

Adding W204-W212-W166 in DAS✔

Special Function Password Free SMART✔

Xentry Special Functions Calculator✔

SMART SAM 450&452 inside ECU adaption

SMART ESP Extra Coding+Dev. Data ✔

Superess ALL TAN codes Smart Equipment

Passwordfree Offline Key Teach in Smart

Offline SAM Assignent✔

TRANSPORTER Special Function Passwordfree Coding/Flashing Offline

SD FLASH Offline in DAS all Vehicules ✔

LKW Nox Torque Limit Setting FDOK XT Automatic in DAS no password calc need ✔

LKW NFZ Erase SCR AD BLUE fault code✔

NFZ Sonderfunktion Passwordfree✔

Added Offline EOL & VMAX all LKW ✔

HHTWIN HHTPKW&NFZHHT ready✔

Vediamo Level 10 whit 9GB shortest ✔

Vediamo 100GB Data Base ✔

New Keys for Xentry✔

BUS Licences MB & Setra ✔

Ready for Online/Offline ✔

Sd Connect C4-C5-C6 & VCI Ready by Wifi

All Server Online !! ✔

Addon Updates Works 100% ✔

SUPPORT 24/7


07.2019 Acronis Images:

07.2019-xentry-xdos-download-1 07.2019-xentry-xdos-download-2 07.2019-xentry-xdos-download-3 07.2019-xentry-xdos-download-4

source: will be released at http://www.uobdii.com/

Free download Subaru SSM 3 & SSM 4 US 04-2018

$
0
0

Free download Subaru SSM 3 & SSM 4 US 04-2018:

https://mega.nz/#!B9wEWa4R!fCiUWWMfFKcZf9bdtCOWP3nl6brU2I8FW_KoYcPIUXM

2018-subaru-ssm3-ssm4-download

Unknown security!!!!!!

Link to get Subaru select monitor 04.2018 for use with relief and security:

http://www.uobdii.com/wholesale/subaru-ssm-iii-software-update-package-for-vxdiag.html

SUBARU-select-monitor-3-tested-version


What is Subaru SSM:

SSM is short call of Subaru Select Monitor


It features:

1.All System Diagnosis

Selecting this item displays on a single screen the fault detect status of all control system control modules for which SSMΙΙΙ diagnosis is supported, and memorized diagnostic codes.
2.Each System Check

Selecting this item makes it possible to select a particular system from among the control systems for which SSMΙΙΙ diagnosis is supported, and perform fault diagnosis. This item can be used to view input/output data of the system control modules that perform fault diagnosis, memorized diagnostic codes, and other data on the PC display. This menu item is also used after repair work is complete to delete diagnostic codes, to configure control module settings, etc.
3.Saved Data Display

This item can be used to save various data sampled during fault diagnosis operations, and to load data for viewing after work is complete.
4.Immobilizer

This item performs immobilizer registration.
5.Reprogram

This item performs reprogramming of the control module.
6..Read CF application measurement data. This item performs reading stand alone measurement data saved in a CF card to hard disk of your PC.
7.Convert/Save measurement data on driving recorder

Loads data sampled on the driving recorder to the PC from the CF card, and converts and saves that data.
8.Oscilloscope

After attaching the optional pulse/analog cartridge to SDI, connect the pulse/analog box to the SDI and using pulse/analog probe to perform analog sampling.


What is SSM 3:

SSM3 is dealership OEM tester software. Made by Hitachi Car Engineering Co., Ltd. Windows PC based diagnostic application that uses the proprietary SDI interface hardware. Later versions also support Denso DST-i interface. Can communicate with various car control units using a bunch of different protocols.

SUBARU-select-monitor-3-download

Link to SSM3: http://www.uobdii.com/wholesale/vxdiag-subaru-ssm-iii-multi-diagnostic-tool-wifi-version.html

(100% tested no issues with vxdiag diagnostic tool for subaru diagnosis and programming)


What is SSM 4:

Subaru Select Monitor 4. Subaru dealership OEM tester software; introduced in 2015, successor of SSM-III.

SUBARU-select-monitor-4-download


SSM 3 vs. SSM 4:

SSMIII DOES NOT work with PassThru.

SSM 4 can work with PassThru devices.


How to Use CG100 Prog to Read & Write 93C66 Chip

$
0
0

Here UOBD2 show you a test report on CG100 Prog read and write 93c66 chip.It is very convenience and fast to operation.


What you Need?

CG100 Programmer

CG100 ATMEGA Adapter


Procedures:

Install 93C66 chip on EEPROM adapter,and install EEPROM adater on ATMEGA adapter

How to Use CG100 Prog to Read & Write 93C66 Chip (1)

Connect ATMEGA adapter to CG100

How to Use CG100 Prog to Read & Write 93C66 Chip (2)

Run CG100 software,and click “Programmer”

How to Use CG100 Prog to Read & Write 93C66 Chip (3)

Select “Serial Flash”àSelect “93C66”

How to Use CG100 Prog to Read & Write 93C66 Chip (4)

Click “Read” button to read

How to Use CG100 Prog to Read & Write 93C66 Chip (5)

Reading succeeded

How to Use CG100 Prog to Read & Write 93C66 Chip (6) How to Use CG100 Prog to Read & Write 93C66 Chip (7)


And before operating writing,please save the original 93C66 data file on you compute in case data damaged.

How to Use CG100 Prog to Read & Write 93C66 Chip (8)


Now we change digits from 00000000 line to 00000010 line to “00”,then click “Write” button to start writing

How to Use CG100 Prog to Read & Write 93C66 Chip (9) How to Use CG100 Prog to Read & Write 93C66 Chip (10)


Writing succeeded

How to Use CG100 Prog to Read & Write 93C66 Chip (11)


After then you can try to read the 93C66 data again to check if the writing operation successfully.

How to Use CG100 Prog to Read & Write 93C66 Chip (12)

Done!

How to update Lexia 3 version B to version C

$
0
0

I bought my Lexia interface clone from china ( full chip with S/N 963830 C ) I tested as it is before reflash it with Mr. NLC vci_updater.com and in some cars that I know 100% that a “B” clone didn’t worked before this “C” clone didn’t worked too.
Then I tested it again in same cars after I flashed with Mr. NLC vci_updater.com. And all worked 100%


Here is what I did:


Open the “vci_updater.com” with a HEX Editor and read what Mr. NLC wrote in it.
I use my tool from time to time but what I wanna tell you is that when I bought my clone from china ( full chip with S/N 963830 C ) I tested as it is before reflash it with Mr. NLC vci_updater.com and in some cars that I know 100% that a “B” clone didn’t worked before this “C” clone didn’t worked too.
Then I tested it again in same cars after I flashed with Mr. NLC vci_updater.com.
And all worked 100%
I took my clone for a long now so I do not remember when I did this tests but if I remmebr well was in May 2013
This are my tests that I did. What will be we will see. Conclusions are yours

If you wanna play you can edit the serial in the vci_updater.com. But take care.


Tip you might need:

For those have tried to update the firmware from B to C with the file i’ve been downloading from WP74, but it makes no difference in working, and you can’t access the C CAN bus:


The solution is: Just buy a standard 10K Ohms 1/4 watt resistor and solder it between the two terminals, similar to the form shown in the snapshot*.

* The snapshot is a random photo taken from the internet for demonstration purpose and not related to the XS Evolution VCI.

lexia-3-pcb-10K-Ohms


(Thanks to mattydr67)

V2018.3 (43.06) Actia Multi-Diag Office install on win7: No need activation

$
0
0

Topic: How to install V2018.3 (43.06) Actia Multi-Diag Office on Win7 sp1 x32, it needs no registration any more. It runs well with J2534 PassThru device to diagnose VW Passat VIII (2015-2018) etc.


Firstly, you will need Virtual drive device, which can be found by google or download here:

https://mega.nz/#!lAgnzYhC!ZhWYbMCcT_sPkEVCAPf8jtG-65rut6zVxkFKFMP9zOE

(DTLite4454-0314.exe)


Computer operation system: Win7 sp1 x32

Car model and year for test: VW Passat VIII (2015-2018)

Software: V2018.3 (43.06) Actia Multi-Diag Office


Device: J2534 PassThru OBD device

VCI 033918


Video on Win7 install V2018.3 (43.06) Actia Multi-Diag Office and diagnose VW Passat VIII (2015-2018):


V2018.3 (43.06) Actia Multi-Diag Office installation instructions (Images mean a lot):

1Open “Daemon Tools Lite” as administrator.

Select language, then Next ->I agree -> Next.

Free license.

Next

Not install Google Chrome.

Next

Install.

Get a windows message “Device driver software installed successfully”.

Install Desktop Gadgets.

Finish The Daemon Tools Lite setup wizard.

v2018-3-43-06-actia-multi-diag-office-install-on-win7-01 v2018-3-43-06-actia-multi-diag-office-install-on-win7-02 v2018-3-43-06-actia-multi-diag-office-install-on-win7-03 v2018-3-43-06-actia-multi-diag-office-install-on-win7-04 v2018-3-43-06-actia-multi-diag-office-install-on-win7-05


2.V2018.3 Actia Multidiag Crack (No need registration):

1) Open DVD multidiag 2018, copy “Crack” on the desktop.

2) run ACTIA_NET_BLOCK.bat (Run as administrator if possible)

3) run Activation MAJ MD 033918/keyUpdate (Run as administrator if possible).

v2018-3-43-06-actia-multi-diag-office-install-on-win7-06 v2018-3-43-06-actia-multi-diag-office-install-on-win7-07


3.Install Actia Multidiag Standard Profil (if the case, use S/N: 033918 instead of xxxxxxx)

RESTART COMPUTER after installation finished.

v2018-3-43-06-actia-multi-diag-office-install-on-win7-08 v2018-3-43-06-actia-multi-diag-office-install-on-win7-09 v2018-3-43-06-actia-multi-diag-office-install-on-win7-10 v2018-3-43-06-actia-multi-diag-office-install-on-win7-11 v2018-3-43-06-actia-multi-diag-office-install-on-win7-12 v2018-3-43-06-actia-multi-diag-office-install-on-win7-13


4.Go to C:\ACTIA\Portal, Remove Wget.exe

v2018-3-43-06-actia-multi-diag-office-install-on-win7-14


5.Go to control panel -> uninstall or change a program -> there are 3 drivers made by ACTIA. Remove all 3 drivers.

v2018-3-43-06-actia-multi-diag-office-install-on-win7-15


6.Then: (supplier told me it is optional, I have done it anyway)

1)Go to C:\ACTIA\Portal\chrome\multidiag\content\scripts

2)Open in a text editor file multidiag.js

3)Go to line “var showWarningPT1Window=true” and make this line like

3.”var showWarningPT1Window=false”

Save ” multidiag.txt”

Rename ” multidiag.txt” as ” multidiag. js “

v2018-3-43-06-actia-multi-diag-office-install-on-win7-16 v2018-3-43-06-actia-multi-diag-office-install-on-win7-17 v2018-3-43-06-actia-multi-diag-office-install-on-win7-18


7.Install I+ME-Actia-PassThru-XS2G-Driverpack-2.8.1.14.exe

Select language

Next

I accept the agreement.

Next

Next

Install

Finish the I+ME-Actia-PassThru-XS2G setuo wizard.

v2018-3-43-06-actia-multi-diag-office-install-on-win7-19 v2018-3-43-06-actia-multi-diag-office-install-on-win7-20 v2018-3-43-06-actia-multi-diag-office-install-on-win7-21


8.Plug Actia PassThru OBD device to the computer.

v2018-3-43-06-actia-multi-diag-office-install-on-win7-22 v2018-3-43-06-actia-multi-diag-office-install-on-win7-23


9.Computer -Manage -Device Manager – PassThru+ XS USB Driver

v2018-3-43-06-actia-multi-diag-office-install-on-win7-24


10.Use Multi-diag to diagnose VW Passat VIII (2015-2018)

v2018-3-43-06-actia-multi-diag-office-install-on-win7-25 v2018-3-43-06-actia-multi-diag-office-install-on-win7-26 v2018-3-43-06-actia-multi-diag-office-install-on-win7-27 v2018-3-43-06-actia-multi-diag-office-install-on-win7-28 v2018-3-43-06-actia-multi-diag-office-install-on-win7-29


The vehicle communication card cannot be reached…

v2018-3-43-06-actia-multi-diag-office-install-on-win7-30


Just go to update Driver software

v2018-3-43-06-actia-multi-diag-office-install-on-win7-31


Go on diagnose.

v2018-3-43-06-actia-multi-diag-office-install-on-win7-32 v2018-3-43-06-actia-multi-diag-office-install-on-win7-33

Done.


Enjoy.

Note: it should appear each time when you diagnose that your VCI is old and blablabla, just click continue and it connects to the car

Note2:  it might not be 100% compatible with all cars as it is the old interface and does not do the multiplexing like the newer one. I tested on a few cars from 2000 to 2015 and for 300euro it is worth adding to collection!


www.uobdii.com


BMW DIS V57 Download FREE + How to Configure

$
0
0

Free download Dealership BMW Diagnostic Information System DIS V57:


Dis v57 free download:

https://bmw-dis-v57-english-down-xmx.peatix.com/

or

http://www.uobdii.com/wholesale/bmw-ops-gt1-hard-disk-dis-v57-sss-v41-fit-ibm-t30-2527.html

The second link is more reliable, tested without any issue!

 dis-v57-free-download-1

Dis v57 configuration:

How to configure dis v57 & vmware vmnet1 & ediabas.ini file to get connection


BMW DIS V57 Source Code Control System IDENTIFICATION (SCCS ID) IS A UNIX BASED FILE OWNERSHIP COMMAND. IS USED TO ASSIGNED FILE OWNERSHIP IN DIS V57 TO TALK TO THE EDIABAS.INI SETTINGS AS WELL AS IN THE VMWARE NETWORK to TALK to THE vmnet1 Host Only ip address 192.168.68.1

THIS ALLOWS DIS V57 TO READ & CONFIRM THE ip address & port commands in the VMWARE AS WELL AS IN THE EDIABAS.INI CONFIGURATION FILE , WHICH IS CONFIGURED AS:
YOUR ediabas.ini file should be like this:

RemoteHost
; Description : server address/name
; Default = diaghead
RemoteHost = 192.168.68.1

;—————————————————————————–
; Port
; Description : IP communication port
; Value : 1000 < port < 30000
; Default =
Port = 6801
I am using a std:obd2 Ediabas interface unit from ebay. From china.
dis-v57-free-download-2 dis-v57-free-download-3

NOW LETS START UP DIS V57

CLICK ON THE SCREEN AREA OF DIS V57 WITH YOUR MOUSE.
LET US NOW ENTER INTO THE: TOUCH SCREEN CALIBRATION
IN DIS V57 SCREEN TYPE: ON YOUR KEYBOARD PRESS THESE KEYS: CTRL+SHIFT+PRNT SYSRq
IT WILL SHOW YOU THE: SCO OPENSERVER ™ RELEASE 5 (gt1ap) (tty03)
Login:
Type in: “ root” type it in without the quotes.
Then Hit the Enter Key
FOR THE PASSWORD:
Type in: “12345” type it in without the quotes
Then Hit The Enter Key
AFTER THIS # SIGN TYPE IN like this
# vi ediabas.ini
Then Hit the Enter Key
Type in the letter O
This allows you to start type in a line indicated by a white cursor :
Type this in line one.
RemoteHost= 192.168.68.1
Port= 6801
RemoteHost= diaghead
Your done here.. (please note) The letter X on the keyboard if depressed it means delete, as well IT CAN BE USED TO TYPE an X.

As the letter “i” WHICH MEANS TO EDIT A CHARACTR or WORD. To delete with X , you must highlight the character first with the cursor using the arrow keys on your keyboard PRESS THE DELETE BUTTON AND THEN X

:wq means to saves the changes you have made.
:q means quit without save the changes.
Type in this
:wq
Hit enter key
This number sign will appear # . just type beside the # sign like this
# vi host
And then hit the enter key
The host page will appear
Type the letter O (please note) the letter O should not be visible on the page at any time.
This allows the cursor for you to type in the first line:
Should look like this:
127.0.0.1 localhost
192.168.68.1 diaghead diaghead
Type letter O again.
It allows you to drop down the cursor to the next line under what you just typed
Your done here.
Type in the :wq
Then hit enter key.Then # will appear.
#

Type in: init 6

the line should look like this: # init 6

AND THEN HIT ENTER KEY to reboot DIS V57 JUST BE PATIENT.

The following allows you to shutdown DIS V57. COMPLETELY WITHOUT REBOOTING IT.
(THIS COMMAND: init 0 .It means the number zero and not the letter O , Then hit your enter key on your keyboard.
This Command Closes DIS V57.)

AFTER DIS V57 IS REBOOTED GO TO THE ADMINISTRATION SCREEN

CLICK ON “CONNECTION SETUP”
CLICK ON “CONNECTING”

IF IT IS DONE RIGHT THE CONNECTION WILL SUCCESSFULL

IF YOU GET A AN IP ADDRESS CONFLICT WINDOW JUST CLICK ON IGNORE.
YOU WILL SEE CONNECTING CONFIGURATION STATUS WINDOW OPEN UP AND RUNNING.

IF IT IS CONFIGURED CORRECTLY YOU WILL SEE A YELLOW DIAGHEAD SYMBOL IN THE UPPER RIGHT CORNER, ALONG WITH THE TWO CABLE & COMPUTER SIGNAL AR FULL STRENGTH.

YOUR DONE. CONNECT YOUR STANDARD OBD2 EDIABAS INTERFACE TO YOUR BMW CAR AND TURN IGNITION TO IGN1. OR START UP YOUR CAR IF YOU WANT TO SEE RPM SIGNAL ETC…

All about Mercedes fbs4 key programming

$
0
0

In this post, all about hot keywords of Mercedes fbs4 key programming: 

fbs4 all keys lost

fbs4 key programming

diagspeed fbs4

cgdi mb fbs4

vvdi mb fbs4

Fsb4 & fsb3 key


cgdi mb fbs4:

Confirmed! CGDI MB can read & write FBS4 keys

Images means a lot:

cgdi-mb-fbs4-key-reading-01 cgdi-mb-fbs4-key-reading-02

***CGDI MB allow users to program a new key through OBD. All done with a tool. That’s the reason why people look for it.


vvdi mb fbs4:

No. it’s not possible to read data and password for the newest Mercedes cars after 2015 with FBS4 EIS.

vvdi mb is ideal for BGA keys and the other.


To be informed: VVDI MB often works with VVDI PROG, since there are some eis and ecu’s that you cant do with MB Tool lonely. For example some w210 eis or Sprinter 906. You should have both VVDI MB Tool and VVDI prog. Or, if you have to buy some tool again, Simon Touch is the best, but its more expensive.


cgdi mb VS vvdi mb in the aspect of FBS4:

the difference between CGDI and VVDI in FBS4 is as Follow , CGDI can read FBS4 keys and knows if its in a working status or key is damaged , CGDI can read EIS FBS4 and knows if it working or not working , However VVDI can not Detect FBS4 . on the other hand CGDI never claimed that it can make calculation for FBS4 . Only Read to know the status . Out of the subject No one was Born knowing everything at one point we all asked for questions to know. Respect


Both CGDI and Vvdi MB are a great comprehensive solution comparing to what else is available out there. In my opinion they’re the two best for keys maybe along with Diagspeed but much far ahead than AVDI (for keys).


AVDI fbs4:

The most new benz cars have fbs4. Avdi cannot make fbs4. You have to go to dealer. The newest cars to make with avdi are from 2013.


diagspeed fbs4:

diagspeed can read Mercedes FBS4 key info.

Read FBS4 ezs w218 w212 w166 w246 by can full data 2015.

source: http://www.diagspeed.co/news-1.html

FBS4 key solution

https://www.youtube.com/watch?v=i-7iHE-VGJ8


Fsb4 & fsb3 key:

Timings FBS4 comparing to FBS3 totally different, data exchange different so no chance using a FBS4 key like FBS3.


FBS4 applicable models:

Applicable Models: April 2013 to Present, Model W212; July 2013 to Present, Models 166, 207, V212; September 2014 to Present, Model 218; November 2014 to Present, Models 117, 156; April 2015 to Present, Model 172; MY-AII, Models 205, 217, 218, 222, 231.

MY2013, Model 166 with Code 803, Models 207 and 212 with Code 804.


Also, you can check SA Codes on vehicle data card or use any suitable online vin decoder to see SA codes related to your vin. You are looking for the presence of SA code 803 or 804, depending on the Model this means vehicle is FBS4 related.

cgdi-mb-fbs4-key-reading-03


FACT: Be sure . No device can do fbs4 yet . Only MB dealer can do it


I’ve been able to order fbs4 keys for years, got them direct from Mercedes. It car still has to go to dealer to be programmed.


Dealer can order a pre-programmed FBS4 key, similar to older models, but most dealers won’t. Huge amount of paperwork/protocol from FBS4 technician and scrutiny from Benz corporate…Needs to really be a true emergency: IE car stuck at bottom of Grand Canyon and only way out is airlift or get a programmed key…Or maybe easier is DBS4 technician and dealership owner is related to you!

Question:

so if i understand well, vehicle has to be towed?

Answer:

No…dealer can order programmed key (3 to 5 days to deliver), hand it to the customer and car will start, same as any older system. The difference is in the key ordering procedure…FBS4 key needs much more scrutiny of paperwork, authorizations of parts managers and FBS4 technicians etc…most dealers do not want to go through this big procedure and liability, so they tell everyone to have the car towed in and key programmed with diagnostic tool which is a much more common (easier) practice for them. Personally my opinion is that Mercedes corporate is encouraging the dealers NOT to order the programmed key unless total emergency and no way to tow the car in…


To be updated…


www.uobdii.com

How to install 10.2018 SSM3 SSM4 Windows 7 for Subaru diagnosis & programming

$
0
0

Free download Subaru SSM3 SSM4 2018 software:

http://blog.uobdii.com/free-download-subaru-ssm-3-ssm-4-us-04-2018/

It’s your own risk!


Where to get Subaru Select Monitor 3 & 4 for use with relief:

http://www.uobdii.com/wholesale/subaru-ssm-iii-software-update-package-for-vxdiag.html

Tested 100% successfully with VXDIAG SUBARU diagnostic tool

subaru-ssm3-ssm4-2018-install

SSM III abilities confirmed to work:

1.All System Diagnosis…worked
2.Each System Check…worked
3.Saved Data Display…worked
4.Immobilizer (register key) …worked
5.Reprogram…worked
6.Read CF application measurement data…worked
7.Convert/Save measurement data on driving recorder…worked
8.Oscilloscope…worked
9.Program Subaru smart key…worked


How to install VXDIAG SSM 3 software:


Operating system: Windows XP/Windows 7

Language: English German Spanish French Italian

Vehicle coverage: Subaru 2005 to 2018

Internet connection: Yes


The steps:


Step 1: Install SSM3 setup

Step 2: Install SSM4 setup

Step 3: Install FlashWrite

Step 4: Install VX Manager driver

source: http://www.uobdii.com/wholesale/vxdiag-subaru-ssm-iii-multi-diagnostic-tool-wifi-version.html

vxdiag-subaru-ssm3-ssm4-install

10.2018 SSM3 SSM4 Installation video:


VERY VERY VERY IMPORTANT:

You should install SSM4 setup to finish installation.

But VXDIAG cannot be used as a Subaru ssm4 diagnostic tool.

Do always use SSM3 software only.


How do people think of VXDIAG SUBARU:


Look here Subaru SSM 3 review:


Vxdiag and customized settings: handy!

It’s handy for doing stuff like turning off the passenger seat belt warning (my dog rides over there sometimes and doesn’t like wearing his belt) or setting the wiper de-icer to work for as long as I tell it to instead of a 12 minute cycle. Or make the door locks unlock with one press of the remote. All of this is stuff you won’t be able to do (AFAIK) with any other scanner.

I also rebuild wrecks and it’s the only thing that will talk to the airbag systems so I can figure out WTF is making the light stay on after cobbling together a car from 2 or 3 others.


Vxdiag Subaru diagnostics: works!

Complete access to everything with the ability to read and clear codes and manipulate other features. More or less everything that the dealership can do.

It just depends on if you think having complete access to all the systems in the car is worth it. It’s nice to have when I need it. I had a VDC code that was for the steering angle sensor. Rather than go to the dealer, I just busted out the knock off SSM and calibrated it in the driveway.


Vxdiag and new remotes: works!

It should perform “learning control” of TCM after clearing memory2 was done. So, it might be able to program a new remote. if you already know how to use SSM and you know it well enough to tell if this pirate copy is acting up vs. the real thing. It’s not like they give you a license or support, so you’d better already know exactly what you’re doing with it.


Vxdiag Subaru key programming: a bit different!

It is a bit different from most. I make and program keys for a living and for a while the SSM was the only thing that would program the prox fobs. Not true anymore but I still paid less for the VXdiag with software than I would for a single piece of software for my T-code pro. . and there are 3 for Subaru. I have one which only covers the earliest models.

btw, you have to have a NASTF LSID or be very good friends with a Subaru parts manager.

You need an immobilizer code (which is VIN specific) to program keys/fobs. It does not change so once you have it for your car you can go nuts. Odds are your dealer would probably give you YOUR immobilizer code if you shop there somewhat regularly. They may charge you for it as I know they have to pay a couple of bucks to mama subie for them.

There’s also an ‘enabling password’ which is also static and I suppose is a very flimsy extra layer of security to protect the immobilizer features of the SSM. It’s 3781.


Expiry date and additional software: worthy!

Someone says it will stop working after expiry date. Actually, don’t know and don’t care. mine says 2026, that’s like 9 years from now. If I have it that long and nothing better comes along, I got my money’s worth. I will say licenses for additional software titles (toyota, etc.) are only like $20 extra so I’d speculate renewing the license will be cheap if it becomes an issue.

Solution to Nissan consult III error “No registered VI/MI?

$
0
0

Nissan Consult III installation error ” There are no registered VI/MI. Please contact your administrator”. The device is Nissan Consult 3 Renault can clip 2-in-1 diagnostic tool.

nissan-consult-3-installation-guide-001 can clip consult 3-002


Possible reason and solution:

1). Nissan Consult 3 software and Renault can clip software were installed in the same computer. Which caused the conflict.


2). Besides, Nissan Consult 3 should be installed by following the correct instruction, the device must be added to the software.


Nissan Consult 3 software installation procedure:

PASSWORD:nissanconsult3 (for registration)

 nissan-consult-3-installation-guide-02 nissan-consult-3-installation-guide-03 nissan-consult-3-installation-guide-04 nissan-consult-3-installation-guide-05

nissan-consult-3-installation-guide-10

nissan-consult-3-installation-guide-15

nissan-consult-3-installation-guide-20

nissan-consult-3-installation-guide-25

nissan-consult-3-installation-guide-30

nissan-consult-3-installation-guide-34

Source of Can clip consult 3 2-in-1 diagnostic scanner:

http://www.uobdii.com/wholesale/renault-can-clip-and-consult-3-diagnostic-tool.html

Yanhua Mini ACDP Module 12 Volvo key programming : Confirmed working

$
0
0

Yanhua Mini ACDP newly adds Module 12 to support Volvo Semi-smart (5-button) key programming without lifting and desoldering. Coverage: 2009 -2018 Volvo. Volvo smart (6-button) key programming will be enabled soon.

acdp-volvo-semi-smart-5-button-key-programming-01


Yanhua Mini ACDP supports semi-smart (5-button) key programming.

S60 (2010 -2018)

S80 (2009 -2016)

XC60 (2009 – 2018)

V60 (2011- 2017)

V70 (2009 -2016 )

XC70 (2010 -2016)

acdp-volvo-semi-smart-5-button-key-programming-02


Volvo semi-smart (5-button key) key programming function:

Read password

Add key

All key lost

Unlock key

acdp-volvo-semi-smart-5-button-key-programming-03 acdp-volvo-semi-smart-5-button-key-programming-04


How to use Yanhua Mini ACDP to program Volvo key?

1.Prepare ACDP, OBP+ICP adapter, CEM interface board and CEM module.

acdp-volvo-semi-smart-5-button-key-programming-05 acdp-volvo-semi-smart-5-button-key-programming-06

2.Clamp two PCB locks.

acdp-volvo-semi-smart-5-button-key-programming-07

3.Link ACDP and CEM module.

acdp-volvo-semi-smart-5-button-key-programming-08


CEM position in the Volvo car.

acdp-volvo-semi-smart-5-button-key-programming-09


This is the ECM module removed from Volvo car.

acdp-volvo-semi-smart-5-button-key-programming-10 acdp-volvo-semi-smart-5-button-key-programming-11 acdp-volvo-semi-smart-5-button-key-programming-12 acdp-volvo-semi-smart-5-button-key-programming-13


Help on Unlock key:

Please put the Volvo key into the BAV adapter and unlock it with the CEM password file loaded when the key is matched.

acdp-volvo-semi-smart-5-button-key-programming-14


Youtube video on ACDP + Module 12 program semi-smart (5-button key):

Comming….


Enjoy.

www.uobdii.com

Viewing all 3193 articles
Browse latest View live


<script src="https://jsc.adskeeper.com/r/s/rssing.com.1596347.js" async> </script>