Quantcast
Channel: UOBDII Official Blog
Viewing all 3193 articles
Browse latest View live

Autel IM608 + GBOX Read Password fot W210 W211 W209

$
0
0

This is feedback from Michal Widlak. (Many thanks!)

HI GUYS. I have some feedback about yesterday Mercedes update on Autel IM608 programmer.

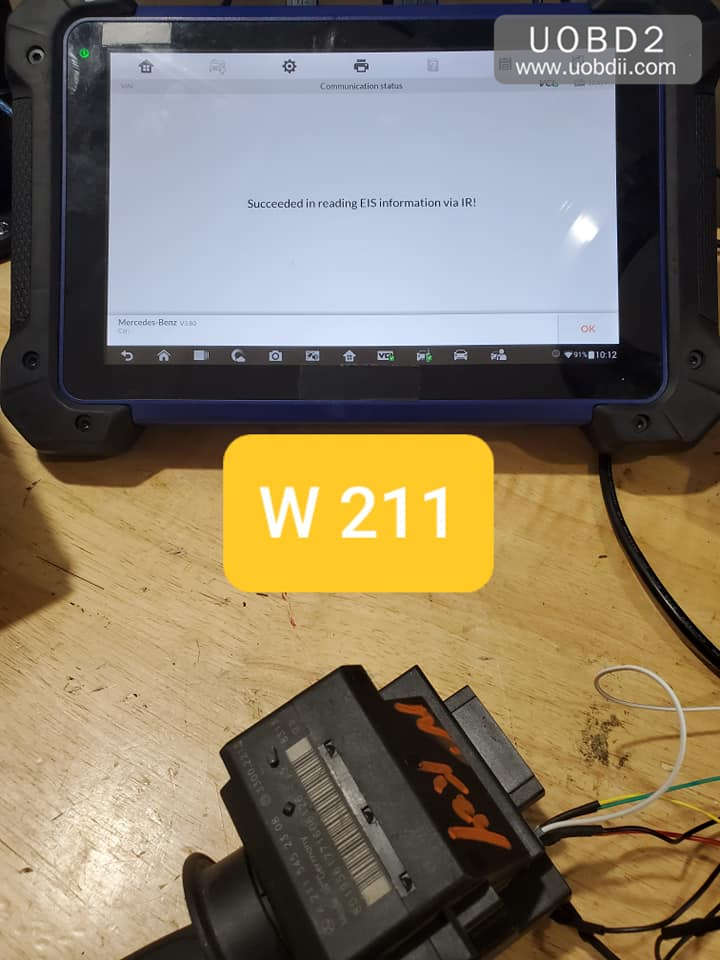
autel-im608-mercedes-1

Just finish testing 3 EIS AKL with GBOX:

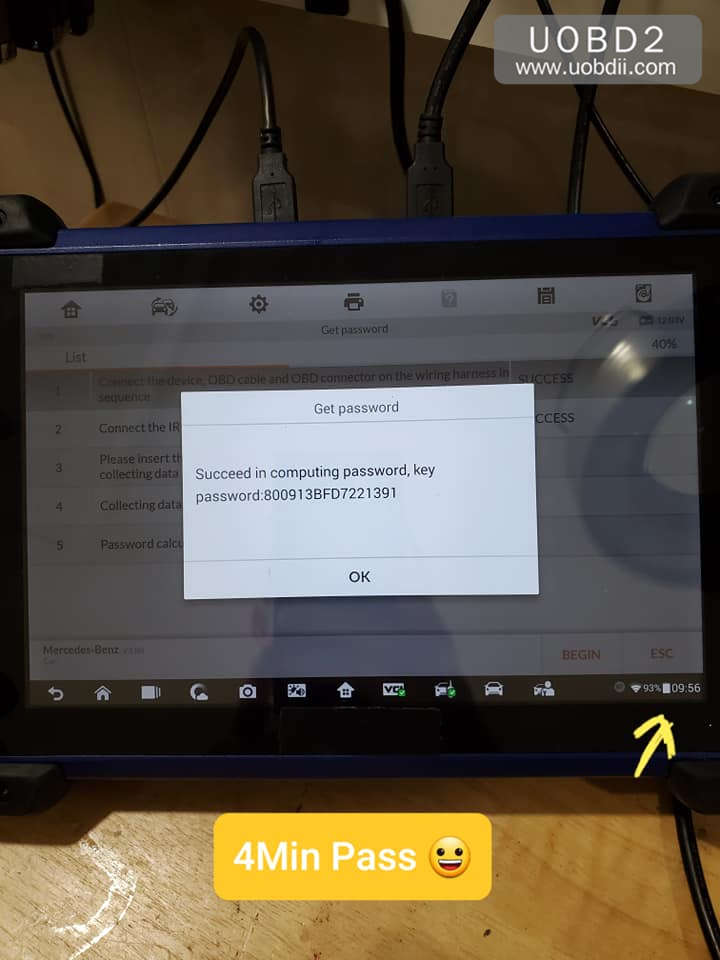
W210- FAST MODE 4 MIN

autel-im608-mercedes-2 autel-im608-mercedes-3 autel-im608-mercedes-4
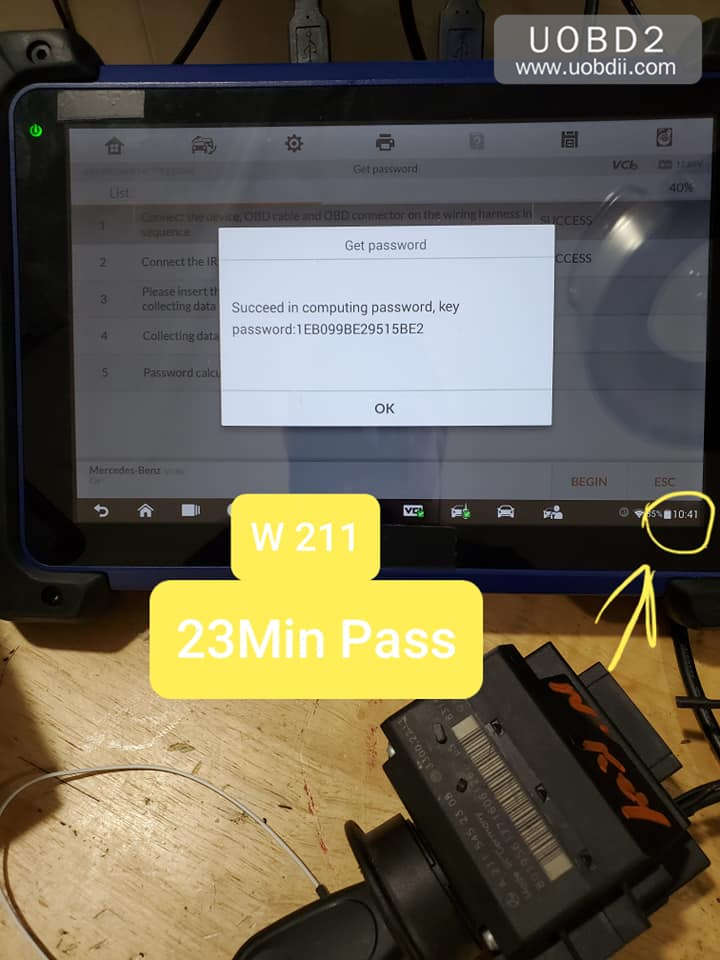
W211- FAST MODE 23 MIN

autel-im608-mercedes-5 autel-im608-mercedes-6 autel-im608-mercedes-7
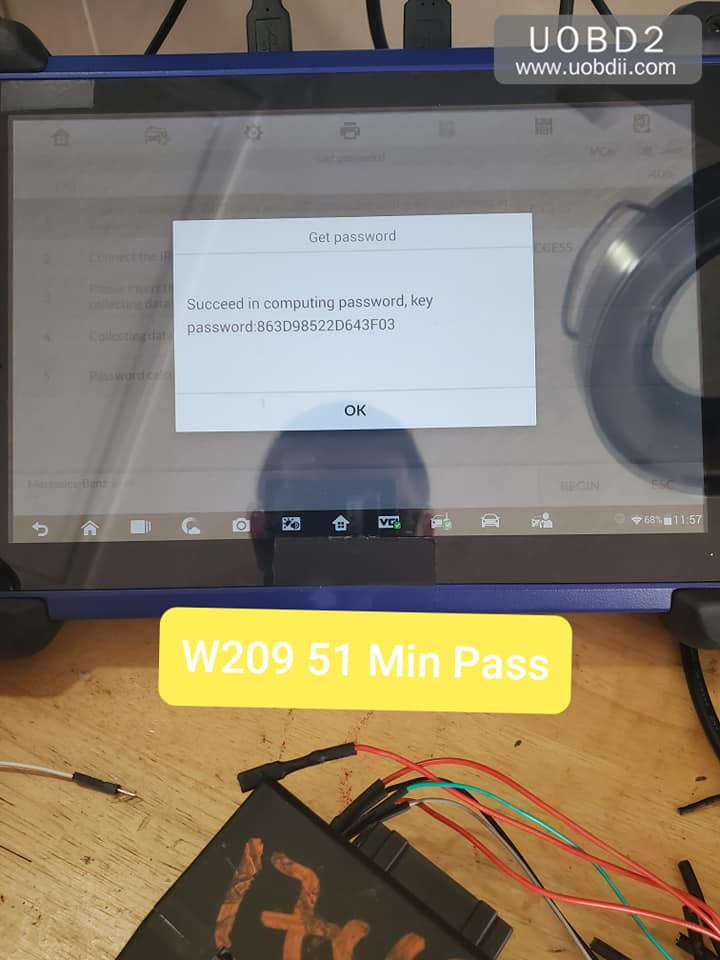
W209- NORMAL MODE 51MIN (did not communicate. under fast mode)

autel-im608-mercedes-8 autel-im608-mercedes-9

Before yesterday update I was able to communicate with all 3 EIS but failed to read a password.
So looks like Autel engeniers fix some issues.

I will check some OBD AKL soon.

I hope that will help


More info:

http://www.uobdii.com/wholesale/autel-maxiim-im608.html


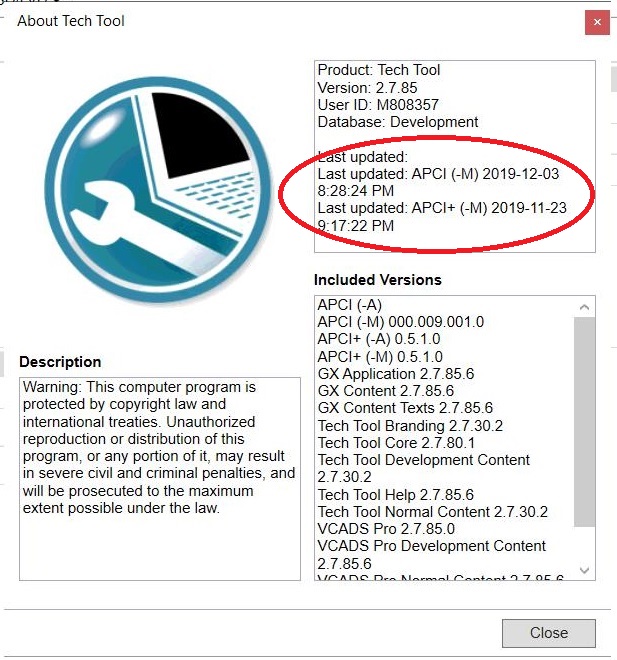
Volvo Tech Tool 2.7.85 Development update, setup, activation etc

$
0
0

Volvo Tech Tool 2.7.85 Development update information, remote installation & activation, workable Volvo truck diagnostic tool etc.

volvo-tech-tool-2-7-85-development-update-01

What is Tech Tool:

Tech Tool is a tool that supports the repair and diagnostic process and was developed in order to make work in the workshops easier and more efficient.

Tech Tool is an application for diagnostics with the possibility to use plug-ins to cover the whole repair process. With Tech Tool you can diagnose, test, calibrate and program a product. A product could be a vehicle, engine or machine.

The set of plug-ins, user authorizations, and available languages is adjustable to provide every user with what they need.

Volvo Tech Tool 2.7.85 update version info:

Region: All regions

Download size: 14 GB

Product: Tech Tool

Version: 2.7.85

User ID: XX27850

Database: Development

Last updated: APCI (-M) 05/11/2019 3:44:17 PM

Last updated: APCI+ (-M) 13/10/2019 8:34:17 AM

APCI (-A)

APCI (-M) 000.009.001.0

APCI+ (-A) 0.5.1.0

APCI+ (-M) 0.5.1.0

GX Application 2.7.80.3

GX Content 2.7.80.1

GX Content Texts 2.7.85.0

Tech Tool Branding 2.7.30.2

Tech Tool Core Expected version: 2.7.85.0

Tech Tool Development Content 2.7.30.2

Tech Tool Help 2.7.0.12

Tech Tool Normal Content 2.7.30.2

VCADS Pro 2.7.85.0

VCADS Pro Development Content 2.7.85.0

VCADS Pro Normal Content 2.7.85.0

VCADS Pro Toolbox 2.7.75.3


Remote install and active Tech Tool 2.7.85:

Install and activation Volvo Tech Tool (PTT) 2.7.85 only by TeamViewer


1) Computer Requirements:

Computer/Processor Intel® Core i5 or​ i7 / i9

Memory (RAM) 4 GB, more memory improves performance

Hard disk Type SSD (Solid State Drive) with 80 GB free space

2) Operation System Requirements:

Windows 7 8, 8.1, 10 Professional or Enterprise 32 bit x86​ or 64 bit x64


3) Workable Volvo truck diagnostic tool:

Volvo 88890300 Vocom

Volvo VOCOM II


Tech Tool 2.7.85 new features:

With this release of tech tool, a new fault tracing strategy is introduced. the new strategy will gradually replace the old one over the upcoming releases. see the tech tool release news for more information.


General information:

This tech tool update contains maintenance issue corrections.


Operation news:

Operation 6476-07-03-01 “active steering calibration” and fault tracking added for volvo dynamic steering system. only applicable to north America.


Diagnostic updates:

Fault tracing information has been updated to be compliant with new hardware and software required to meet emission regulations.

Applicable to models FH and FM. Only applicable to China

Improved fault tracing information for SCR system, Euro 6. Not applicable to north America.

volvo-tech-tool-2-7-85-development-update-02


Source of Volvo Tech Tool 2.7.85 Development:

http://www.uobdii.com/wholesale/volvo-premium-tech-tool-software.html

Autel IM508 and Mercedes All Keys Lost: Possible?

$
0
0

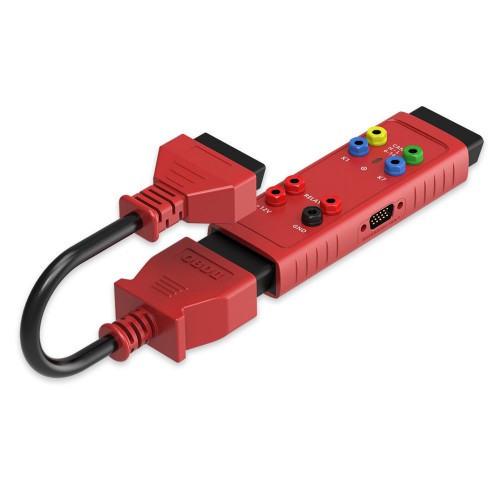
Confirmed! Autel IM508 programmer is confirm to program new keys to Mercedes Benz when all keys are lost but you should have the xp400 adapter and G box 2.

autel-xp400-mercedes-all-keys-lost


http://www.uobdii.com/wholesale/xp400-key-and-chip-programmer.html


The Autel xp400 adapter is for Benz and it looks like a Benz key and it connects to the scanner. You can also buy nust the x400 scanner if you really want to do cas4 bmw too. The software from the im508 & im608 are identical. No difference at all.

autel-g-box-2-mercedes-all-keys-lost


source: http://www.uobdii.com/wholesale/autel-g-box2-tool-for-mercedes-benz-all-keys-lost.html


The G-BOX2 realizes the fast mode on vehicle and bench when Mercedes-Benz with DAS3 EIS/EZS loses all keys. The use of the G-BOX2 reduces the time needed and eliminates the process of insertion and removal.
The G-BOX2 can read and access most engines manufactured by Bosch including EDS/ MEx17 series engines used in BMW and Volkswagen Vehicles. This capability supports the ability to perform adaptions when all keys are lost and engine is replaced.
The G-BOX2 is compatible with the Autel’s advanced diagnostic tablets support IMMO and key programming functions.

In short, Less Time, More Secure

Autel IM508 Mercedes All Keys Lost:


This is the full Mercedes car list that IM508 covers for key programming when all keys are lost.

A 2005-2011 / / / / IMMO System(DAS3)(CAN/IR) Get password All keys lost / Above Mercedes-Benz_V3.80 /
A 2005-2011 / / / / IMMO System(DAS3)(CAN/IR) Get password All keys lost(Fast) / Above Mercedes-Benz_V3.80 /
A 2012-2013 / / / / IMMO System(DAS3)(CAN/IR) Get password All keys lost / Above Mercedes-Benz_V3.80 /
AMG GT 2010-2014 / / / / IMMO System(DAS3)(CAN/IR) Get password All keys lost / Above Mercedes-Benz_V3.80 /
B 2005-2011 / / / / IMMO System(DAS3)(CAN/IR) Get password All keys lost / Above Mercedes-Benz_V3.80 /
B 2005-2011 / / / / IMMO System(DAS3)(CAN/IR) Get password All keys lost(Fast) / Above Mercedes-Benz_V3.80 /
B 2012-2013 / / / / IMMO System(DAS3)(CAN/IR) Get password All keys lost / Above Mercedes-Benz_V3.80 /
C 2001-2005 / / / / IMMO System(DAS3)(KWP/IR) Get password All keys lost / Above Mercedes-Benz_V3.80 /
C 2001-2005 / / / / IMMO System(DAS3)(KWP/IR) Get password All keys lost(Fast) / Above Mercedes-Benz_V3.80 /
C 2006 / / / / IMMO System(DAS3)(CAN/IR) Get password All keys lost / Above Mercedes-Benz_V3.80 /
C 2006 / / / / IMMO System(DAS3)(CAN/IR) Get password All keys lost(Fast) / Above Mercedes-Benz_V3.80 /
C 2007-2011 / / / / IMMO System(DAS3)(CAN/IR) Get password All keys lost / Above Mercedes-Benz_V3.80 /
C 2007-2011 / / / / IMMO System(DAS3)(CAN/IR) Get password All keys lost(Fast) / Above Mercedes-Benz_V3.80 /
C 2012-2013 / / / / IMMO System(DAS3)(CAN/IR) Get password All keys lost / Above Mercedes-Benz_V3.80 /
C 2012-2013 / / / / IMMO System(DAS3)(CAN/IR) Get password All keys lost(Fast) / Above Mercedes-Benz_V3.80 /
C 2014-2015 / / / Coupe IMMO System(DAS3)(CAN/IR) Get password All keys lost / Above Mercedes-Benz_V3.80 /
C 2014-2015 / / / Cabriolet IMMO System(DAS3)(CAN/IR) Get password All keys lost / Above Mercedes-Benz_V3.80 /
C 2014-2015 / / / Coupe IMMO System(DAS3)(CAN/IR) Get password All keys lost(Fast) / Above Mercedes-Benz_V3.80 /
C 2014-2015 / / / Cabriolet IMMO System(DAS3)(CAN/IR) Get password All keys lost(Fast) / Above Mercedes-Benz_V3.80 /
CL 2006-2013 / / / / IMMO System(DAS3)(CAN/IR) Get password All keys lost / Above Mercedes-Benz_V3.80 /
CL 2006-2013 / / / / IMMO System(DAS3)(CAN/IR) Get password All keys lost(Fast) / Above Mercedes-Benz_V3.80 /
CLK 2001-2005 / / / / IMMO System(DAS3)(KWP/IR) Get password All keys lost / Above Mercedes-Benz_V3.80 /
CLK 2001-2005 / / / / IMMO System(DAS3)(KWP/IR) Get password All keys lost(Fast) / Above Mercedes-Benz_V3.80 /
CLK 2006-2008 / / / / IMMO System(DAS3)(CAN/IR) Get password All keys lost / Above Mercedes-Benz_V3.80 /
CLK 2006-2008 / / / / IMMO System(DAS3)(CAN/IR) Get password All keys lost(Fast) / Above Mercedes-Benz_V3.80 /
CLK 2009 / / / Coupe IMMO System(DAS3)(CAN/IR) Get password All keys lost / Above Mercedes-Benz_V3.80 /
CLK 2009 / / / Cabriolet IMMO System(DAS3)(CAN/IR) Get password All keys lost / Above Mercedes-Benz_V3.80 /
CLK 2009 / / / Coupe IMMO System(DAS3)(CAN/IR) Get password All keys lost(Fast) / Above Mercedes-Benz_V3.80 /
CLK 2009 / / / Cabriolet IMMO System(DAS3)(CAN/IR) Get password All keys lost(Fast) / Above Mercedes-Benz_V3.80 /
CLK 2010-2016 / / / / IMMO System(DAS3)(CAN/IR) Get password All keys lost / Above Mercedes-Benz_V3.80 /
CLK 2010-2016 / / / / IMMO System(DAS3)(CAN/IR) Get password All keys lost(Fast) / Above Mercedes-Benz_V3.80 /
CLS 2006-2010 / / / / IMMO System(DAS3)(CAN/IR) Get password All keys lost / Above Mercedes-Benz_V3.80 /
CLS 2006-2010 / / / / IMMO System(DAS3)(CAN/IR) Get password All keys lost(Fast) / Above Mercedes-Benz_V3.80 /
CLS 2011-2013 / / / / IMMO System(DAS3)(CAN/IR) Get password All keys lost / Above Mercedes-Benz_V3.80 /
E 2001-2005 / / / / IMMO System(DAS3)(KWP/IR) Get password All keys lost / Above Mercedes-Benz_V3.80 /
E 2001-2005 / / / / IMMO System(DAS3)(KWP/IR) Get password All keys lost(Fast) / Above Mercedes-Benz_V3.80 /
E 2006-2008 / / / Coupe IMMO System(DAS3)(CAN/IR) Get password All keys lost / Above Mercedes-Benz_V3.80 /
E 2006-2008 / / / Sedan IMMO System(DAS3)(CAN/IR) Get password All keys lost / Above Mercedes-Benz_V3.80 /
E 2006-2008 / / / Cabriolet IMMO System(DAS3)(CAN/IR) Get password All keys lost / Above Mercedes-Benz_V3.80 /
E 2006-2008 / / / Wagon IMMO System(DAS3)(CAN/IR) Get password All keys lost / Above Mercedes-Benz_V3.80 /
E 2006-2008 / / / Coupe IMMO System(DAS3)(CAN/IR) Get password All keys lost(Fast) / Above Mercedes-Benz_V3.80 /
E 2006-2008 / / / Sedan IMMO System(DAS3)(CAN/IR) Get password All keys lost(Fast) / Above Mercedes-Benz_V3.80 /
E 2006-2008 / / / Cabriolet IMMO System(DAS3)(CAN/IR) Get password All keys lost(Fast) / Above Mercedes-Benz_V3.80 /
E 2006-2008 / / / Wagon IMMO System(DAS3)(CAN/IR) Get password All keys lost(Fast) / Above Mercedes-Benz_V3.80 /
E 2009 / / / Coupe IMMO System(DAS3)(CAN/IR) Get password All keys lost / Above Mercedes-Benz_V3.80 /
E 2009 / / / Sedan IMMO System(DAS3)(CAN/IR) Get password All keys lost / Above Mercedes-Benz_V3.80 /
E 2009 / / / Cabriolet IMMO System(DAS3)(CAN/IR) Get password All keys lost / Above Mercedes-Benz_V3.80 /
E 2009 / / / Wagon IMMO System(DAS3)(CAN/IR) Get password All keys lost / Above Mercedes-Benz_V3.80 /
E 2009 / / / Coupe IMMO System(DAS3)(CAN/IR) Get password All keys lost(Fast) / Above Mercedes-Benz_V3.80 /
E 2009 / / / Cabriolet IMMO System(DAS3)(CAN/IR) Get password All keys lost(Fast) / Above Mercedes-Benz_V3.80 /
E 2009 / / / Wagon IMMO System(DAS3)(CAN/IR) Get password All keys lost(Fast) / Above Mercedes-Benz_V3.80 /
E 2010-2013 / 207 / / IMMO System(DAS3)(CAN/IR) Get password All keys lost / Above Mercedes-Benz_V3.80 /
E 2010-2013 / 212 / / IMMO System(DAS3)(CAN/IR) Get password All keys lost / Above Mercedes-Benz_V3.80 /
E 2010-2013 / 207 / / IMMO System(DAS3)(CAN/IR) Get password All keys lost(Fast) / Above Mercedes-Benz_V3.80 /
G -2015 / / / / IMMO System(DAS3)(KWP/IR) Get password All keys lost / Above Mercedes-Benz_V3.80 /
G -2015 / / / / IMMO System(DAS3)(KWP/IR) Get password All keys lost(Fast) / Above Mercedes-Benz_V3.80 /
GL/GLS 2006-2008 / / / / IMMO System(DAS3)(CAN/IR) Get password All keys lost / Above Mercedes-Benz_V3.80 /
GL/GLS 2006-2008 / / / / IMMO System(DAS3)(CAN/IR) Get password All keys lost(Fast) / Above Mercedes-Benz_V3.80 /
GL/GLS 2009-2012 / / / / IMMO System(DAS3)(CAN/IR) Get password All keys lost / Above Mercedes-Benz_V3.80 /
GL/GLS 2009-2012 / / / / IMMO System(DAS3)(CAN/IR) Get password All keys lost(Fast) / Above Mercedes-Benz_V3.80 /
GLC 2008-2014 / / / Off-Roader IMMO System(DAS3)(CAN/IR) Get password All keys lost / Above Mercedes-Benz_V3.80 /
GLC 2008-2014 / / / Off-Roader IMMO System(DAS3)(CAN/IR) Get password All keys lost(Fast) / Above Mercedes-Benz_V3.80 /
GLK 2008-2014 / / / Off-Roader IMMO System(DAS3)(CAN/IR) Get password All keys lost / Above Mercedes-Benz_V3.80 /
GLK 2008-2014 / / / Off-Roader IMMO System(DAS3)(CAN/IR) Get password All keys lost(Fast) / Above Mercedes-Benz_V3.80 /
M/ML/GLE 2006-2008 / / / / IMMO System(DAS3)(CAN/IR) Get password All keys lost / Above Mercedes-Benz_V3.80 /
M/ML/GLE 2006-2008 / / / / IMMO System(DAS3)(CAN/IR) Get password All keys lost(Fast) / Above Mercedes-Benz_V3.80 /
M/ML/GLE 2009-2011 / / / / IMMO System(DAS3)(CAN/IR) Get password All keys lost / Above Mercedes-Benz_V3.80 /
M/ML/GLE 2009-2011 / / / / IMMO System(DAS3)(CAN/IR) Get password All keys lost(Fast) / Above Mercedes-Benz_V3.80 /
M/ML/GLE 2012 / / / / IMMO System(DAS3)(CAN/IR) Get password All keys lost / Above Mercedes-Benz_V3.80 /
R 2006-2008 / / / / IMMO System(DAS3)(CAN/IR) Get password All keys lost / Above Mercedes-Benz_V3.80 /
R 2009-2017 / / / / IMMO System(DAS3)(CAN/IR) Get password All keys lost / Above Mercedes-Benz_V3.80 /
R 2009-2017 / / / / IMMO System(DAS3)(CAN/IR) Get password All keys lost(Fast) / Above Mercedes-Benz_V3.80 /
S 1999-2005 / / / Sedan IMMO System(DAS3)(KWP/IR) Get password All keys lost / Above Mercedes-Benz_V3.80 /
S 1999-2005 / / / Sedan IMMO System(DAS3)(KWP/IR) Get password All keys lost(Fast) / Above Mercedes-Benz_V3.80 /
S 2006-2012 / 216 / / IMMO System(DAS3)(CAN/IR) Get password All keys lost / Above Mercedes-Benz_V3.80 /
S 2006-2012 / 221 / / IMMO System(DAS3)(CAN/IR) Get password All keys lost / Above Mercedes-Benz_V3.80 /
S 2006-2012 / 216 / / IMMO System(DAS3)(CAN/IR) Get password All keys lost(Fast) / Above Mercedes-Benz_V3.80 /
S 2006-2012 / 221 / / IMMO System(DAS3)(CAN/IR) Get password All keys lost(Fast) / Above Mercedes-Benz_V3.80 /
S 2013 / / / Coupe IMMO System(DAS3)(CAN/IR) Get password All keys lost / Above Mercedes-Benz_V3.80 /
S 2013 / / / Coupe IMMO System(DAS3)(CAN/IR) Get password All keys lost(Fast) / Above Mercedes-Benz_V3.80 /
SLK/SLC 2006-2010 / / / / IMMO System(DAS3)(CAN/IR) Get password All keys lost / Above Mercedes-Benz_V3.80 /
SLK/SLC 2006-2010 / / / / IMMO System(DAS3)(CAN/IR) Get password All keys lost(Fast) / Above Mercedes-Benz_V3.80 /
SLK/SLC 2011-2018 / / / / IMMO System(DAS3)(CAN/IR) Get password All keys lost / Above Mercedes-Benz_V3.80 /
SLK/SLC 2011-2018 / / / / IMMO System(DAS3)(CAN/IR) Get password All keys lost(Fast) / Above Mercedes-Benz_V3.80 /
SLS 2010-2014 / / / / IMMO System(DAS3)(CAN/IR) Get password All keys lost / Above Mercedes-Benz_V3.80 /


src: http://www.uobdii.com/wholesale/autel-maxiim-im508.html

Top 5 GM ABS brake bleeding scan tools

$
0
0

Using experience on top 5 GM scanner that can perform the ABS bleed function.


Autel Maxicheck Pro

Foxwell NT630 Elite

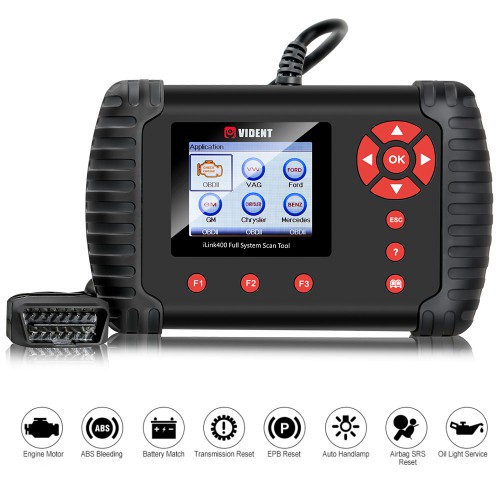
Vident iLink400 GM scanner

GM MDI clone

GM Tech II


In details…

Top 1. Here’s a guy doing the GM ABS bleed procedure on an Autel Maxicheck Pro, $179.

https://youtu.be/fUqmBqYIEAE

Autel MaxiCheck Pro-01


Top 2. Foxwell NT630 Elite is about $189 and seems like it will perform the automated ABS bleed feature.

https://youtu.be/jwgdolnLQRQ

So far this Foxwell is the cheapest I’ve found. Got a reply to my question on uobdii.com from Foxwell NT630 and they say this can do it on my 96 Tahoe. Think I’m holding out for a Tech 2 though.

Foxwell NT630 Elite-02


Top 3. Vident iLink400 GM scanner is also able to do ABS bleeding.

Read Vident iLink400 GM function list:

http://www.uobdii.com/upload/pro/19102615720743541414.zip

There are 2 tables, one is ” funtion list” and another one is ” special function”, search “ABS” in the table of ” special function”. And this table is not the newest, if you can’t find your car model, you can contact at email Sales@UOBDII.com.

vident-iLink400-03


Top 4. This guy used a GM MDI clone, which I believe is cheaper than a tech2 knock-off. The video comments says it can do the crank relearn and ABS bleed.

https://youtu.be/wuRkFPARQVQ

gm-mdi-clone-04


Top 5. GM Tech 2 is tested working fine to bleed the ABS.

Bleeding ABS on Corvette with GM Tech II by following the next procedure.

Perform a manual or pressure bleeding procedure. If the desired brake pedal height results are not achieved, perform the automated bleed procedure below.

The procedure cycles the system valves and runs the pump in order to purge the air from the secondary circuits normally closed off during normal base brake operation and bleeding. The automated bleed procedure is recommended when air ingestion is suspected in the secondary circuits, or when the BPMV has been replaced.

Automated Bleed Procedure


Notice: The Auto Bleed Procedure may be terminated at any time during the process by pressing the EXIT button. No further Scan Tool prompts pertaining to the Auto Bleed procedure will be given. After exiting the bleed procedure, relieve bleed pressure and disconnect bleed equipment per manufacturer’s instructions. Failure to properly relieve pressure may result in spilled brake fluid causing damage to components and painted surfaces.

1.Raise the vehicle on a suitable support.

2.Remove all four tire and wheel assemblies.

3.Inspect the brake system for leaks and visual damage. Refer to Brake Fluid Loss or Symptoms – Hydraulic Brakes. Repair or replace as needed.

4.Inspect the battery state of charge.

5.Install a scan tool.

6.Turn ON the ignition, with the engine OFF.

7.With the scan tool, establish communications with the EBCM. Select Special Functions. Select Automated Bleed from the Special Functions menu.

8.Bleed the base brake system.

9.Follow the scan tool directions until the desired brake pedal height is achieved.

10.If the bleed procedure is aborted, a malfunction exists. Perform the following steps before resuming the bleed procedure:

– If a DTC is detected, refer to Diagnostic Trouble Code

(DTC) List and diagnose the appropriate DTC.

– If the brake pedal feels spongy, perform the conventional brake bleed procedure again.

11.When the desired pedal height is achieved, press the brake pedal in order to inspect for firmness.

12.Remove the scan tool.

13.Install the tire and wheel assemblies.

14.Inspect the brake fluid level.

15.Road test the vehicle while inspecting that the pedal remains high and firm.


I’d like to say: The tech2 clones work perfectly fine, they will do ANYTHING a original $3000 one will do, the only notable difference is the built in power module will not hold up to a low voltage vehicle restart, so the workaround is to simply plug in a 12v dc power adapter to a extension cord, there are very few instances where you would even need to do that. otherwise they are well worth the investment, just getting a diagnostic from the dealer is around $125 a pop, you can stay at home and save time and money.

gm-tech2-05


www.uobdii.com

SDconnect c4 DAS not work after network cable is connected (fixed)

$
0
0

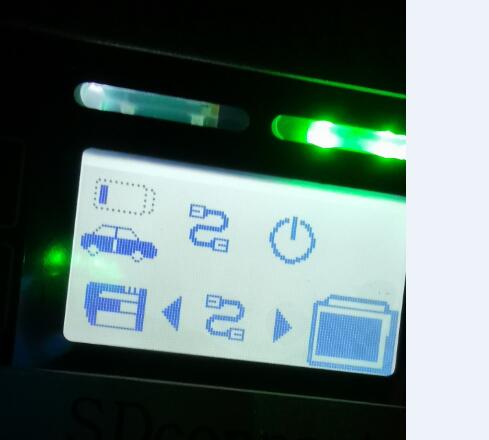
sdconnect c4 has one problem:

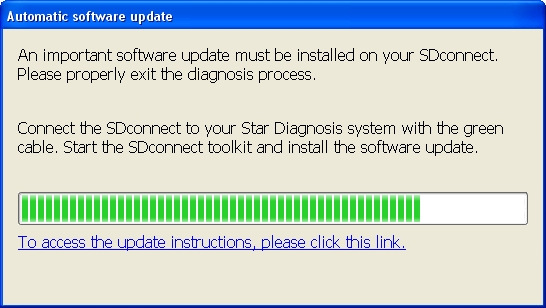
After connecting the network cable, toolkit is connected, but DAS doesn’t work. If I disconnect the OBD cable, C4 will turn off. If I connect the OBD cable, C4 will turn on and the screen displays shown as below, but the network fails to connect.

sdconnect-c4-das-not-work-solution-01


uobdii.com engineer solution:

To connect sdconnect c4 to one computer to upgrade C4 hardware.


sdconnect c4 hardware update procedure:

Instructions for the SDconnect Software Update:

with DVD 07/2011

Star Diagnosis variant:

compact4 with SDconnect

compact3 w with SDconnect


Operating system:

Windows XP


Network:

LAN (wired connection)

WLAN (wireless connection)


Objective:

This document provides simple step-by-step instructions for updating the kernel software (operating system) on

your Star Diagnosis SDconnect multiplexer.

The kernel update of the SDconnect is similar to a regular software update via the Star Diagnosis system.


Step 1 Introduction

Step 2 Connecting the SDconnect to the Star Diagnosis system.

Step 3 SDnetControl

Step 4 Software update

Step 5 Completing the installation

Step 6 Checking the installed software


Step 1 Introduction

Check battery if needed (only if related message is shown in the display)

When working on the vehicle or using an external power supply, the message “! Batteries cannot be charged!” may sometimes appear on the SDconnect display:

This may be related to tarnishing, crystal formation, or corrosion on the battery contacts or leaking batteries:

sdconnect-c4-das-not-work-solution-02


Since the external power supply is extremely important for the update process, the batteries should be checked for the above-mentioned indications by removing the side panel on the SDconnect (see details on how to install batteries at

http://blog.uobdii.com/easy-guide-on-how-to-install-mb-sd-c4-batteries/ ).

  • If the batteries are contaminated, you can do the following:

– Clean or polish the battery contacts and re-check the battery function.

– Exchange the batteries if necessary (see SDconnect manual, chapter 2.3.2, for notes on batteries)

  • After checking the batteries, you can continue with the next step.


Closing the Xentry Diagnostics/Xentry DAS diagnostics application

When accessing a vehicle in Xentry Diagnostics or Xentry DAS, the following message appears:

sdconnect-c4-das-not-work-solution-03

Please exit the diagnostic application Xentry Diagnostics or Xentry DAS correctly and follow the next steps.


Step 2 Connecting the SDconnect to the Star Diagnosis system

Connect the SDconnect to the Star Diagnosis system with the green cable.

The SDconnect will be automatically selected and appear in the deskband on the Star Diagnosis system:

sdconnect-c4-das-not-work-solution-04


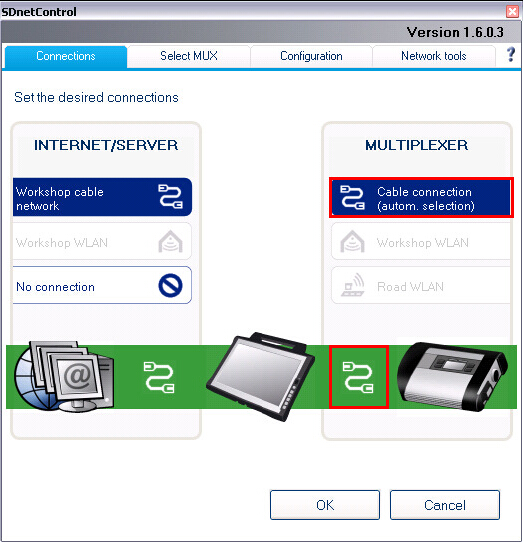
Step 3 SDnetControl

Start SDnetControl by clicking the deskband

Go to the “Connections” tab.

2)  Check whether automatic selection via the cable connection is active:

sdconnect-c4-das-not-work-solution-05

Go to the “Configuration” tab, and confirm the warning with “Yes”:

sdconnect-c4-das-not-work-solution-06


Step 4 Software update

Go to the “MUX” tab in SDnetControl.

Click on the “Software update” button.

sdconnect-c4-das-not-work-solution-07

The “SDconnect Toolkit Administration” program will start.


Go to the “Software update” tab in the SDconnect Toolkit.

Your SDconnect is already selected on the left-hand side.

Select the “Software update” packet under “Files for software update”.

Click “Start” to start the process.

sdconnect-c4-das-not-work-solution-08

The update process will start. This takes approx. 4 minutes.


Step 5 Completing the installation

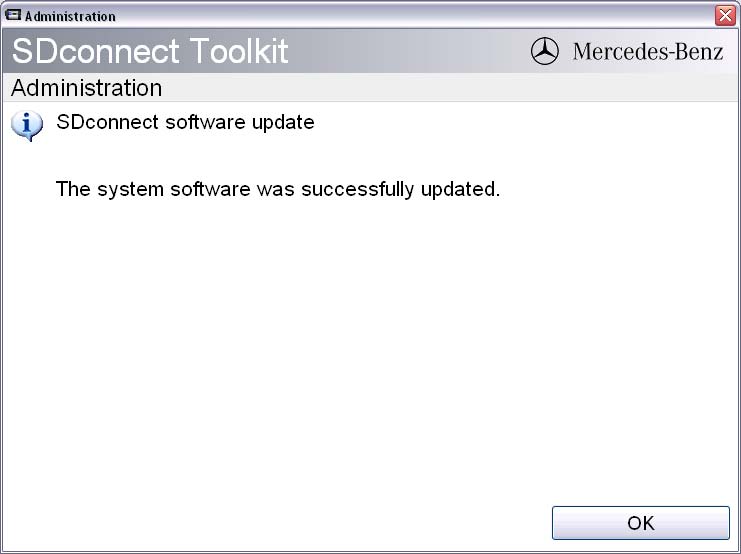
Confirm the successful completion of the update.

After a successful update, a message indicating the successful update completion appears.

Confirm the message by clicking “OK”.

sdconnect-c4-das-not-work-solution-09


Update not successful

If the update was not successful, the message “The software update was aborted. Please repeat theupdate process” will appear.


Confirm this message by clicking “OK”. Check the SDconnect batteries if necessary and repeat the update process.

sdconnect-c4-das-not-work-solution-10


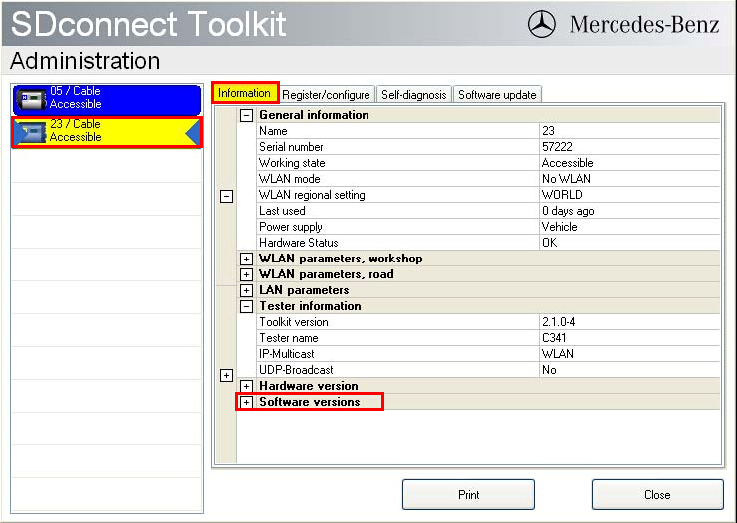
Step 6 Checking the installed software

Go to the “Information” tab in SDconnect Toolkit

Select your SDconnect on the left-hand side.

  • Check the information under “Software versions” at the right:

The versions of the Linux OS and the CommandServer must be at least 2:0:xxxxxx.

sdconnect-c4-das-not-work-solution-11

The SDconnect software update is complete. The green cable can be removed.


www.uobdii.com

Autel AP200 code scanner is great for BMW F10 5 series

$
0
0

If it doesn’t require a lift or an engine hoist I usually tackle it.

I knew Autel had a great reputation for Euro import software and gave it a try. I wanted several of their $400 scanners but I just had issues justifying that expense. Benefit with those is you get tons of makes – downside is you pay for updates (usually at least $150/year).

Autel AP200 code scanner is great for BMW F10 5 series
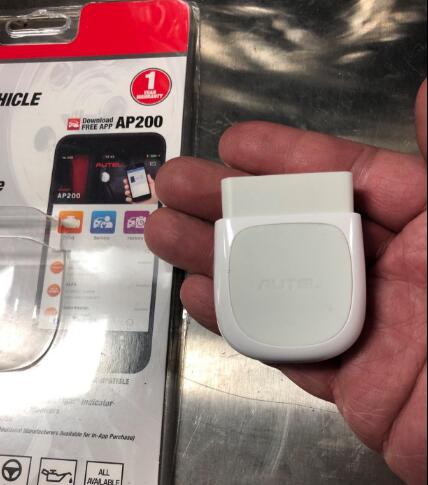
Autel AP200 code scanner was easy to set up and it’s really easy to use. It scans tons of modules and gets lots of live data in charts that you can easily manipulate the range, C or F, display type, etc.
Example: to change the trans fluid on this car (I don’t believe that any automotive fluid is really “lifetime”) you have to complete the final fill at a certain operating temp range – this tool will give you real time data.
Turbo spool RPM’s
Engine oil temp
Wheel speed sensors (these can cause all sorts of issues with these cars – if you have a bad one you can easily see because all 4 are shown at the same time on the same screen as you drive).
It can even tell you what door is open – I guess this is helpful if you’re having door contact sensor issues.

What  Autel AP200 cannot do?

As far as I can tell Autel AP200 scanner won’t do any two way active programming (like programming a battery). So you can’t really change setting or program modules – like transfer case adaptations or setting/initializing window module settings.

Keep in mind I’ve spent a grand total of 10 minutes with this tool but so far it’s an incredible value for a majority of users that need live data and manufacturer specific codes. Even if you aren’t a home mechanic it’s useful to pull codes when the light goes on (or iDrive warning pop up) and do some internet research (there’s a button next to the code readout that searches Google for you) and educate yourself so the mechanic doesn’t just completely hammer you with lies.

WELL DONE AUTEL – this product was a long time coming and you guys nailed the value proposition. I’d have paid twice this amount for adaptations and programming but I understand you have to protect your pro level $1000+ scanners. But if you’re listening my wallet is at the ready.

I’ll update this review as I learn more about the tool. But so far I love it.

How To Do GM Control Module Programming With Multiple Diagnostic Interface (MDI/MDI 2)

$
0
0

Something good about successful control module programming for GM vehicles:

It’s becoming second nature for many repairs — reprogramming vehicle control modules with updated calibration files using the Service Programming System (SPS). The calibration files contain the data that manage vehicle control functions. The programming process uses Pass-Thru Programming through the Multiple Diagnostic Interface tool (MDI/MDI 2).

gm-sps-programming-instruction-1

But successful reprogramming of an existing control module as well as programming a new module, including for installation of GM Accessories, requires that the programming process be followed properly every time, including correctly preparing the vehicle for programming, setting up the necessary tools, and reviewing the Service Information.

Check the Service Information Every Time

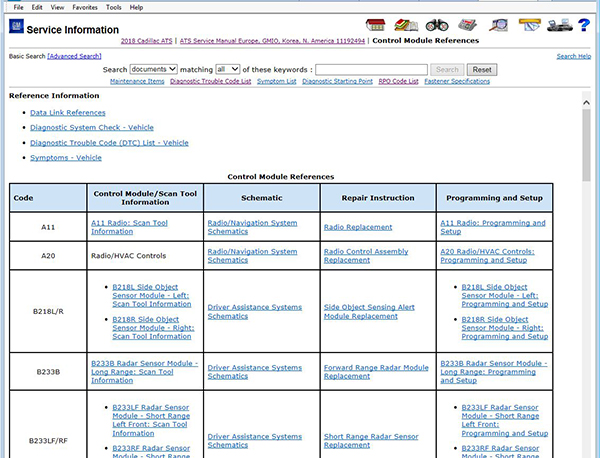
The Service Information should always be reviewed for the appropriate programming and set-up procedures of an individual module. Based on the control module being programmed, some vehicle modules will require configuration, reset or learn functions to be performed after programming. Review the Control Module References in the Service Information for module-specific programming and related procedures. These procedures must be completed in the correct order. Failure to perform all programming actions at the same time on a vehicle may result in additional drivability concerns.

gm-sps-programming-instruction-2

Programming Basics


There are a number of steps that should be followed for all programming events


  • Do not program a control module unless directed to by a service procedure or a Service Bulletin. Programming a control module at any other time will not permanently correct a customer concern.
  • GM does not recommend reprogramming with the same calibration. If the Same Calibration/Software Warning is noted on the SPS Controller screen, do not attempt to program the module.
  • Ensure the programming tool is equipped with the latest software and is securely connected to the Data Link Connector. If there is an interruption during programming, programming failure or control module damage may occur.
  • The MDI 2 has wireless capability; however, it is recommended when programming a control module that it is hard wired to the programming tool with the SPS application.
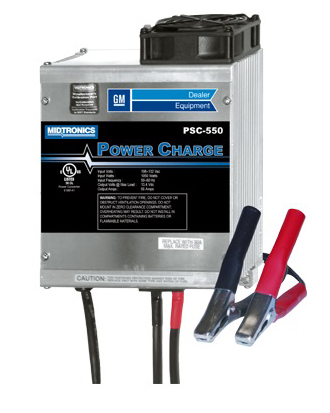
  • Maintain stable battery voltage during programming by installing the EL-49642 SPS Programming Support Tool. Any fluctuation, spiking, over voltage or loss of voltage will interrupt programming. If the EL-49642 tool is not available, connect a fully charged 12V jumper or booster pack disconnected from the AC voltage supply. Do not connect a battery charger.
  • Turn off or disable systems that may put a load on the vehicle battery such as: interior lights, exterior lights (including daytime running lamps), HVAC, radio, etc.
  • During the programming procedure, follow the SPS prompts for the correct ignition switch position. To help avoid damage to vehicle control modules, do not turn off the ignition during reprogramming unless instructed to do so.
  • Clear Diagnostic Trouble Codes (DTC) after programming is complete. Clearing powertrain DTCs will set the Inspection/Maintenance (I/M) system status indicators to NO.
  • Refer to the appropriate Programming and Set-up procedures in the Service Information for the control module being programmed for additional information on programming.
  • Always record the SPS Warranty Claim Code on the job card for warranty transaction submission.

gm-sps-programming-instruction-3


USB Programming

USB port programming allows for Human Machine Interface (Infotainment, Navigation, XM, and Audio programming) and Instrument Cluster programming. A USB File Transfer is used to transfer data files from SPS to a USB flash drive, or memory stick. Using the USB flash drive reduces the programming time of large calibration files. The USB flash drive should have a USB 2.0 specification with a minimum of 512 MB.

gm-sps-programming-instruction-4

When using a USB flash drive, follow the precise order outlined in the programming procedures. Performing the steps out of order or not completing all steps may cause the programming to be unsuccessful or cause features to work improperly.


Before programming, be sure to check the appropriate Service Information to determine the correct USB port in the vehicle to use for programming. The USB port used for programming depends on the optional equipment on the vehicle.


Once the USB flash drive is installed in the proper USB port in the vehicle, the system will recognize that update files are available and the download will start automatically. Instructions will appear on the infotainment display. After the USB programming is completed, SPS programming should be performed.


TIP: Instrument Cluster Module Programming requires SPS programming first, then set-up and configuration, before USB file transfer.


Do not use the software on the USB flash drive to update multiple vehicles. A USB software validation must be done for each vehicle to be properly updated. This may or may not require writing new files to the USB flash drive.


Solenoid Valve Characterization Reprogramming

The solenoids in some transmissions require unique performance characteristic data in order to function at maximum efficiency. The data is stored in the Transmission Control Module (TCM). When a transmission assembly, TCM, or valve body is replaced, the performance characteristic data for the solenoids must be retrieved from an online web server and reprogrammed into the TCM using SPS.

Before beginning repairs, document the new Transmission Unique Number (TUN) on the transmission or the Part Unique Number (PUN) on the control valve solenoid body. These numbers can be difficult to access when the components are installed on the vehicle.

In SPS, once on the MCVM (Mechanical Characterization and Virtual Matching) Operation Selection screen, the TUN or PUN will be needed if replacing a transmission part. SPS will read the VIN from the Engine Control Module and retrieve the applicable genealogy data tree from the online web server. The data tree includes the original characterization data so that it can be updated with the new component information. The TCM is updated with the correct solenoid characterization data, and the online server is updated with the new genealogy relationship.

Solenoid valve characterization reprogramming must be completed before performing a transmission Service Fast Learn procedure. The characterization data is needed in order for the TCM to learn the individual clutch apply pressures during the Service Fast Learn procedure. Be sure to follow the exact sequence of the Service Fast Learn procedure as outlined in the appropriate Service Information.


Electrical Procedures

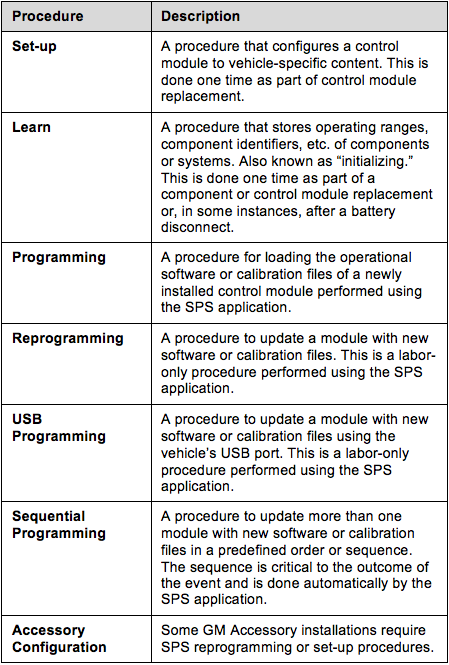
Following is a list of electrical procedures that are associated with reprogramming or control module replacement.

gm-sps-programming-instruction-5

– Thanks to John Yadlosky and Bret Raupp

2M2 Tank makes unusual noise solution: 100% works

$
0
0

Problem:

Receiving 2M2 Tank key cutting machine, I test it and find it makes unusual noise. I took two short videos. Hope you help me out.

https://youtu.be/xMLZ4RjUeu0

https://youtu.be/r83VPR0z_Ow


uobdii.com Engineer solution: 100% works

Dear friend!

1.The trouble is due to collide on the way. so it is easy to solve it, please check belt and PCB board by following my instructions. and send pictures to me.


2.You installed the cutter & probe at the wrong place, please install

them by following the next youtube videos.

install probe & cutter + calibration


3 steps to check the belt:

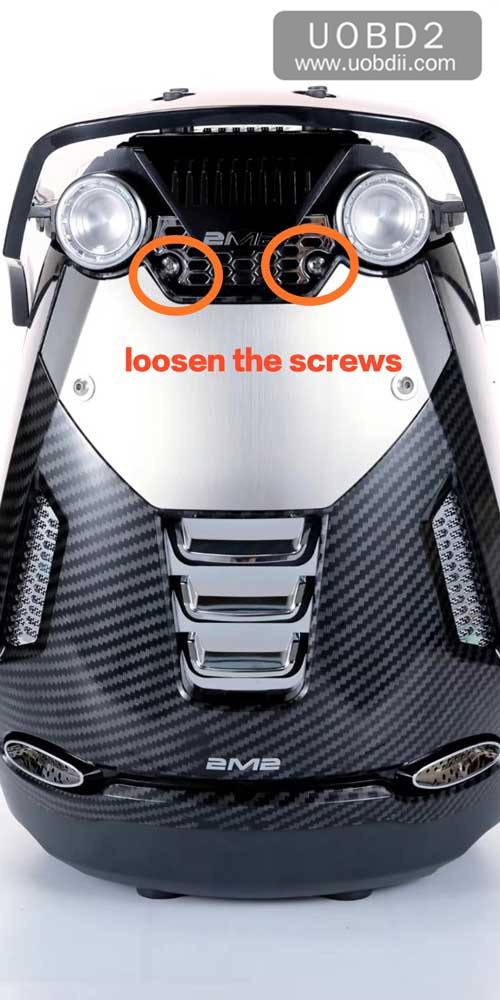
Look for 5 screws at the bottom.

check-the-belt-of-2m2-tank-01


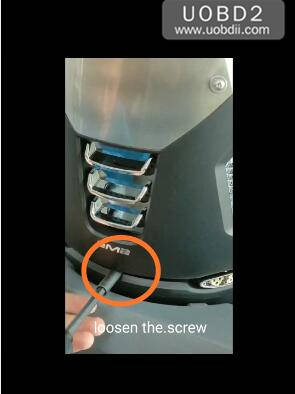
Loosen the 5 screws.

check-the-belt-of-2m2-tank-02


Take a picture and send me.

check-the-belt-of-2m2-tank-03


3 steps to check the PCB board:

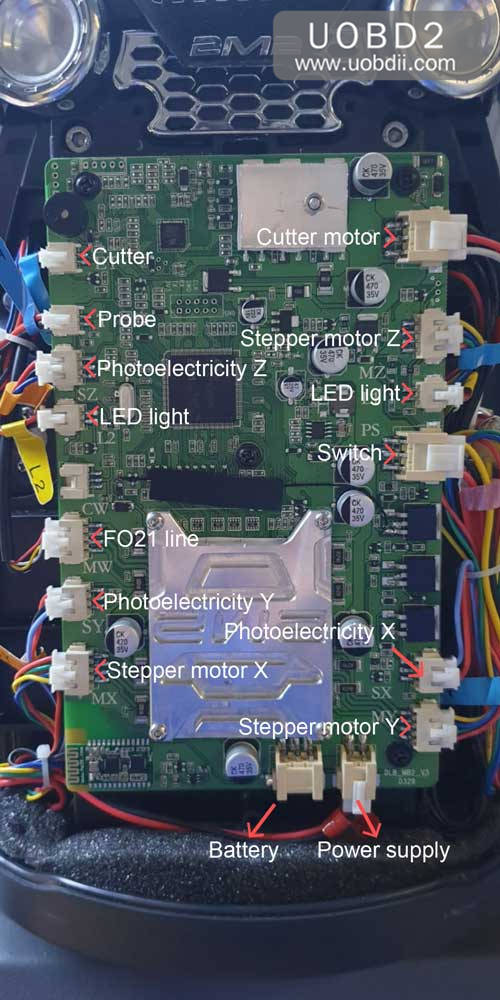
This is 2M2 Tank PCB.

check-the-pcb-board-of-2m2-tank-01


Loosen the screws.

check-the-pcb-board-of-2m2-tank-02 check-the-pcb-board-of-2m2-tank-03 check-the-pcb-board-of-2m2-tank-04


Good luck


www.uobdii.com


Dodge Ram Key Programming Using Launch X431 V

$
0
0

Launch X431 V is verified to add two new keys for Dodge Ram successfully.


Video Guide Here:

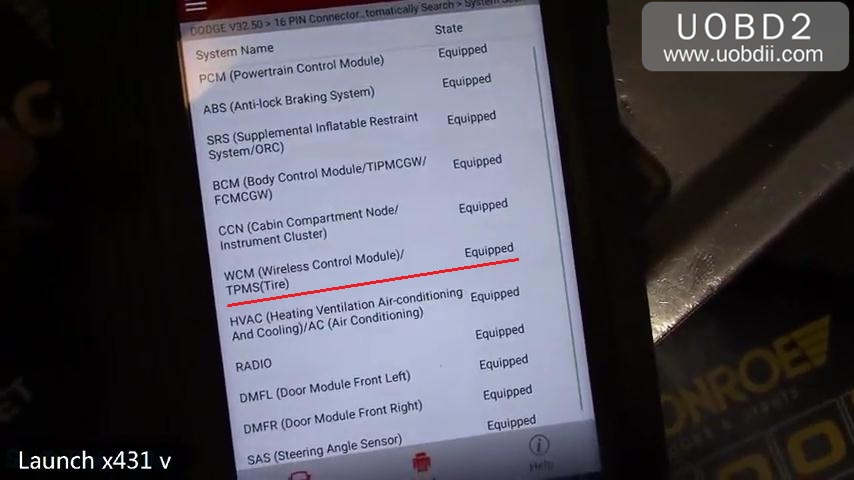
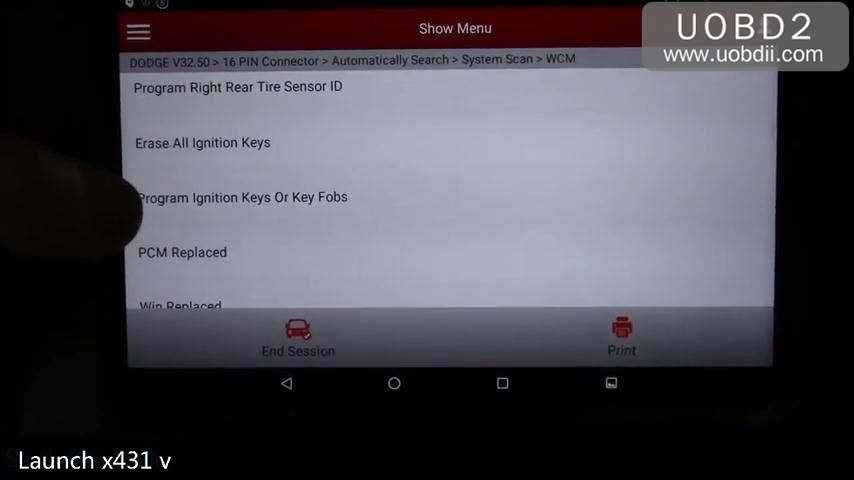
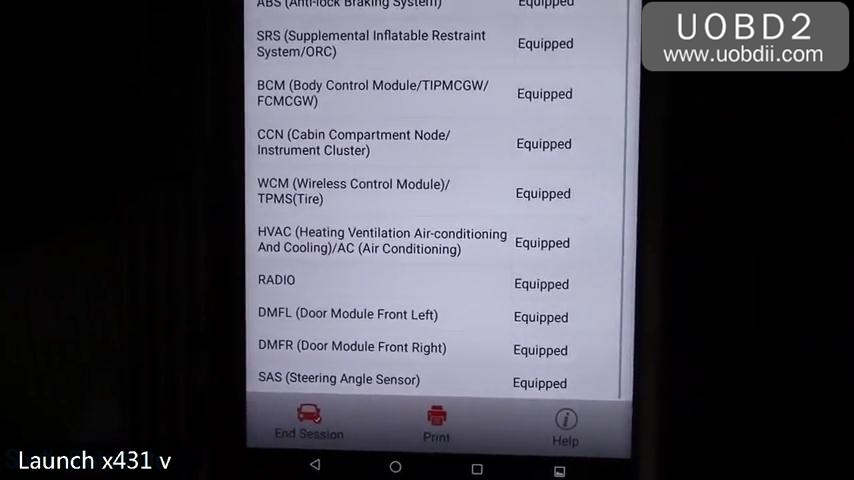
I’ve logged in here I got to boot Launch X431 V up. I did a system scan to see what modules it’s equipped. We’re gonna enter into the wireless control module that will go hop in the car hopefully.

dodge-ram-key-programming-using-launch -x431-v-01

Enter special function.

dodge-ram-key-programming-using-launch -x431-v-02


Enter “Program Ignition Keys or Key Fobs”.

dodge-ram-key-programming-using-launch -x431-v-03


Performing this function may change the state of the vehicle, please exercise caution.

dodge-ram-key-programming-using-launch -x431-v-04


This function is to be used when programming a new ignition key or reprogramming an existing. It will program the win functionality along with the RKE functions. Ignition should be in run position while running this function.

dodge-ram-key-programming-using-launch -x431-v-05 dodge-ram-key-programming-using-launch -x431-v-06


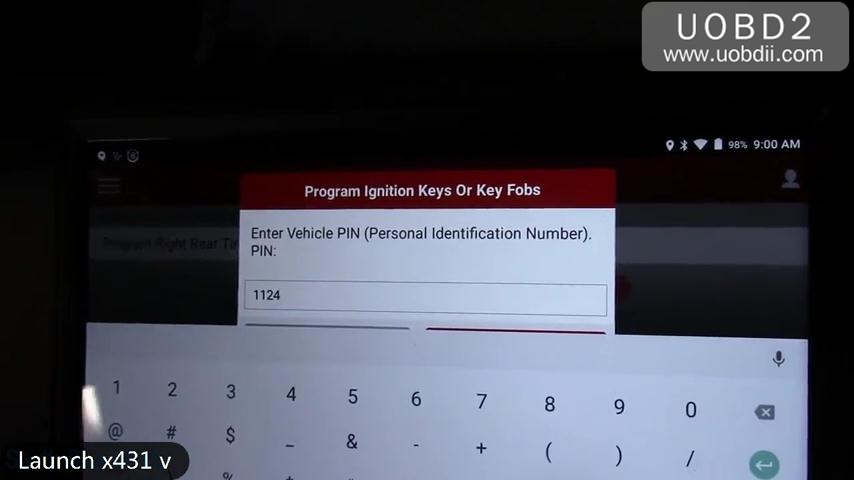
Okay, we put in a pin.

dodge-ram-key-programming-using-launch -x431-v-07

Please verify that is the correct PIN for this vehicle before continuing. Warning! Entering the incorrect PIN 3 times will cause the WCM/Win to enter anti-scan lockout.

dodge-ram-key-programming-using-launch -x431-v-08


Place un-programmed ignition key into the ignition, turn the key to the run position and continue.

dodge-ram-key-programming-using-launch -x431-v-09


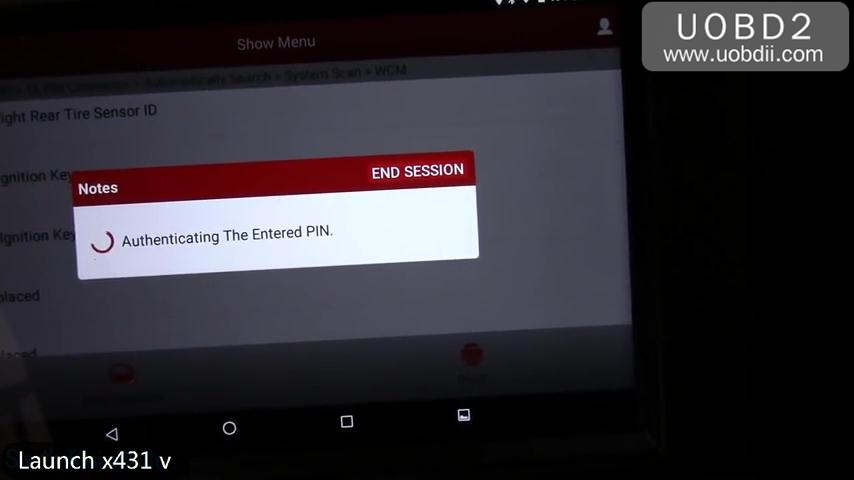
Authenticating the PIN.

dodge-ram-key-programming-using-launch -x431-v-10


Programming, please wait…

dodge-ram-key-programming-using-launch -x431-v-11


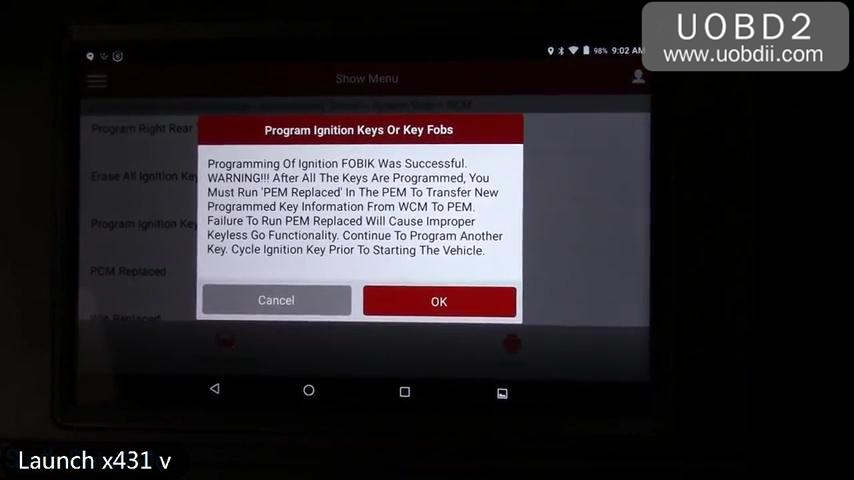
Programming of ignition FOBIK was successfully.

Click Yes. And get window message ” Place un-programmed ignition key into the ignition, turn the key to the run position and continue. ”

dodge-ram-key-programming-using-launch -x431-v-12 dodge-ram-key-programming-using-launch -x431-v-13


Programming of ignition FOBIK was successfully.

Click on “Cancel”.

dodge-ram-key-programming-using-launch -x431-v-14


Communicating, please wait…


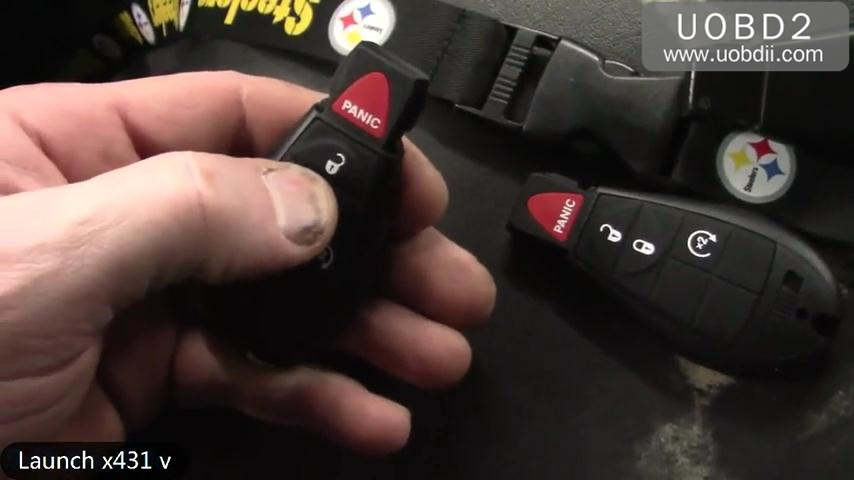
I called my friend, and he says not all Chrysler have the PM RFH module, questions me whether or not the vehicle had remote start.

These are the other key fobs the new ones.

We could use this one and see if the remote start works. And it does, so it’s good.

Then we spill it stick it in turn it on, security light on and security light out.

dodge-ram-key-programming-using-launch -x431-v-15 dodge-ram-key-programming-using-launch -x431-v-16

dodge-ram-key-programming-using-launch -x431-v-17

Job is done.


Launch X431 V8 is excellent, help me save hundreds of dollars.

Best key programmer: Obdstar DP Plus vs Lonsdor K518 vs Autel IM608

$
0
0

MHH Poll: Compare about IM608 from Autel Maxisys Elite and Obdstar DP+ and Lonsdor 518, which Is Better?

26 votes in total:

OBDSTAR X300 DP Plus 46.15%

Autel MaxiIM IM608 38.46%

Lonsdor K518 15.38%

Obdstar DP Plus vs Lonsdor K518 vs Autel IM608

Poll Autel MaxiIM IM608 and reasons:

I own the Autel MaxiIM IM608. I purchased it because I wanted to do more key programming. My first vehicle I used it on, was a 2015 Fiat 500 NEC MCU in BCM. I could not find PIN in NEC, I was able to read with VVDI prog. So I purchased the Autel IM608, it was able to read pin no problem. Went to precode the transponder (Dealer key would have worked no problem but I was using aftermarket) and the IM608 would not get the needed information from IMMO (said Failed, Locked BCM, had to disconnect battery to regain communication).

So I called Autel support (China) I tried Autel USA but they didn’t seem too knowledgeable. Autel support china within minutes could see the error on their server, they sent me Beta software for IMMO_FIAT to attempt and solve the problem. It worked perfectly.

All other vehicles I have tried have gone well, I was curious about Incode/outcode in newer fords. It programmed a key on 2018 Ford transit no problem, didn’t ask for any pins or incode/outcode.

I only purchased the Autel because I have their Maxisys Elite and ADAS frame and I am very happy with their tools. I have never used a Lonsdor or OBDStar so I cannot comment on their performance.

One big bonus to the IM608 is you also get SCN Coding, VW online coding ect. I use the XP400 to clone modules all the time, VVDI prog used to be my “go to” but now Xp400 is.

Is it a rookie tool? Nope, if you’re a rookie you’ll probably be frustrated. But if you have basic EEPROM and MCU skills / Locksmith skills id highly recommend it.


Poll OBDSTAR X300 DP Plus and reasons:

I have OBDSTAR x300 dp , with RFID and EPROM adapters, I’m really happy with it , never had any problem.
I made several keys but mostly I use it for mileage correction. Anyway to do locksmith job u need other tools not just one of these posted here.


If you are considering to have one OBDSTAR, it depends on what main job you want to do, they have newest ODO Master for mileage correction and X300 Pro4 for locksmith. Their price is half of OBDSTAR X300 DP Plus.

Read:

OBDSTAR ODO Master car list

Comparison table X300DP Plus vs X300 Pro 4


Poll Lonsdor K518 and reasons:

I have Lonsdor K518 and it works good with all newer Fords. Even with all keys lost. I have done 2018 Explorer, 2017 Expedition, 2015 F150, etc.

It works good with Maserati key programming as well.

Land Rover has good coverage.

I’ve done BMW FEM/BDC All keys lost. (It was easier with Lonsdor than Autohex and VVDI).


Videos on how to operate Lonsdor K518S on various car models:

Click Here:Lonsdor K518 Video Guide Play List

More than 20 videos

Lonsdor K518S = Lonsdor K518 English version.


Lonsdor K518 Cons:

Can add new key for Continental MQB, not Jonson control MQB


www.uobdii.com

What’s good of SDConnect C4 in C5 housing?

$
0
0

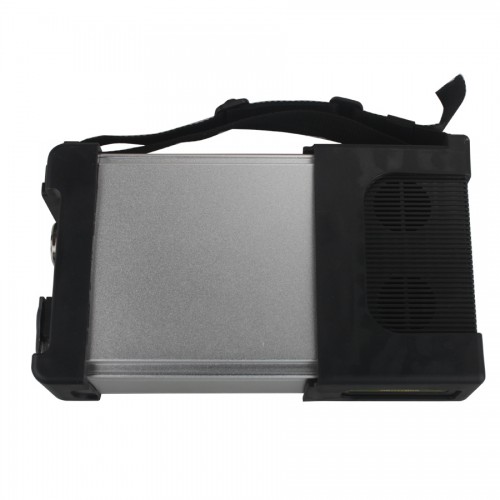
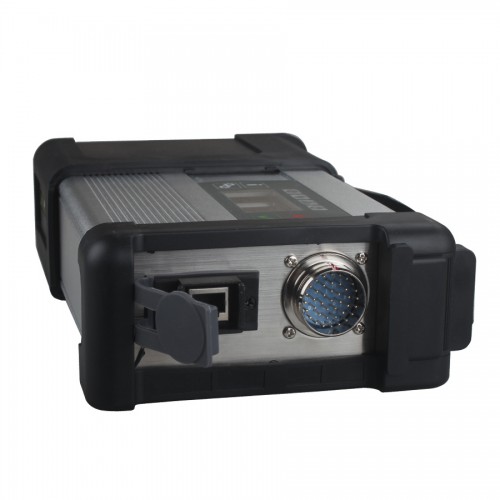
SDConnect C4 in C5 housing is designed specifically for hot climates.


Full kit (main unit + 5 cables) – 339 USD:

1pc x C5 Multiplexer (New C5 Case)

1pc x OBDII 16PIN Cable

1pc x 38PIN Cable

1pc x 14PIN Cable

1pc x 8PIN Cable

1pc x Lan Cable

SDConnect-C4-in-C5-housing-4

source: http://www.uobdii.com/wholesale/mb-sd-connect-compact-5-star-diagnosis-with-wifi.html


After receipt from the manufacturer, as well as for multiplexers in the classic SD Connect case, our specialists perform several stages of improvement (Full upgrade):

1Unique white serial number firmware (guarantee against blocking)

2.Setting the “shutdown” function – full power off

3.Fix battery charging error “Insert / check batteries” ” batteries can not be charged»

4.Replacing the stock (Chinese) WiFi NEC card to the original D-Link used in the original SDConnect multiplexers. The original D-Link card provides a much more stable Wi-Fi connection.

5.Update the multiplexer with the latest firmware


In addition to the above improvements, for the body C5 is made:

Installation of active cooling system. The system provides a continuous flow of air through the entire inner cavity of the body.

Install lithium batteries instead of NiMh / NiCd batteries

Mercedes Star Diagnosis SDConnect C4 in C5 housing is identical to the classic multiplexer circuit design and equipment of five cables. It functionally completely repeats the classic version. Just like the classic SDConnect, it has a full disable feature, white serial number, firmware updated to the latest version.


The differences are in the presence of effective active cooling and the use of lithium batteries.


SDConnect-C4-in-C5-housing-1 SDConnect-C4-in-C5-housing-2 SDConnect-C4-in-C5-housing-3

Specialists who have experience with SDConnect C4 in a classic case, known for its drawback as a significant heating during prolonged use. The lack of ventilation and the small internal volume of the body create conditions for significant heating of the device elements. This effect is especially noticeable in regions with a hot climate, where overheating of the device can lead to a decrease in its performance — “hanging”. In particularly hot conditions often have to resort to short-term (with pauses) mode of operation with the multiplexer SDConnect C4.


For regions with hot climates, the most suitable option for Mercedes diagnostics is the Mercedes Star Diagnosis SDConnect C4 in the C5 body with active cooling.


The use of the SDConnect C5 case with the installed active cooling system completely eliminates the multiplexer from such a disadvantage as overheating. First, the C5 case has a much larger internal volume, which allows you to install a radiator with a large cooling surface area on the CPU (see photo). Secondly, the presence of two built-in fans and ventilation holes creates forced air circulation through the body of the device. Under such conditions, the temperature regime of the electronic components of the multiplexer remains far from critical, regardless of the duration of continuous operation.


Another positive difference between the SDConnect multiplexer in the classic case and the SDConnect C4 in the C5 case, in addition to the active cooling system, is the use of lithium batteries in the latter. The advantages of lithium-ion batteries in comparison with Nickel batteries include lower self-discharge, longer service life and higher specific capacity.

ECU programmer Iprog+ Pro clone V80 vs.V77 V76

$
0
0

Newest ECU programmer Iprog+ Pro clone V80 update, it is different from Iprog+ V77 in the aspect of car models.


Please firstly look at Iprog+ Pro clone V80 main unit and its adapters:

iprog-plus-clone-v80-01 iprog-plus-clone-v80-02


As you can see, it contains one iprog+ main unit, one RFID 125+134 adapter, one EEPROM adapter, one UARTBDM adapter, one 16pin cable, one USB cable, one CD, one CAN adapter, one K-line Adapter, one Welding Line.


Next is Iprog+ Pro clone V80 function display:

 1.Airbag

Read and erase Airbag crash to some cars
Read and erase DTC
Repair CFG

iprog-plus-clone-v80-03 iprog-plus-clone-v80-04

2.Others:

Dashboard: Read km, write a new km


Car Radio: Read and erase info; Reset count


ECU: Immo OFF, DPF off


EEPROM: Read/write/erase eeprom


IMMO:

Program and copy chips for cars and truck
Unlock keys
Cover Toyota smart keys: reset key prepare
Write a key by immo dump


MCU: Read and write chips, Cover chips Atmel, Fujitsu and microchips Motorola, NEC v850


Special functions:  Mile to km, Pincode from dump

iprog-plus-clone-v80-05 iprog-plus-clone-v80-06 iprog-plus-clone-v80-07 iprog-plus-clone-v80-08


Finally, for the Iprog+ Pro V80 installation, it is as the same as Iprog+ Pro clone V77.

Refer to Iprog+ Pro clone V77 installation.


Enjoy.

How to do G30 VLD (low beam) coding with ENE cable

$
0
0

My ENET cable has arrived. I definitely want to do the anti-dazzle, widescreen CarPlay, and possibly VLD.

bmw-enet-cable


The link: http://www.uobdii.com/wholesale/bmw-enet-ethernet-to-obd-interface-cable-e-sys-icom-coding-f-series.html


VLD is explained in Almaretto’s G30 coding doc. It allows the headlights to turn with the steering wheel at low speeds. Crazy not to get coded while doing everything else.

LD found in Coding


It is decoded for US as is anti-dazzle. It is more complex than just turning the lights:

Here is a more detailed explanation about VLD found in Coding

Thread thanks to opasha

Variable Light Distribution has several different modes of operation (for Low Beam):

1 – City Light: Shallow and Very Wide Beam Pattern active from 0 – 50kph (30MPH) (Both Headlamps are Panned outwards 12 horizontal from center and 0.7 lowered vertically)

2 – Standard Light: Same Basic Beam Pattern as with 8S4 Enabled and Headlamp Switch Set to Auto. Active from 50 – 110kph (30MPH – 68MPH)

3 – Guiding Fog Light – Shallow and Wider Beam Pattern Enabled with the Front Fog Lamps On and Headlamp Switch in Auto and Speed 0 – 110kph (Both headlamps are panned outwards 8 horizontal from center and lowered 0.7 vertically)

4 – Highway Light – Long Throw Pattern illuminating approx. 25% further than Standard Light. Active from 110 to 250kph (68MPH- 155MHP). (Driver’s Side Headlamp is panned 3.5 outwards Horizontal from center and lowered 0.25 vertically, while the passenger side headlamp is raised 0.2 vertical) (thank you @shawnsheridan)

Clarification of VLD, HBA, and Anti-Glare/Anti-Dazzle (thank you @skalberti):

VLD is Variable Light Distribution – It only works on your low beams to move your headlights and position the beams on the road depending on steering angle and vehicle speed.

HBA is High Beam Assistant – USA spec high beams that turn off in the presence of headlights or taillights of other cars and automatically turns the high beams on if no other cars are present.

Anti-Glare, Anti-Dazzle – European spec high beams that enable your car to keep the high beams on without blinding other cars.

VVDI Prog+Special Adapter for BMW CAS4 Reading without Soldering

$
0
0

It is necessary to remove and solder for BMW CAS4 data reading,it will cause data damaged/loss.So here give the solution without removing and soldering during you use VVDI Programmer to reading data from BMW CAS4.


What You Need?

BMW CAS4 Clip Adapter

Xhorse VVDI Prog


BMW CAS4 Data Reading Socket can prevent data loss, specialized for VVDI PROG Programmer

BMW CAS4-5M48H-1N35H, easy to operation, no need disassembling, no need welding, it is a powerful data reading tool.

vvdi-pro-bmw-cas4-clip-adapter-user-instruction-01


CAS4 clip adapter includes adapter cable (for vvdi pro), clip A and clip B.

Before using clip A and clip B, please use one blade to remove the glue on the contact surface to prevent poor contact between the probe and the circuit board.

vvdi-pro-bmw-cas4-clip-adapter-user-instruction-02


Read BMW CAS4 data wiring diagram

vvdi-pro-bmw-cas4-clip-adapter-user-instruction-03


Note:

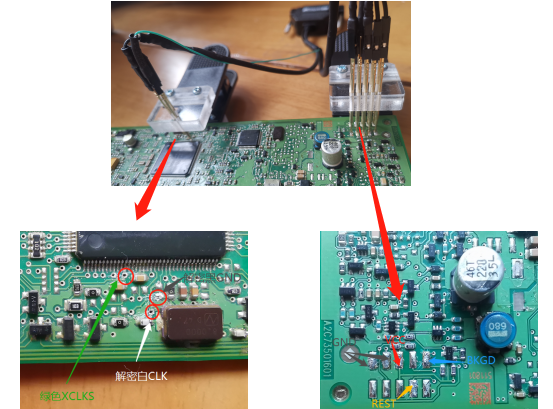
This auxiliary clip reads CAS4 data without welding, but it lengthens the length of the wiring harness. Some types of CAS require multiple attempts to read out. It is recommended to try 3-5 times (the data will not get lost). If you can’t read the data after repeat attempts, please read the data in the traditional method.

VVDI MB Renew Benz SIM271DE2.0 & SIM271KE2.0

$
0
0

In this instruction,uobd2 will show you guide on how to use VVDI MB Tool to renew Mercedes Benz SIM271DE2.0 & SIM271KE2.0.


What You Need?

Xhorse VVDI MB Tool

SIM271DE2.0 ECU renew cable (No need to disassemble ECU)

Mercedes SIM271KE2.0 renew cable (No need to disassemble ECU)


VVDI MB renew Mercedes SIM271DE2.0 on Bench

This is Mercedes SIM271DE2.0 renew cable:

mercedes-sim271de20-renew-cable-01


This is Mercedes SIM271DE2.0 ECU box dismantled from the car.

mercedes-sim271de20-renew-cable-02


It is simple to use Mercedes SIM271DE2.0 renew cable and vvdi mb tool.

Use the OBD2 cable to connect vvdi mb tool and SIM271DE2.0 renew cable, then to the ECU box, then to one computer.

mercedes-sim271de20-renew-cable-03


Install vvdi mb tool software in one computer (win 7 8 10)

Click on “Renew ECU /Gearbox”.

Click on “Read”.

Connecting to unit…

Reading data, please wait…

Soon, reading data success.

Click “Renew” to continue.

mercedes-sim271de20-renew-cable-04 mercedes-sim271de20-renew-cable-05 mercedes-sim271de20-renew-cable-06


VVDI MB renew Mercedes SIM271KE2.0 on Bench:

Here is the Mercedes SIM271KE2.0 renew cable

vvdi-mb-renew-mercedes-sim271ke2.0-via-obd-01


This is the Mercedes SIM271KE2.0 ECU box dismantled from the car.

vvdi-mb-renew-mercedes-sim271ke2.0-via-obd-02


How-to guide:

Connect vvdi mb tool to the renew cable with the 16pin cable, and to the SIM271KE2.0 ECU box, on the other end, use one USB cable to connect one computer.

vvdi-mb-renew-mercedes-sim271ke2.0-via-obd-03


Install vvdi mb tool software in the computer.

Click on “Renew ECU /Gearbox”.

Click on “Read”.

Connecting to unit.

Reading data …

Reading data success.

Click “Renew” to contine.

vvdi-mb-renew-mercedes-sim271ke2.0-via-obd-04 vvdi-mb-renew-mercedes-sim271ke2.0-via-obd-05 vvdi-mb-renew-mercedes-sim271ke2.0-via-obd-06


Can Yanhua acdp read 2008 BMW 335 ISN?

$
0
0

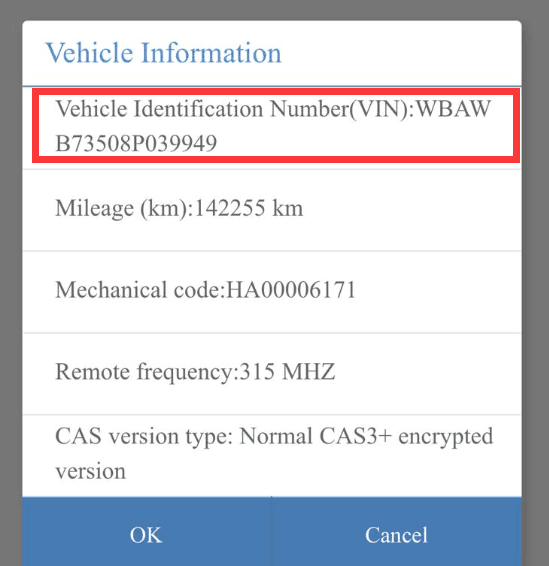
Yanhua acdp programmer can read most 2008 BMW 335 ISN, for 100% confirmation, please provide me with the car VIN number to check the specific DME model.


This is 2008 BMW 335 VIN number.

yanhua-acdp-read-2008-bmw- 335-isn-01


uobdii.com engineer reply:

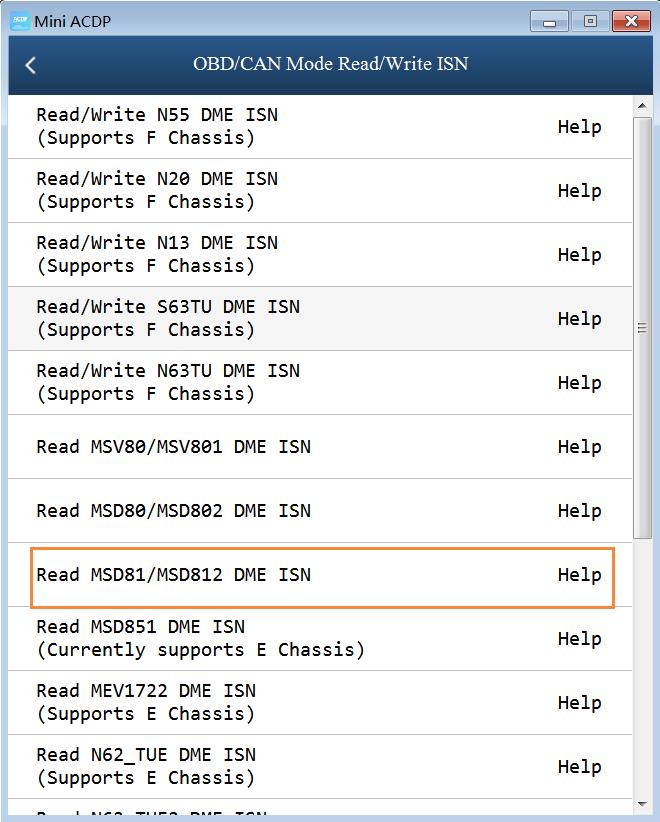
After confirming, the engine is MSD81, yanhua acdp is able to read the ISN.

yanhua-acdp-read-2008-bmw- 335-isn-02


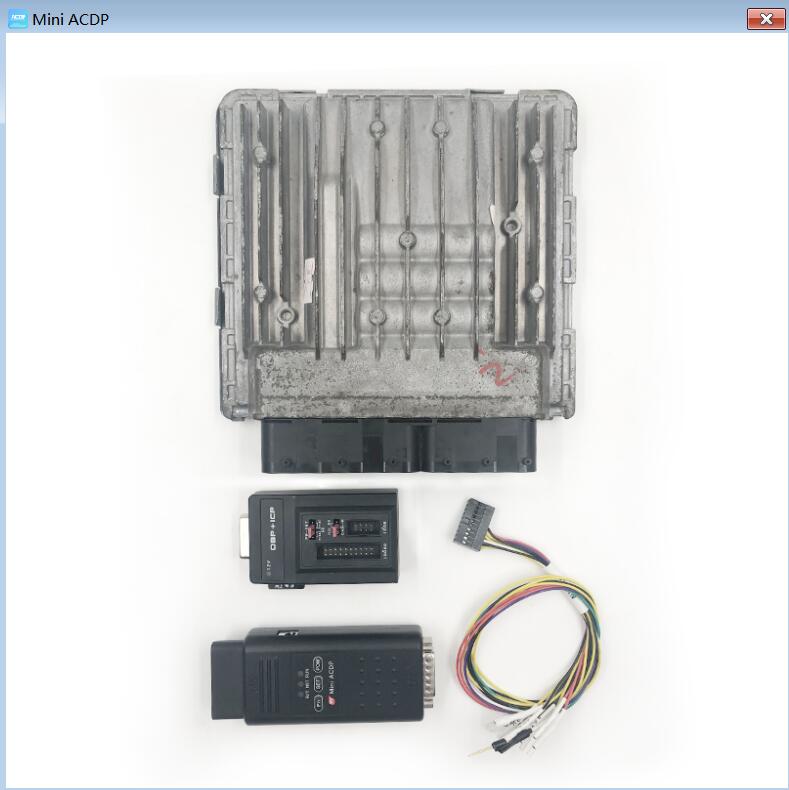
For your information, to use yanhua acdp to read BMW ISN, you need one extra Module 3.

Good source of yanhua acdp

http://www.uobdii.com/wholesale/yanhua-mini-acdp-programming-master.html


Good source of Module 3

http://www.uobdii.com/wholesale/yanhua-mini-acdp-read-bmw-dme-isn-code-by-obd-module.html


yanhua-acdp-read-2008-bmw- 335-isn-03


After receiving the hardware, please obtain the authorization by yourself.

Tutorial: How to obtain Yanhua acdp authorization by yourself.

What kinds of key cutting machine do you use?

$
0
0

Here, have collected answers under a post about ” What kinds of key cutting machine do you use?”


James Kennedy Triton

Fórizs Józsi Xhorse condor Mini , silca 2000 and some cheap chinese cutters

Óðinn Sigurðsson Silca Unocode 299 and 399, Silca Triax, Silca Idea, Miracle 9 and then a few copiers

Robert N. Simmons Jr. Rytan 256, Framon 2, XHorse Mini Condor Plus, Scotsman in the truck.

Jorge Aguilar XHorse Dolphin

Марин Узунов Miracle A9

Heriberto Padilla Xhorse dolphin

Aylin Cherkez Xhorse dolphin

Joe Taylor Maurice plus mini and sec 9

Jeremy Causey Xhorse condor xc-009, dolphin xp-007 and dolphin xp-005 all cordless great for mobile service no need for a heavy duty power inverter if you have a van

its portable no need to plug it in that’s the main difference other than the touchscreen other then that they do everything else the same

Ignat Ignatov Gymkhana 994

Dan Florko 2- itl959c ‘s
Matrix retro
KD50
Rytan
Silca
Delta fo (tibbe)
Scotsman
And more to come soon


Conclusion:

The most popular is Xhorse key cutting machine

Top 1 xhorse key machine is the Dolphin

xhorse_dolphin_key_cutting_machine


source: http://www.uobdii.com/wholesale/xhorse-condor-dolphin-key-cutting-machine.html


DOLPHIN is the latest portable automatic key cutting machine with a built-in battery inside.


It has all the capabilities of Condor XC Mini.


Dolphin works on mobile phone application via bluetooth connection. There is no touchscreen, instead you interface with the machine via the mobile phone or tablet.


M1/M2 Jaws included.

M3 Jaw – optional purchase.


Specifications:


Working temperature: -10~50℃

Working Humidity: 10%~90%

Battery capacity: 64.75w.h

Standby power: 15W

Motor Rotation Speed: 10000-13000 RPM

USB Port: USB2.0

Machine Dimension: 315x218x270mm

Net Weight: 15KG

Gross Weight: 18KG

POWER: 100W


POWER PARAMETER: 12-24V


MOTOR TORQUE: 0.15Nm


Features:


Precision Production: All aluminum body structure, Manufactured by Germany-made DMG CNC machine

Data Richness: Provide rich vehicle data, blank key data, the best tool of all key lost.

Built-in Lithium Battery: Optimized lithium battery of well-known brand, stable and reliable, support cutting under no power conditions.

Clamps: Standard equipped two clamps M1 and M2, supports Sided, Track, Dimple and Tibbe keys. Optional M3 clamp and M4 clamp are available, M3 clamp is applicable to Ford FO21 & Citroen SX9 keys, M4 clamp is applicable to single-sided house-keys (duplication only).

One year warranty

Intelligent Control: Provide powerful free App, support multi-language, support mobile phone, tablet computer and other intelligent terminal control, easy for operations.

High Efficiency Cutting: Use American famous brushless motor and screw rod, high efficiency and stability, create high precision cutting quality.

Online Update: Provide free software upgrade service, software function and database.


Accessories:

M1 Clamp – included

M2 Clamp – included

M3 Clamp (optional)


Kukai Alpha vs. Kukai SEC-E9 Key Cutting Machine

$
0
0

Kukai Alpha is better than Kukai SEC-E9 Key Cutting Machine in the following aspects:

1.Save money in clamps

No additional purchase required for the clamps of these types of keys (HU66,HU64, VA2, TOY2, BW9, SIP22, HU162T, LDV etc). like Kukai SEC-E9

2.Can cut dimple keys using the standard clamp.

3.Has engraving capability that the newest Kukai SEC-E9 doesn’t have.

4.Has higher accuracy than Kukai SEC-E9.

5.Much smaller cutting noise than Kukai SEC-E9.

The new keys that are cut are also much smoother.

6.Kukai Alpha warranty: 2 years

Kukai SEC-E9 warranty: 1 year

7.Some users prefer Kukai Alpha outlook to Kukai SEC-E9 outlook.


In details:

Details Kukai SEC-E9 automated key cutting machine Kukai Alpha automatic key cutting machine
Outlook Kukai SEC-E9


Kukai Alpha


Screen E9: 7″ Touch Screen (Without Battery)
EP&EB&EU: 8″ Tablet (With Battery)
EA: 7″ Android Screen (Without Battery)
7″ Android Screen (Without Battery)
Size 255(W)*360(H)*340(D)mm 305(W)*300(H)*400(D)mm
Weight 19.5kg 16kg
Main clamp One Jaw to support car keys (including double standard keys and laser keys) 4-way Jaw to support car keys (including double standard keys and laser keys), special car keys( HU66, HU64, VA2, TOY2, BW9, SIP22, HU162T) and dimple keys
Optional House Jaw Dimple key jaw, Single-sided key jaw, Tubular key jaw Single-sided key jaw, Tubular key jaw
Optional Car clamps
HU66, HU64, VA2, TOY2, BW9, SIP22, HU162T, FO21, LDV FO21
Accuracy High Higher
Engraving Function Serial Number starting by E9, EP, EU only Yes
Duplicating Function Double-sided keys, Single-sided key, Tubular keys Double-sided keys, Single-sided key, Tubular keys, Single external groove keys, Double external groove keys, Internal groove keys
Key Code Function Yes Yes, but have detailed keycode range and classification based on the car brand list.
Progression Function Serial Number starting by EP, EB, EU, EA only Yes, and support to search bitting numbers of ignition lock based on those of door lock for HU162T (Vice Versa)
Create Key Profile Function Yes Yes
Cutting History Function Yes Yes
Favorite Function Yes Yes
Software Upgrade method WIFI and USB WIFI and USB
Communication method USB and Bluetooth for different versions USB and Bluetooth for different versions
Extra Function LED light LED light & 2 Toolboxes for putting decoders/cutters/calibration block/stopper
Released Time 2014 2019
Warranty 1 year 2 years
Retail Price $2195 (Xmas sale) $2,995


Cheap BMW OBD2 reader reviews: Autel AP200, INPA, ISTA / P, Foxwell NT530, C110

$
0
0

Recommend 5 cheap BMW OBD2 readers:

Autel AP200 code scanner

INPA

Creator c110

Torque app

Foxwell NT530


Reviews in details…

1.Will a $60 OBD2 reader work with your BMW? Autel MaxiAp AP200 Bluetooth OBD2 scanner review:

Autel AP200 code scanner was easy to set up and it’s really easy to use. It scans tons of modules and gets lots of live data in charts that you can easily manipulate the range, C or F, display type, etc.
Example: to change the trans fluid on this car (I don’t believe that any automotive fluid is really “lifetime”) you have to complete the final fill at a certain operating temp range – this tool will give you real time data.
Turbo spool RPM’s
Engine oil temp
Wheel speed sensors (these can cause all sorts of issues with these cars – if you have a bad one you can easily see because all 4 are shown at the same time on the same screen as you drive).
It can even tell you what door is open – I guess this is helpful if you’re having door contact sensor issues.

I’ve spent a grand total of 10 minutes with this tool but so far it’s an incredible value for a majority of users that need live data and manufacturer specific codes. Even if you aren’t a home mechanic it’s useful to pull codes when the light goes on (or iDrive warning pop up) and do some internet research (there’s a button next to the code readout that searches Google for you) and educate yourself so the mechanic doesn’t just completely hammer you with lies.

WELL DONE AUTEL – this product was a long time coming and you guys nailed the value proposition. I’d have paid twice this amount for adaptations and programming but I understand you have to protect your pro level $1000+ scanners. But if you’re listening my wallet is at the ready.

I’ll update this review as I learn more about the tool. But so far I love it.


Autel AP200 limitation: no bidirectional control or actuator test it

Compared to diagnostics units in the $300+ category (or the BMW diagnostics suite), the Autel AP200 is quite limited – so it doesn’t do all of the tests that a mechanic would want by any means. It is the bargain-priced error-reading tool with a few good functions for people who need to program a new key, put in a new battery or replace their own brake pads.


Autel MaxiAp AP200 BMW scanner price: 60usd  

autel ap200-01

Source: http://www.uobdii.com/wholesale/autel-maxiap-ap200.html

I am not going to tell you that this is the absolute best scanner for your BMW, but it is the cheapest I have found that actually works, and has some good features.


2.Pretty BMW specialized equipment: Inpa, ISTA / P etc

Autel AP200 scanner Cons / limitation: This unit appears to provide exact matches for all of the BMW error codes, so I expect it will give you valvetronic errors too. unfortunately if you want more than just the valvetronic error messages then this unit will not be right for you. You will need some pretty BMW specialized equipment (I.E ISTA /P)

To access everything in your BMW you would need to have a laptop with the full BMW dealer diagnostics software (INPA, DIS, SSS, NCS EXPERT etc).

bmw inpa-02

Image 2: BMW inpa cable ($17.99)


Ista D and Inpa tog tether will do more than anything else.
Ista D is what BMW used in there dealerships for years.
Inpa is there Engineering development tool.
You can do any type of coding with Inpa well beyond the canned
routines you get with things like Carly.
Ista D is like having a shop manual with guided trouble shooting. It also has schematics and mechanical diagrams
its something like 50 gigs of space on a disk.

The catch is you have to know your way around a PC and it you have Apple products you have to run these programs inside a Virtual
machine. It will also require effort to set up and learn to steer either of these.

bmw icom-03

Image 3: best BMW ICOM Next with Wifi ($359).  


3.golo easydiag x431 for BMW diagnosis

The Easydiag x431 does bi-directional actuator testing by the look of it, so it is a much more professional tool. But it is also more than 4x as expensive as Autel MaxiAP AP200, so it is not really a direct competitor.

golo-easydiag-04

Image 4: Launch Easydiag 3.0 Plus with BMW software + another one car software ($199 and no stock now)


4.Foxwell NT530 BMW scanner reviews

Foxwell NT530 BMW scanner loaded with the BMW software ($169) (Software for other makes are available for download at $60) is the ONLY low-cost tool I’ve ever seen that support multiple OEMs.

The BMW software for the NT530 is EXCELLENT, and provides access to not only the engine computer, but virtually ALL computers on the car – Engine, transmission, brakes, ABS, Traction Control, Air Bags, Audio, Navigation, Climate Control, Locks, Alarm, etc. Mine has already paid for itself many times over in the ~9 months I’ve owned it.

Foxwell NT530 BMW function list:

https://docs.google.com/spreadsheets/d/1CW5kw8_UYWNVG_wxjjZ6lgXS9zy2I8HsJI_rkBbURco/edit?usp=sharing


Foxwell NT530 Mini function list:

https://docs.google.com/spreadsheets/d/1apudxEGMZBm-e9xpZMrrHEBNyluV-3fT2vbXDs2cxQE/edit?usp=sharing


Foxwell NT530 Rolls-Royce function list:  https://docs.google.com/spreadsheets/d/1ayhAptKQ1RXWsbuP_SIiBCDIoTMZElOjKYxeCZinFtQ/edit?usp=sharing

foxwell--nt530-bmw-05 foxwell--nt530-bmw-06 foxwell--nt530-bmw-07


5.BMW Creator c110 reviews

I bought BMW Creator c110 for around $45, and it works perfect. But I think it’s gonna work only with E series, for the F series need a different one. I was using mine on E46, E38, E39, E53 and E60, read all the faults, made my life a lot easier, when fixing my cars. Anything that works, and saves yours money, it’s worth it.

Creator C110-08

Image of BMW Creator c110 ($44.9)


6.Torque app

A 15quid Generic Bluetooth OBDII module and 5quid (or so) Torque app works fine with my F30 BMW! Plus does live gauges and track recording telemetry. Although it does only connect to engine ECU.


Cons:

The Torque app does a lot of good things for sure, but unfortunately they haven’t cracked all of the BMW codes and sensors yet – so it misses too much to be used for diagnostics.

Torque app-09


To be upgrading…


www.uobdii.com

Yanhua acdp clear 8hp 45 isn “EGS version does not support” solution

$
0
0

Problem:

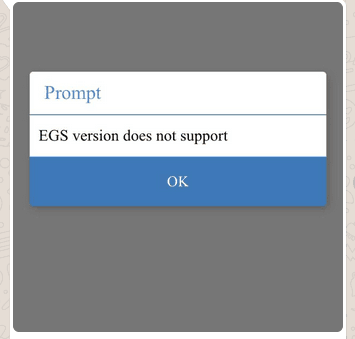
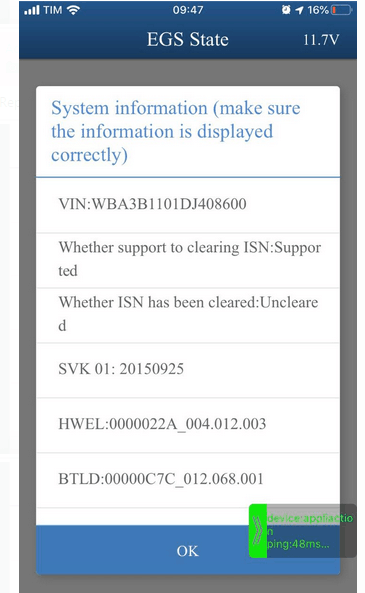
When I used Yanhua acdp to clear 8hp 45 isn, I got prompt “EGS version does not support”.


Yanhua-acdp-clear-8hp-45-isn-EGS-01


uobdii.com engineer replied:

Please send us the image like this.

Yanhua-acdp-clear-8hp-45-isn-EGS-02


User asked:

Do I need to remove the gearbox?

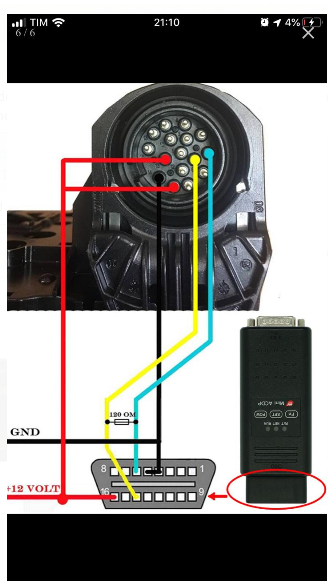
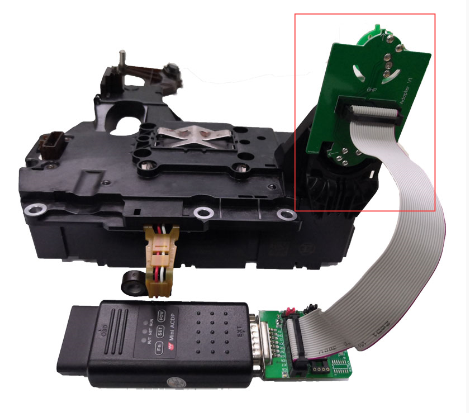
I operated by following the below diagram.

Yanhua-acdp-clear-8hp-45-isn-EGS-03


uobdii engineer replied:

Please send us the car VIN number.


User said:

Here you can see my VIN number.

Yanhua-acdp-clear-8hp-45-isn-EGS-04


uobdii engineer replied:

Please try in this method.

Yanhua-acdp-clear-8hp-45-isn-EGS-05


Finally. Problem solved.

For your information, to clear EGS ISN, Module11 is needed also, not only Yanhua acdp basic module.

Big thanks to Yanhua engineer.

Viewing all 3193 articles
Browse latest View live


<script src="https://jsc.adskeeper.com/r/s/rssing.com.1596347.js" async> </script>