Quantcast
Channel: UOBDII Official Blog
Viewing all 3253 articles
Browse latest View live

HUMZOR NexzDAS ND306 Lite can be Multi-Diag Access J2534 alternative?

$
0
0

Look here: what is the best handy universal diganostic tools 2019?

Here, we’ll talk about HUMZOR NexzDAS ND306 Lite, Multi-Diag Access J2534 and Multidiag Pro

Item Multidiag Pro Multi-Diag Access J2534 HUMZOR NexzDAS ND306 Lite
Image TCSCDP-Pro+ MULTIDIAG-ACCESS-J2534 HUMZOR-NexzDAS-ND306-Lite
Price 70 usd 159 usd 99 usd
Software version V2016.1 V2018.3 V4.5
Year of Car 2016 2018 2018
Activation Yes, need activation NO No. Just download software and use it.
OS requirement Windows 7 Windows XP/Windows 7 Android
Device with OS required Laptop Laptop Mobile
Bluetooth Yes, has Bluetooth version NO NO
Software update Not available By CD By software (free for life)
Update method Update stopped You have to purchase a new device when sw is updated to a new version.


I-2013 Multi-Diag Access J2534

I-2014 Multi-Diag Access

I-2018 Multi-Diag Access J2534

Download from Google Play Store
Functions Diagnosis Diagnosis

Repair/Maintenance

Diagnosis

IMMO

Special Functions:

Oil Reset + TMPS +EPB+ ABS+ SAS +DPF


Conclusion:

HUMZOR NexzDAS ND306 Lite is the most cost-effetive.

it’s handy. mobile compatible and more powerful than Multidiag+ and Multidiag J2534 because of the immobilizer and special functions it covers.


HUMZOR Nexzdas

http://www.uobdii.com/wholesale/humzor-nexzdas-lite-full-system-diagnostic-tool.html

Mutidiag j2534

]http://www.uobdii.com/wholesale/multi-diag-access-j2534-pass-thru-obd2-device.html


W210 All Key Lost Done on Bench by Autel IM508 + XP400 + G-box

$
0
0

This article is available with how to use Autel IM508 + XP400 + G-box to program a new key on bench when Benz W210 All Key Lost.


As the title suggest, it needs:

Autel MaxiIM IM508

G-BOX2 Tool (for Benz all keys lost)

Autel XP400

autel-im508-xp400-g-box-done-w210-all-key-lost-01


Then, how to connect them together, please look at:

autel-im508-xp400-g-box-done-w210-all-key-lost-02 autel-im508-xp400-g-box-done-w210-all-key-lost-03 autel-im508-xp400-g-box-done-w210-all-key-lost-04


Tap “Smart Mode” on Autel IM508 machine.

autel-im508-xp400-g-box-done-w210-all-key-lost-05


Tap “on Bench”.

autel-im508-xp400-g-box-done-w210-all-key-lost-06


Tap “All keys lost Fast”.

autel-im508-xp400-g-box-done-w210-all-key-lost-07


Select “W210 (K)”.

autel-im508-xp400-g-box-done-w210-all-key-lost-08 autel-im508-xp400-g-box-done-w210-all-key-lost-09


Read the notes for Benz W202 w208 W210 All Keys Lost (Fast).

autel-im508-xp400-g-box-done-w210-all-key-lost-10


Establishing vehicle communication…

autel-im508-xp400-g-box-done-w210-all-key-lost-11


Read EIS data on Bench.

autel-im508-xp400-g-box-done-w210-all-key-lost-12

Establishing vehicle communication…

Please insert the blank key into the IR keyhole on the programmer, and press OK.

autel-im508-xp400-g-box-done-w210-all-key-lost-13 autel-im508-xp400-g-box-done-w210-all-key-lost-14

Communicating with the key, please wait…

It prompts “This key is not an blank key, but it can be reused after cleaning . Do you want to use it? Click on “Yes”.

autel-im508-xp400-g-box-done-w210-all-key-lost-15


Message ” Is there a key password?”, tap “No”.

Then press OK to enter Password Calculation process.

autel-im508-xp400-g-box-done-w210-all-key-lost-16 autel-im508-xp400-g-box-done-w210-all-key-lost-17


1.Connect the device, OBD cable and OBD connector on the wiring harness is sequence.

Click on “Bench”.

autel-im508-xp400-g-box-done-w210-all-key-lost-18


Warning: please follow the instructions in the follow up operations, do not disconnect the relevant connection. Tap “OK”.

autel-im508-xp400-g-box-done-w210-all-key-lost-19

Click on “OK”.

autel-im508-xp400-g-box-done-w210-all-key-lost-20

Connect the IR key simulator (APB102 /APB103) to the programmer. Tap “Ok”.

autel-im508-xp400-g-box-done-w210-all-key-lost-21


Establishing vehicle communication…

Connecting to obtain data.

Collecting data, calculating password.


Inset the IR key simulator (APB102 /APB103) into the EIS. If it is already inserted, remove and insert again.

autel-im508-xp400-g-box-done-w210-all-key-lost-22 autel-im508-xp400-g-box-done-w210-all-key-lost-23


Collecting data and calculating password is in progress. Please wait. The process takes 10-90 min (It takes longer for part vehicles). Please ensure that the device and vehicle battery are stable and sufficient during the process. Time consumed: 01 mimute(s).

autel-im508-xp400-g-box-done-w210-all-key-lost-24


25 minutes later, password calculation succeed.

autel-im508-xp400-g-box-done-w210-all-key-lost-25


Tap “Ok” to return to the All Key Lost Data Collection process and go to the next step.

autel-im508-xp400-g-box-done-w210-all-key-lost-26


Generating key file. Please wait…

autel-im508-xp400-g-box-done-w210-all-key-lost-27


Please insert the blank key into the IR keyhole on the programmer, and tap OK.

autel-im508-xp400-g-box-done-w210-all-key-lost-28

Writing key file.

autel-im508-xp400-g-box-done-w210-all-key-lost-29


Key addition completed. After pressing OK, check if the new key can be used normally according to instructions.

autel-im508-xp400-g-box-done-w210-all-key-lost-30


1.Insert the new key into the EIS. If the red indicator lamp on the key lights up and goes off, the key learning is successful.If the red indicator lamp stays lit, try inserting and removing the key for several times. if still not working, the key addition failed.

autel-im508-xp400-g-box-done-w210-all-key-lost-31

2.Turn ignition on and check if the vehicle can be stared normally. If the vehicle not started normally, the key addition failed.

autel-im508-xp400-g-box-done-w210-all-key-lost-32

3.Check if remote lock and unlock functions can work normally. If not, please check if the key battery can work normally.

If the key battery works normally and the remote function is still invalid, the key addition failed.

autel-im508-xp400-g-box-done-w210-all-key-lost-33 autel-im508-xp400-g-box-done-w210-all-key-lost-34


Job is done.

As you can see, the whole process is easy to do by following the Autel IM508 on-screen instruction.

Review: HIM HDS Tool for Honda SRS Replacement

$
0
0

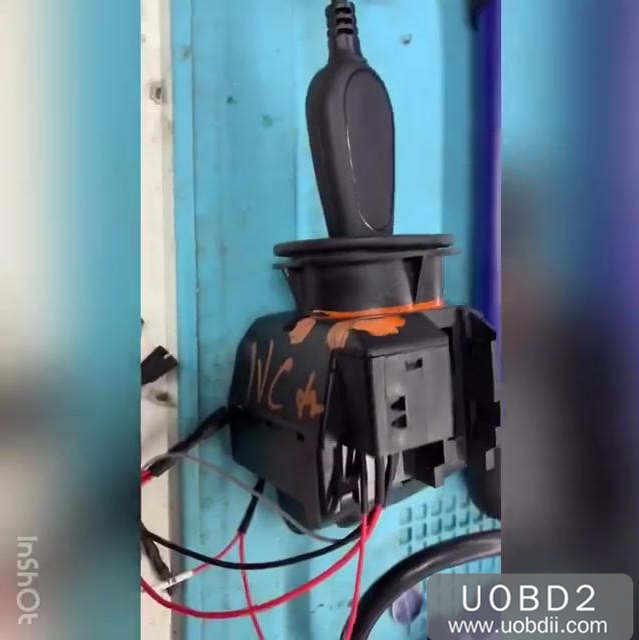
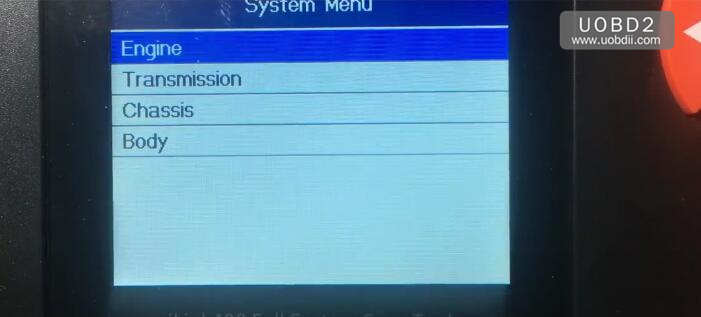
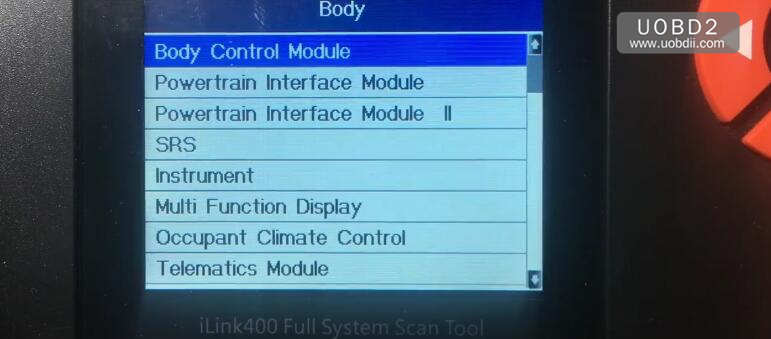
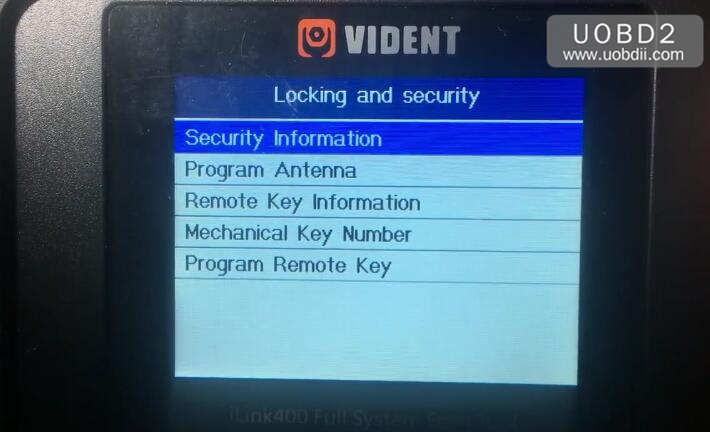
Good info. I just did a type cluster install and installed the 07/08 SRS unit because the new cluster uses the fcan to control the airbag light,.. I changed 3 pins on the connector to accommodate the physical changes, and the airbag light is still on. So, like JJH, when he swapped his seats, I think his SRS unit has to be sync’d with the opds on the seats, and so when I installed the new SRS, it doesn’t see the opds on my seats. I got the SRS unit from ebay. So,I think I am going to try this HDM thing.. I am guessing at all this.. just a hunch

unfortunately, my woh’s don’t stop there. The VSA light is also on after about 10 minutes. And nothing is different (physically) between the 05 and the 07 VSA according to the 05 HELM and the 07 HELM. (I have both books).

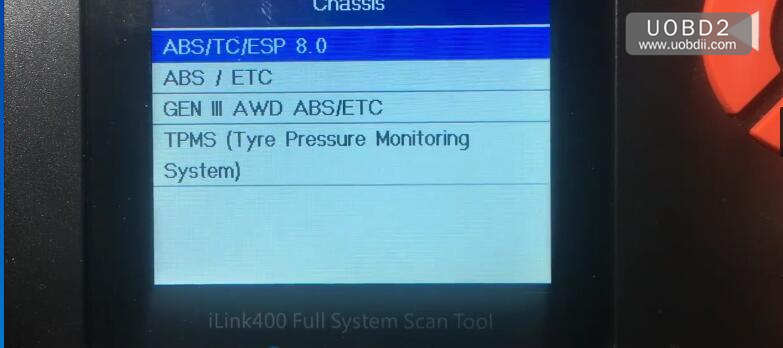
lastly, 1 more problem. I installed the full tpms system, and it works for a while but then for no apparent reason it flashes that common orange screen and says “malfunction” hahaha So, I am hoping I can get it all working. Its only another $120 bux right?


I think I read that these CAN elements need to be synchronized. I am only guess this is how it is, but if that is true, I would think that the devices could sync to the bus, or sync with the FCAN in the cluster. The bus runs at 400 or 433 hz. So, it’s analog, sending bits. Now, in SONET networks, the fastest most operate is at 10gb/s. And they are synchronized using satellite clock, which is external. So maybe these devices on the bus have no way of synchronizing until you tell it to do so. This could explain why these devices work for a period of time then they “drift” too far out of sync, and then the error occurs. SONET networks have a feedback loop to compensate for drift, but that is more sophisticated than these little buses on our cars, since supposedly they were deployed to “save wires” on the harness to make them “lighter”. (That is what I read in the HELM book) So, I’m sure these are pretty cheap engineering fixes to make a car cheaper but I am still surprised they cannot sync themselves. Even video has a sync input to a monitor. So I dunno. I am just thinking out loud


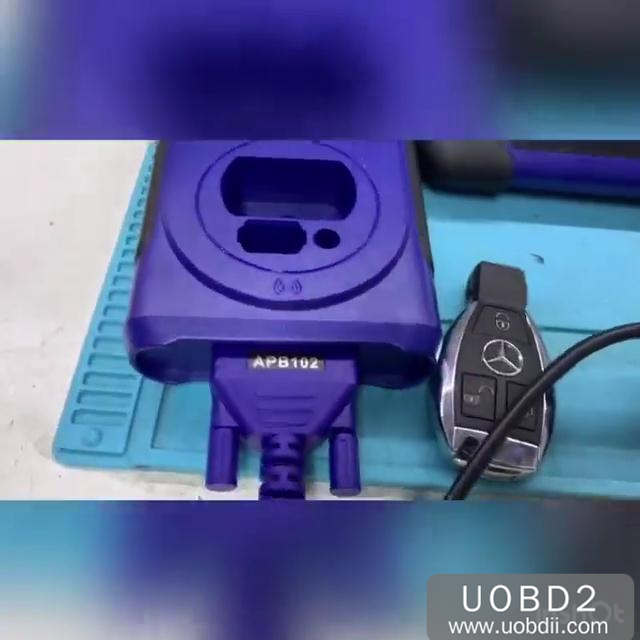
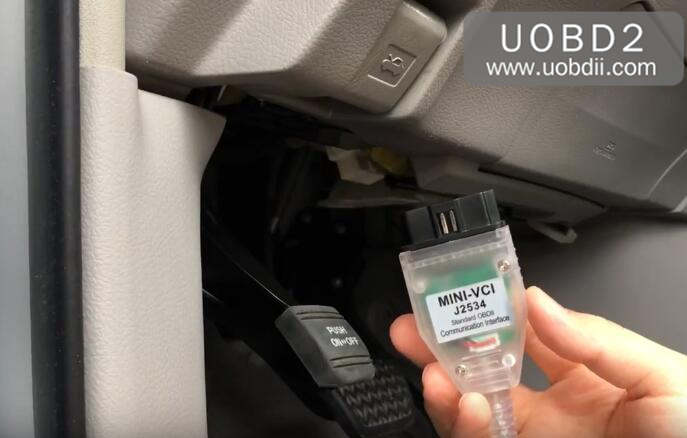
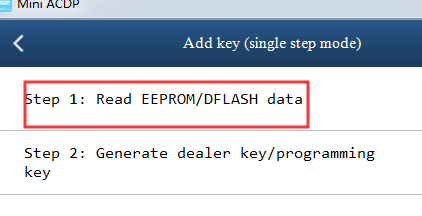
Can someone tell me if I am on the right track? I have the software installed on my PC and I have a physical serial port installed.

As I read the back of the HIM, it appears that first the car ECM is copied to the HIM. Then we disconnect it (per instructions) then connect it to the PC to read.. is that correct? It looks like we make changes to the HIM on the PC, then reconnect the HIM to the ECM/DLC and it goes through a process and writes it to the car.

Is there any time when the PC communicates directly to the car in “real time”? Or do you just keep flipping the HIM back and forth between the car and the PC?

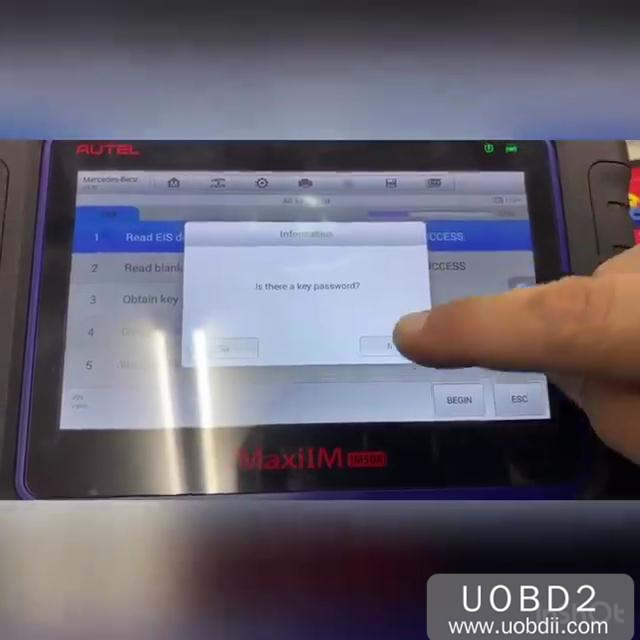
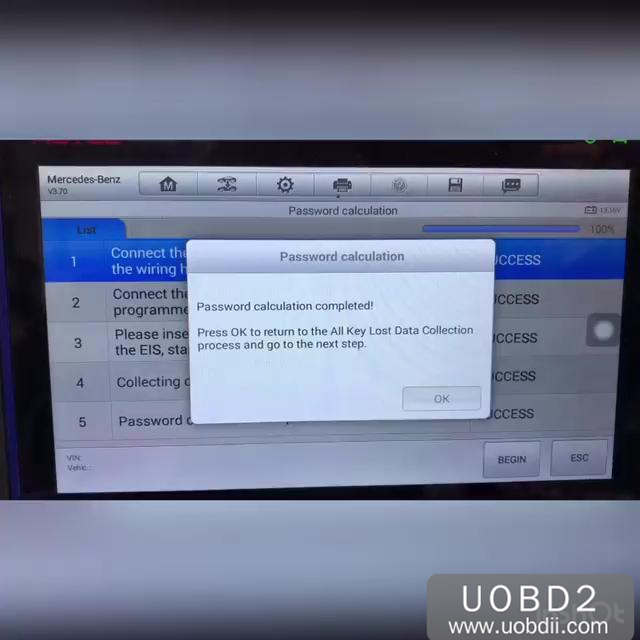
Basically, I just want to try to reset or resync my airbag system..

I assume I have to load the HIM first from the car, then face it toward the PC.. and read and make changes, then write it back to the car.. am I close? haha


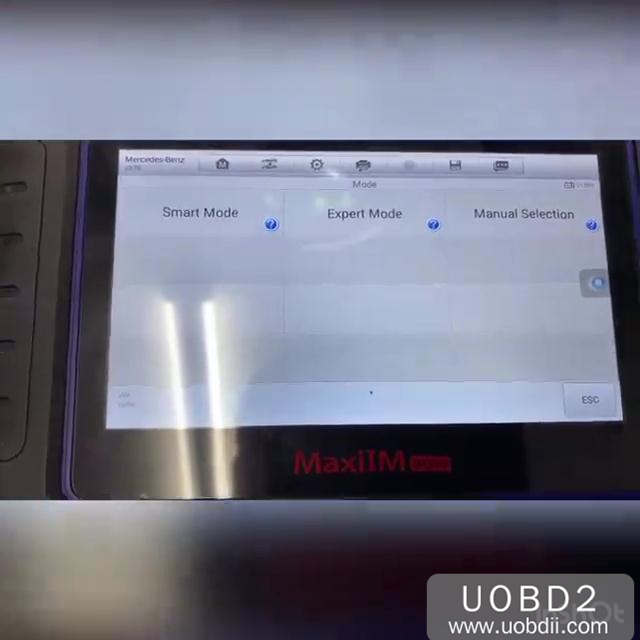
I just discovered the pass-thru mode and the storage mode. If you don’t have a laptop, it will store changes on the HIM. Then you follow the instructions on the back of the HIM to manually let the HIM program the changes by watching the lights on the HIM and turning the key off and then on per step by step instructions on the back of the HIM..

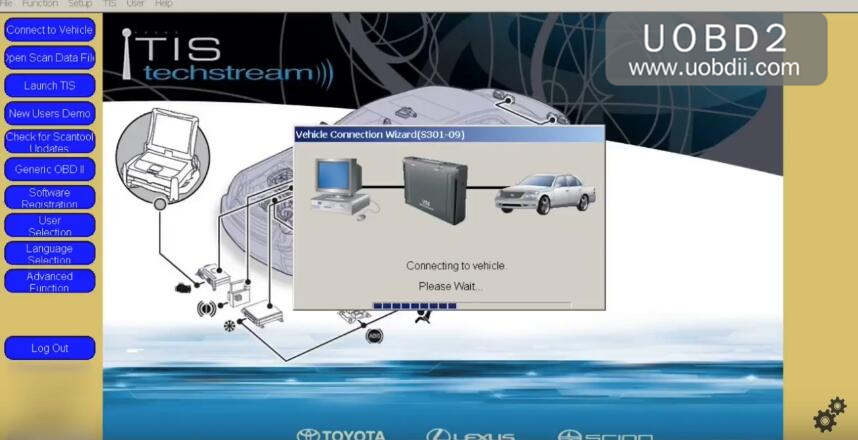
As for the pass-thru mode, It can be used while connected to both the PC and the vehicle; this is called “pass-thru” mode.
“Pass-thru” mode may be used if the PC can be brought near to the vehicle, for example, when using a laptop. The entire CM update sequence is under software control, hence the user is provided with feedback during the whole process…

I only found all that information by poking around on the help screen, because there were no instructions. I also won’t need the USB to serial cable because I have the serial port. By the way, the software for that serial to usb converter cable, was all in Chinese symbols. And the software disk would not run. In fact, the main software dvd was corrupted too.. It would not run. So, I would stay away from the vendor link that I posted previously! They are helpless! Don’t ask me where all this stuff comes from, but its somewhat of a HACK! All of it! The software is a hack from OEM most likely. And make sure you keep your virus detection handy. I noticed a “HDS manual” from that other Chinapost download site has a “backdoor.agent” virus. At least, that is how malwarebytes identified it. So, I deleted it. But as for the main software, I cannot find any viruses. It looks legit. er, at least as legit as a hack can be. haha! And by the way, to all the less technical guys, I would not advise doing this, or buying it, especially if you are in a hurry. Definately have to take your time and learn the software before you jump in. And find out what all the buttons do. And some apps the bundle does not apply! Like the software 3.012 installed something called MCVI wireless. I am pretty sure that is for another Honda device that is wireless, and I think this HIM is NOT wireless. So, the software doesn’t even tell you what you need or don’t need. So, you have to go to it with the approach of knowing the software was ripped from something else, and you gotta do a lot of “hand waving” and say, that doesn’t apply to me. Then of course there are 2 different ways to burn the changes, or image or whatever it does. Like pass thru (real time) or storage mode. Again, there were no pamphlets that came with the equipment.

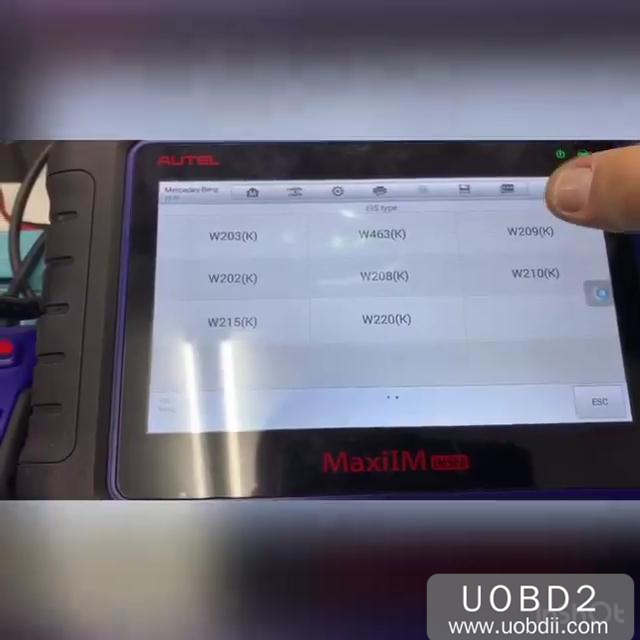
So, fortunately, reading through the steps, made me ask questions, as I saw a different method, other than real time, printed on the back of the HIM.


 I ended up using the pass-thru mode because I couldn’t get the storage mode to work. Basically, the HIM responded with the car properly but when I took to my PC I couldnt get the rewrite program to see anything. It just said, “this vehicle doesnt need to be updated”. Anyway! I was able to get pass-thru working.

Notice it says the SRS indicator is on. And that is correct. My airbag light is on. I tried to initialize the SWS and OPDS, and it went fine but it said to clear any DTC’s first. So, I cleared the DTC’s but I have a few PERMANANT DTC’s. So, I do not know if that is causing the indicator light to stay on or not. But I noticed that the MES selection says MES must have steps taken to erase DTC’s from the SRS unit. See, I got the SRS unit from ebay! So it might have been in a collision. How can I erase Permanent DTC’s? And What about this MES function? It doesn’t tell me what steps to take.

let me know what you think please! haha  I’m trying to turn off the airbag light.. thanks! And what about all those that say “invalid”? Is that something not compatible with my 05?

honda-hds-srs-1


Permanent DTC’s?

honda-hds-srs-2

I just noticed something. Is that thing telling me to replace the SRS unit? It says “conditions for cancelling DTC’s.. REPLACE SRS unit!”
I wonder if that means, the INDICATOR light will go OFF if I replace the SRS unit


I just tried the MES manual jumper wire reset per this site, and my car acted like it didnt see anything .. like dead wires. nothing responded any different. So, I must say the MES reset is nothing more than something I already did with the HDS tool. Meaning, the HDS tool will reset DTC’s but not permanent ones.. Even the screenshots say “replace SRS unit”. I got this SRS unit used from ebay, so it was likely in a wreck. I bought it to upgrade to the new cluster. Anyway…


Note that my airbags have never blown.

I got the SRS from Ebay. I think the SRS unit must have come from a car that had been wrecked. So it stored a permanent DTC. I learned that a permanent DTC in the SRS cannot be cleared. Even Acura as well as the HDS tool says to clear a permanent DTC, you must replace the SRS unit itself. I bought the 07/08 SRS unit because I need it for the 08 cluster. I got the TPMS working like a charm. -No yellow warning light! – But I didnt know about not being able to clear a permanent DTC in the SRS unit. If I did, I would have been more cautious about where I bought one. But nevertheless, that guy on ebay says he can reprogram the SRS unit.


Even if i have to buy a new srs unit i will get it working. Btw, speaking of codes, there is a honda code needed also on the HDS tool. I entered 000001 and it worked fine. I think it was called an rpo code. But I cant remember for sure.


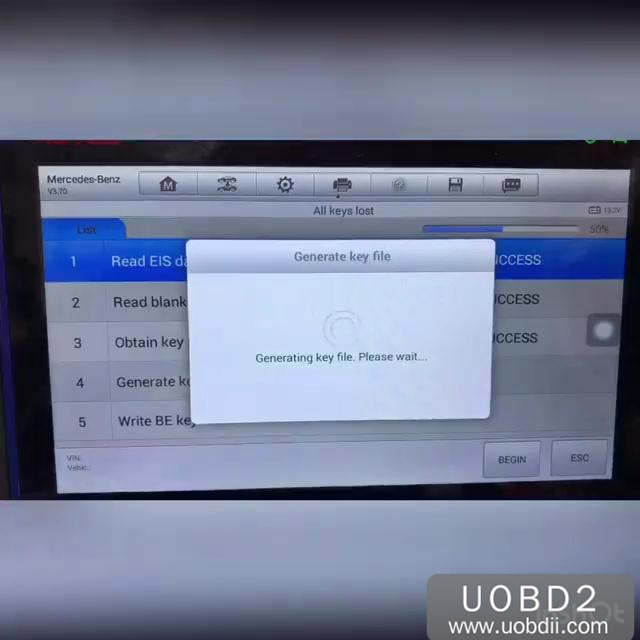
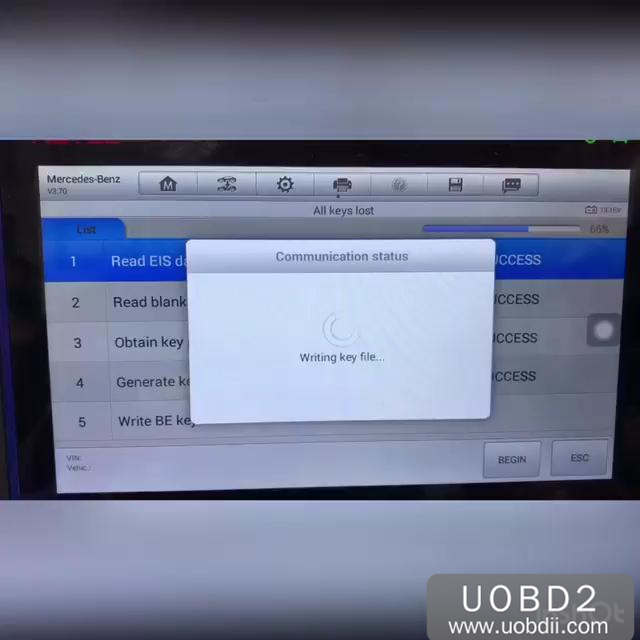
I got my SRS unit back. Supposedly the SRS was reset, but I still noticed “permanent DTC’s”. But it had a few other dtc’s and looked like they did alter it. So, I clicked clear DTC’s, and it still did not clear the permanent DTCs. Then I went through the OPDS initialization and all went fine. Then I ran the SWS initialization. I got through part ways, and I have to drive the car for 22 MPH as part of that process? I wonder why that is needed? That means I must have a laptop. My PC is not mobile. I had to stop that initialization process. But one thing I noticed just as I was about to exit that that process. The airbag light was off. But so was the engine light. Then after I exited, the airbag light came back on. AND I also noticed even going half way through that process, it actually DID clear the permanent DTC’s. So, I thought it was fixed until the airbag light came back on.. I *might* have to properly finish out that SWS initialization process by driving the car 22 mph, and then see what it prompts me for next, before it hopefully shuts off the airbag light…. long process..


I think to get the airbag light off, even though I have a 07/08 SRS unit which is using the FCAN properly to operate the airbag indicator (because I wired it up), I would still have to replace the OPDS unit. Because I have 3 codes now and 1 or all of them could be causing the airbag light to come on. And I am not sure if it is really faulty equipment, or if it is incompatible with the OPDS OR if the codes are left over from the car from where I got this SRS unit on ebay. Supposedly I just paid someone to reset the SRS unit. ( I probably should have bought a new one).. Anyway, The HDS tool is telling me that the front right and the front left crash sensors are faulty. And it also is telling me the OPDS unit Model ID number is inconsistent with the SRS model ID number. So it says replace the OPDS with the proper unit! My gosh, I’m in a rabbit hole!! haha

So, I double checked part numbers between the 05 TL and the 07 TL and there are different numbers for the front impact sensors and also the OPDS unit. Those parts total about $200 or so at wholesale. So, not a huge problem since I have already replaced everything, but I noticed that the pinouts are different and the connectors have more pins on the newer model. Acura started using shielded cables on the 07/08 on the OPDS unit so there are a doubling of pins for that.. So this would be another bear since my harness is not like that.

I thought it would be possible that just replacing the OPDS unit will allow communication with the front impact sensors and they will not be seen as faulty.. But that is just a guess IF the pinout were corrected between the 05 and 08’s.. I never had any airbag light before this mod so I don’t think my car has any bad impact sensors but somehow it thinks there are some faulty sensors, OR the codes (left and right front) were still hanging on from the last car that was wrecked on ebay! Its hard to say. I should have started with a clean slate and got a new SRS unit from acura for 230 at wholesale.

Long story short, it may not be worth fixing that airbag light. I may just re-install my 05 SRS unit, and rerun the HDS tool and see what it says.. And basically just leave the 05 SRS unit installed so the system works, but then just black out the airbag light with a small piece of electrical tape. I could do all that work on the OPDS overhaul, but I have been working on this car long enough. If it takes that much work and time to get the airbag to go off, then I may just cover it. Maybe in the long term future, if I still have this car, and I find an 07 TL at salvage that has a good passenger seat, I might take on this mod. (The opds unit is located in the left side of the passenger seat) But hey the TPMS works great!!

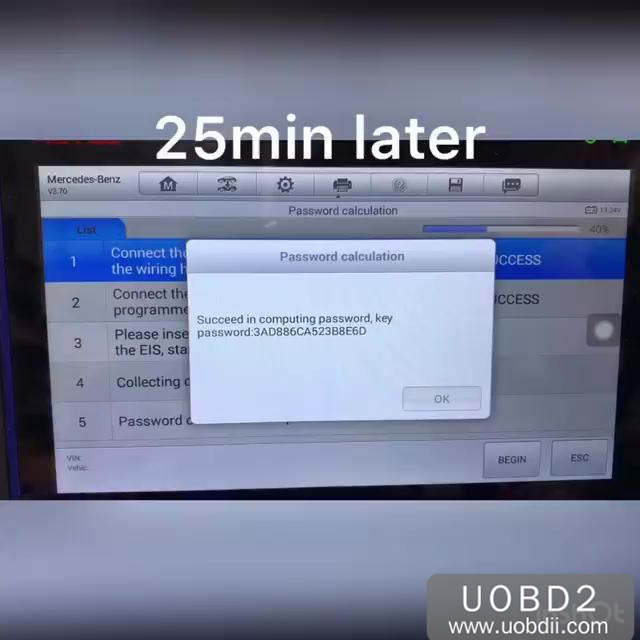
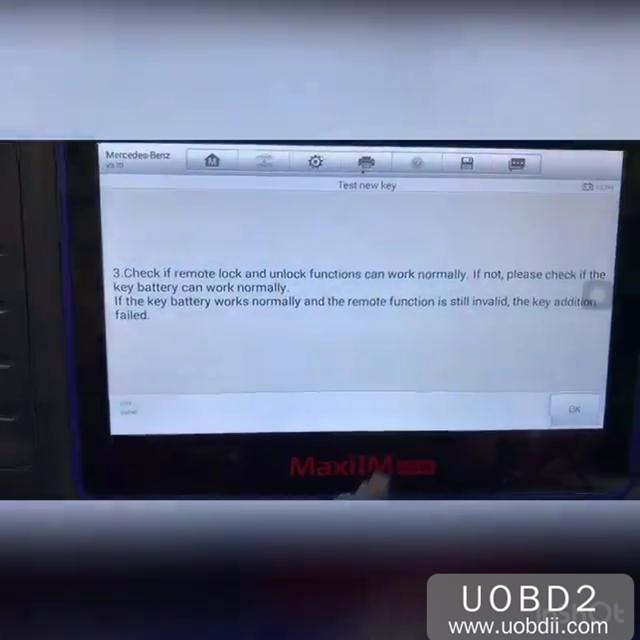
I got the airbag light working correctly. Turns out the HDS tool was a good investment. But just watch who you buy from.. It is best to work with a seller in the states.

honda-hds-airbag-light-reset

FGTECH GALLETTO V54 0475 / 0386 FIX EPT HEX DUMP & PROGRAM etc.

$
0
0

Topic: free offer source of FGTECH GALLETTO V54 0475 / 0386 FIX EPT HEX DUMP & PROGRAM;  source of FGTECH v50 v54 0386 error crash solution; source of Fgtech V54 0386 AES Software FIX for Win7-64bit.


Link 1:

https://mega.nz/#!cJABgQbD!SlEUD1vM91ovCGuCrHzAT6891t7OKgdkydhDFnB1iCs

No password

Suitable: FGTECH v50 v54 0386 error crash

How to fix fgtech software not compatible with windows system:

https://youtu.be/IsNrzivSvXo

Supplied by uobdii.com engineer.


Link 2:

https://mega.nz/#F!9oRj2T6L!uPLJ7AhbS2phDvrfrXgFwA

Password: PM to @ fantomel (DK member)

What you can find here:
1.For tool number 0386: ept file,fix file,hex dump and 2 versions of programs V54 used for it, the one from china and the AES November software.

2.For tool number 0475: ept file,fix file, hex dumps made from my tool and program V54 for it that does not need time back.

3.For both tools you have here how to connect to it, how to read firmware movie, how to write dump that you wish.

Reading and writing the mcu for this tool can be done with old Philips LPC 2000 software and USB-TTL adapter, preferd the one that uses PL2303 chipset. You need also a jumper in position to do that.
If you want to check CRP level of your NXP mcu you can do that with FlashMagic and USB-TTL adapter.


Link 3:

https://mega.nz/#!DA0xGI5K!WGoRMEFga1cHj3dCf7TORPoBIfcxXPaNFsF1STdM20o

Fgtech V54 0386 AES Software FIX for Win7-64bit – tested 100%

Pass: ionuty

Contributor: @ionutbutusin (cartechnology.co.uk)


1.Fix driver for win7-64bit .. DRIVER CANNOT START CODE 10…AND FUNCTIONING TOGETHER BDM100 SOFTWARE AND DRIVER
ON THE SAME PC WINDOWS 7-64Bbit
2. AES Software
3. Fix read 5% error


More info:

1.My FGTech V54 0475 works now under Win10

I succeeded to run FGTECH Galletto 0475 on windows 10 64bit.

If says:

Information

Windows Vista or above detected, making a second patch.

then nothing

Right click on fgtech icon dann properties denn compatibility and change program compatibility windows 7 or windows 8. Works fine on my lenovo laptop.

fgtech-4-0475-win10-03

2.FGTech Galletto V54 0475 works with win 7 32bit without problem.

3.FGTech Galletto V54 0475 works with win7 64bit?

It needs lucky. better run with Win7 32bit.


Thanks.


www.uobdii.com

2M2 Magic Tank Car Key Blade Chart

$
0
0

2M2 Magic Tank car key cutting machine can cut a wide range of car blade from worldwide, this article is available with the Key Blade chart.

2M2 Tank Key Cutting Machine

Chart 1: European car makes key blades

European Cars
Car Make Plain Mill End Mill End Mill Internal Tooth Ball Mill Inner Milling Unilateral
ALFAROME GT15.D99 SIP22.H8
GT16.D66
AUDI HU49_246.D77 HU66.H8
HU49_256.D77
WT7_246.D77
WT7_256.D77
BMW HU50.D00 HU100R.H8
HU50.D11 HU92.H8
HU58.N66
CITROEN NE73.D66 HU83-L.H7
SX9_A.D44 HU83.H7
SX9_A.D55 SIP22.H8
VA2-1049.H3
VA2.H6
FERRARI GT16.D66 HU66.H8
FIAT GT10.D66 SIP22.H8
GT10.D77 VA2-1049.H3
GT15.D99 VA2.H6
SX9_A.D44
SX9_A.D55
FORD HU101.M10 FO21.T6
HU66.H8
HOLDEN FO38.D88 GM45.M8
FO40.D88 HU100T12.H8
MIT2.D66 YM27.M10
SZ12.D88
TOY27.D66
YM28.D00
IVECO GT10.D66
GT10.D77
JAGUAR FO21.T6
TBE1.T8
LANCIA GT10.D66 SIP16.M9
GT10.D77 SIP22.H8
GT15.D99
GT18.D99
SX9_A.D44
SX9_B.D55
LANDROVE NE75.D00 HU92.H8
MAN HU83-L7.H7
HU83-L8.H8
HU837.H7
HU838.H8
MASERATI YM308.M8
YM30.M8
MERCEDES-BENZ HU39.N88 HU41.M10
HU72.D00 HU64.M10
YM15.D00
MINI HU92.H8
OPEL GM15.D88 HU100.H8
HU46.D00 HU43.M10
HU87.D00 YM27.M10
NE73.D66
YM28.D00
PEUGEOT NE72.D66 HU83-L.H7
NE73.D66 HU83.H7
NE78.N55 VA2-1049.H3
SX9_A.D44 VA2.H6
SX9_B.D55
PORSCHE HU49_246.D77 HU66.H8
HU49_256.D77
RENAULT NE72.D66 VA2-1049.H3
NE73.D66 VA2-ABCD.H6
VAC102.D66 VA2.H6
VA6-1234.H6
VA6-ABCD.H6
VA6-DECO.DE
ROVER NE77.D00 HU92.H8
SAAB B99.D00 YM30.M10
GM40.D00
NSN14.D00
NSN15.D00
SEAT HU49_246.D77 HU66.H8
HU49_256.D77
SKODA HU49_246.D77 HU66.H8
HU49_256.D77
SK22.S6
VAUXHALL GM15.D88 HU100.H8
HU46.D00 HU43.M10
HU87.D00 YM27.M10
NE73.D66
YM28.D00
VOLKSWAG HU49_246.D77 HU66.H8
HU49_256.D77 YM15.D00
WT7_246.D77
WT7_256.D77
VOLVO HU56.M8
NE51.D00 NE66-A.N44
NE66-B.N44
NE66-C.N44


Chart 2: Japanese car makes key blades

Japanese Cars
Car Makes Plain Mill End Mill End Mill Internal Tooth Ball Mill Inner Milling Unilateral Remarks
ACURA HON58.D88 HON66.N66
NE77.D00
DAIHATSU DH4R.D88
HONDA HON58.D88 HON66.N66
HON65.D88
NE77.D00
INFINITI NSN11.D88
NSN14.D00
LEXUS TOY40.L88 Long
TOY48-8-.L44 Short
TOY48(80.L44 Short
TOY48.L55 Short
MAZDA FO21.T6
MITSUBIS CY24.D77 HU56.M8 MIT14.L88
HYN11.D88 TOY40.L88
HYN6.D88
MIT11.D88
MIT8.D88
MIT9.D88
NISSAN NI02.D00 Long
NSN11.D88 Short
NSN14.D00 Long
NSN15.D00 Short
NSN16.D88 Short
SUBARU DAT11.D66 DAT17.N55
HU87.D00 Long
NSN11.D88 Short
NSN14.D00 Long
NSN19.D00
SZ12.D88
SUZUKI HU87.D00
SZ11.D88
SZ12.D88
TOY43.D00
TOY43.D88
TOYOTA TOY25.D66 VA2-1049.H3 TOY48.L55
TOY27.D66 VA2.H6
TOY38.D88
TOY40(80.L44
TOY40.L88
TOY41.D88
TOY42.D88
TOY43.D00
TOY43.D88
TOY46.D77
TOY47.D99


Chart 3: Korean car makes key blades

Korean Cars
Car makes Plain Mill End Mill End Mill Internal Tooth Ball Mill Inner Milling Unilateral Remarks
Hyundai HYN10.D88 KIA7.L66
HYN11.D88 TOY40.L88
HYN12.D88
HYN14.D00
HYN14.D88
HYN15.D88
HYN6.D88
HYN7.D88
HYN8.D88
HYN9.D77
KIA FO32.D00 TOY40.L88
FO34.D00 KIA7.L66 Short
HYN14.D88
HYN7.D88
KIA1.D77
KIA2.D77
KIA3.D88
KIA4.D77
MAZ20.D00
SSANGYON HYN10.D88
SSYI.D77
SSY2.D77
SSY3.D88


Thanks.


www.uobdii.com

BMW 320i CAS3 Add One Key in 30s Using Mini ACDP

$
0
0

Tested: BMW 320i CAS3 Add One Key in 30s Using Yanhua Mini ACDP automatic operation.

bmw-320i-add-one-key-with-yanhua-acdp-01


Need:

Yanhua Mini ACDP with module 1


Procedure:

Connect ACDP to the OBD port of BMW 320i car.

Open ACDP APP;

Choose “BMW”;

CAS1-4;

CAS3 /CAS3+;

OBD mode” ;

IMMO;

Automatic operation.

Then ACDP will automatically generate data, only need to click on “Next” until key programming successfully.

(If it is a manual operation, the user needs to read the data and select the data step by step, and operate according to the user’s needs. For example, some users do not read the data and directly generate the generated key. Generally, the user does not need one device to complete all operations. Some users like a device to do half of the operation. )

bmw-320i-add-one-key-with-yanhua-acdp-02 bmw-320i-add-one-key-with-yanhua-acdp-03 bmw-320i-add-one-key-with-yanhua-acdp-04 bmw-320i-add-one-key-with-yanhua-acdp-05 bmw-320i-add-one-key-with-yanhua-acdp-06 bmw-320i-add-one-key-with-yanhua-acdp-07 bmw-320i-add-one-key-with-yanhua-acdp-08 bmw-320i-add-one-key-with-yanhua-acdp-09 bmw-320i-add-one-key-with-yanhua-acdp-10


The following parts are copied from Yanhua Mini ACDP “Help”, I personally think they are helpful especially for those who are interested in Mini ACDP but don’t know how to use it.

Add key (car key is valid)
A) Use valid car key to start and switch off the engine. Leave the key in ignition switch. Turn on the emergency light to prevent other modules into sleep mode.
B) Click on “Step 1: Read CAS data” to read CAS data. Pop out the key when prompted by APP. The name of CAS data is “CAS3_ORGKEY20xxxxxxxxxxxx.bin”.
C) Click on “Step 2: Enable/Disable/Program Key”. APP will import original CAS data file generated in previous step. Select the key route “KEY X” where you want to add new key. Do not overwrite the key used.
Select “Program with BAV adapter” in mode list. The name of CAS data is “CAS3_DLRKEY20xxxxxxxxxxxx.bin” after key programmed. This file contains the new key information.
D) Click on “Step 3: Update CAS data”. APP will import new key CAS data file generated in previous step and update the CAS system. Try to start engine using new key.
E) If Add key or other operation result in the original car key cannot start. perform the DME and CAS synchronization (Refer to “Sync and Fault solution “). If there is a steering wheel lock fault. Synchronize CAS and ELV to unlock.


CAS programming:
A) If the current CAS version is ISTA-P45 or later. we recommend using ICP method to add new key.
B) There is a risk for CAS programming. ensure the power of vehicle battery is enough to work at least 20 minutes.
Or connect a battery charger to the car; the charging voltage must not be less than 13V to prevent the low voltage result in data lost.
C) Ensure the car no serious fault before CAS programming.
D) It’s recommended to back up FLASH and EEPROM of CAS to reduce risk if have BDM programmer in hand.
E) If you have a car key in use. start the car. then switch off and pop-up the key. If it’s a smart key
please keep it 3 meters away from the car. If programming fails. repeat this operation.
F) In the “Step 2: Generate dealer key / Program key”. the user can manually modify the key ID or disable / enable key.
or use VAG-KEY to program keys. or pre-process key (only for programming in ignition switch).


All keys lost (programming in ignition switch):
A) We recommend using ICP method to back up the original FLASH and EEPROM data of the CAS.
B) It is strongly recommended to use PCF7936 chip or reprogrammable BMW keys (such as YH universal key) for key programming in ignition switch first. Otherwise. it will be void once the key locked!
After the new programmed car key start the car successfully. use the key to program the original BMW blank key by “add new key (have a car key in use)”.
C) Put a blank key into the ignition switch. Turn on the emergency light.
D) Click on “Step 1: Read CAS data” to read CAS data. The name of CAS data is “CAS3_CHGKEY20xxxxxxxxxxxx.bin”.
E) Click on “Step 2: Enable/Disable/Program Key”. APP will import original CAS data file generated in previous step. Select the key route “KEY X” where you want to save the pretreat key.
click on “program in ignition switch” to program key and select the key type you want to pretreat. The name of CAS data is “CAS3_PREKEY20xxxxxxxxxxxx.bin” after key pretreated. This file contains the preteated key information.
F) Click on “Step 3: Update CAS data”. APP will import pretreated key CAS data file generated in previous step and update the CAS system.
G) When the APP prompts “Please try to start the engine with the new key.” Insert the pretreated key into ignition switch and try to start the engine.
H) If the engine can not be started. click on “NO” and try again. Otherwise. click on “YES” to complete car key generated process. According to different versions of CAS. It may take 16 or 64 times to try.
I) If the number of attempts exceeds expectations and fail to generate a car key. Select another key route and retry from step F).
Warning: In case of all keys lost. DME and CAS synchronization prohibited.


Enable/Disable key:
A) Click on “Step 2: Enable/Disable/Program Key”. APP will import original CAS data file generated in previous step.
B) Enable/Disable key need valid car key inside the ignition switch. Select the key route you want to enable/disable and click Enable/Disable.
The name of CAS data is “CAS3_CHGKEY20xxxxxxxxxxxx.bin” after enabled/disabled operation.
C) Click on “Step 3: Update CAS data”. APP will import modified key CAS data file generated in previous step and update the CAS system.


Sync and Fault solution:
If the new key or original car key can not ignite because of something mater (CAS can identify the key but could not start the engine).
the main reason is the DME module and CAS module can not be synchronized. The solution is as follows:
A) Diagnose the DME module. read and clear DTCs. For the DTCs cannot be cleared ( “EWS manipulation error” usually).
please disconnect the battery more than 5 minutes. and then connect the battery to clear the fault code of DME module again to ensure no fault code.
B) Clear fault codes (DTCs) of CAS.
C) Synchronize DME and CAS. Synchronization fails prompt can be ignored (or try to start the engine during synchronization).
D) Use original car keys to start the car.
E) If there is a fault. clear DTC and Shadow fault under “special features” before key programming and after keys added.

Thanks.

www.uobdii.com

Vident iLink400 Diagnostic Tool Review on Holden Commodore VZ 2005

$
0
0

Here is Vident iLink400 diagnostic tool test report on American car Holden Commodore VZ.This diagnostic tool perform well on American market.


Here comes the test report

Connect Vident iLink400 to Holden Commodore VZ,and select “Holden”

Vident iLink400 Review on Holden Commodore VZ 2005 (1)

The 10th VIN Character

Vident iLink400 Review on Holden Commodore VZ 2005 (2)

VZ and WL Series

Vident iLink400 Review on Holden Commodore VZ 2005 (3)


Now it show the function menu:

Diagnosis,Serice,Programming/Coding

Vident iLink400 Review on Holden Commodore VZ 2005 (4)


For Diagnosis function,enter the menu and select “Control Unit”

Vident iLink400 Review on Holden Commodore VZ 2005 (5)

It cover engine,transmission,chassis,body systems

Vident iLink400 Review on Holden Commodore VZ 2005 (6)


Engine

Vident iLink400 Review on Holden Commodore VZ 2005 (7)

Transmission

Vident iLink400 Review on Holden Commodore VZ 2005 (8)

Chassis

Vident iLink400 Review on Holden Commodore VZ 2005 (9)

Body

Vident iLink400 Review on Holden Commodore VZ 2005 (10) Vident iLink400 Review on Holden Commodore VZ 2005 (11)


Service Function-Reset service interval,break bleed,locking and security,bcm

Vident iLink400 Review on Holden Commodore VZ 2005 (13) Vident iLink400 Review on Holden Commodore VZ 2005 (14) Vident iLink400 Review on Holden Commodore VZ 2005 (15) Vident iLink400 Review on Holden Commodore VZ 2005 (16) Vident iLink400 Review on Holden Commodore VZ 2005 (17)


Programming/Coding

Vident iLink400 Review on Holden Commodore VZ 2005 (18)

http://www.uobdii.com/wholesale/vident-ilink400-scan-tool-single-maker.html

2008 Toyota Highlander HV Smart Key Programmed using Techstream

$
0
0

This test report on how to use Toyota Techstream mini vci to program smart key for Toyota Highlander HV 2008.


Success! Have programmed a new smart key to

Model: Toyota Highlander HV 2008

Engine: 3MZ-FE

Key: w/ smart key


New key to be programmed

techstream-program-key-techstream-highlander-hv-1

techstream-program-key-techstream-highlander-hv-5 techstream-program-key-techstream-highlander-hv-6

And you also need:

techstream-program-key-techstream-highlander-hv-2 techstream-program-key-techstream-highlander-hv-3 techstream-program-key-techstream-highlander-hv-4

techstream-program-key-techstream-highlander-hv-7 techstream-program-key-techstream-highlander-hv-8

link to mini vci and techstream:

http://www.uobdii.com/wholesale/cheapest-mini-vci-for-toyota.html

Connect the mini vci cable to the OBD port on the car and to the USB port on the laptop

techstream-program-key-techstream-highlander-hv-9 techstream-program-key-techstream-highlander-hv-10 techstream-program-key-techstream-highlander-hv-11 techstream-program-key-techstream-highlander-hv-12

Start the car

techstream-program-key-techstream-highlander-hv-13

Run Techstream software

techstream-program-key-techstream-highlander-hv-14

Select the model and engine…

Model: Toyota Highlander HV 2008

Engine: 3MZ-FE

Key: w/ smart key

techstream-program-key-techstream-highlander-hv-15

Go to smart key

techstream-program-key-techstream-highlander-hv-16 techstream-program-key-techstream-highlander-hv-17


Smart key registration

techstream-program-key-techstream-highlander-hv-18

register a key:

– turn the engine/power switch on (engine off/ready off)

– do not carry any device which may generate electric waves, such as a cellular phone, into the vehicle

– be aware that each step must be performed within a specific amount of time

– do not carry two or more keys into the vehicle. this may cause the function to fail

techstream-program-key-techstream-highlander-hv-19

check the current number of key codes

current number of key codes:

number of available spaces for new codes: 5

number of registered key codes: 2

check the current number of key codes and then press Next to continue

new keys can only be registered if spaces are available

if available spaces for new codes is 0, no new keys can be registered

techstream-program-key-techstream-highlander-hv-20

preparation before work

confirm that the two types of keys are separated and placed 30cm (1 foot) or more from the vehicle

– a registered key

– keys to be registered


perform the follow steps:

step 1: separate the two types of keys

step 2: place a registered key into the vehicle

techstream-program-key-techstream-highlander-hv-21

touch engine sw with a registered key

confirm key number

press Pre-Start CHK button to review registration process.

press Start button to begin the registration process

perform the step below with the specified time limit


touch engine sw wit a registered key (beep)

techstream-program-key-techstream-highlander-hv-22

additional key registration: normal type

to register an additional smart key, follow the procedure below:

step 1: hold a registered key to the engine/power sw. a buzzer will sound when the vehicle recognizes the key

step 2: remove the registered key from the vehicle

step 3: place the key to be registered in the vehicle

step 4: hold the key to be registered to the engine/power sw

step 5: place the key to be registered on the passenger seat to complete registration

step 6: registration is complete when the registration complet screen is displayed


the above is an explanation of the registration procedure.

pls close this window and return to the utility screen and then press Start

techstream-program-key-techstream-highlander-hv-23 techstream-program-key-techstream-highlander-hv-24

put the key close to the ignition switch and the take it away

techstream-program-key-techstream-highlander-hv-25 techstream-program-key-techstream-highlander-hv-27 techstream-program-key-techstream-highlander-hv-28 techstream-program-key-techstream-highlander-hv-29 techstream-program-key-techstream-highlander-hv-30


test the new key

techstream-program-key-techstream-highlander-hv-30 techstream-program-key-techstream-highlander-hv-31


the new key worked!

job’s done!


Update: Yanhua Mini ACDP BMW ECU Clone User Instruction

$
0
0

Yanhua Mini ACDP BMW ECU Clone update:

  1. Read and write Dflash / Pflash for BMW DME (N13,N20,N63,S63,N55,B38 etc), then perform DME clone.
  2. Read and write the data without removing DME shell and punching.
  3. More ECU types will be added one by one.


Need:

Yanhua Mini ACDP Master (149usd)

A51C Software License with Adapters (219usd)


Connection method:

Step 1. Please prepare ACDP, OBP+ICP adapter, interface board and DME.

yanhua-mini-acdp-bmw-ecu-clone-01


Step 2. Connect the interface board correctly to the DME interface as shown.

yanhua-mini-acdp-bmw-ecu-clone-02


Step 3. Connect ACDP, OBP+ICP adapter, interface board and DME.

yanhua-mini-acdp-bmw-ecu-clone-03


Open Mini ACDP APP.

Choose “BMW”.

yanhua-mini-acdp-bmw-ecu-clone-04


Then ECU clone.

yanhua-mini-acdp-bmw-ecu-clone-05


Then DME type, any of N13 N20 N63 S63 N55 B38

yanhua-mini-acdp-bmw-ecu-clone-06


Function Menu:

Identify

Read /write DFLASH

Read/write PFLASH

yanhua-mini-acdp-bmw-ecu-clone-07

For the following operation, please follow the on-screen instruction.

When Yanhua ACDP engineer have time, we will make video and share with you.

Thnaks.


www.uobdii.com

Humzor NexzDAS Pro Manual: Function List, How to Use, Comparison etc

$
0
0

What is Humzor NexzDAS Pro?

Humzor NexzDAS Pro is a professional diagnostic tool, able to read/clear codes for all the available modules of wide vehicle makes, and offers the perfect diagnostic solution for mechanics who demand unrivaled OE level smart technology and smart repair.


What can Humzor NexzDAS Pro do?

Read/clear codes for all systems, input the VIN and automatically recognize it, or manually select the vehicle model,type and year to start the quick scan for all the control units and get the inspection result with detailed DTC description.

Carrying out tests on some components of the vehicle and access vehicle specific subsystems. It may vary by makes, models, types, years, thus only the available ones will be shown.

Besides, it can perform advanced service reset like: Oil Reset, TPMS, ABS, SAS, TPS, DPF, EPB, Battery Test, Injector Adjust.

Moreover, Humzor NexzDAS Pro can add new key, erase keys, key programming, all key lost via OBD

Free Download: Humzor NexzDAS Pro IMMO Function List.


What language Humzor NexzDAS Pro has?

English, Italian, German, Russian, French, Spanish, Polish, Traditional Chinese etc.


How to update Humzor NexzDAS Pro?

Free update on the official site: www.humzor.com .


Humzor NexzDAS Pro (SC393-B) VS Humzor NexzDAS Pro with 10inch Tablet (SP353):

There are two optional selection of Humzor NexzDAS Pro (one can run with Android phone, another one can run with both the tablet and android phone). For the vehicle coverage and capabilities, they are the same.

 1.This is Humzor NexzDAS Pro (SC393-B):

Running with one Android phone (IOS phone is not okay yet).

Source: http://www.uobdii.com/wholesale/humzor-nexzdas-pro-full-system-diagnostic-tool.html

Price: $149


2.This is Humzor NexzDAS Pro with 10inch tablet

Comes with one 10″ tablet, meanwhile it allows the user to download the software into the Android phone, so that you can use on both tablet and phone.

Source: http://www.uobdii.com/wholesale/humzor-nexzdas-pro-tablet.html

Price: $239


6 steps to use Humzor NexzDAS Pro:

Step 1:The NexzDAS APP has already installed, so just open it directly with network working.
Step 2:Use an email to register firstly and set up your login password.
Step 3:Binding the product, get the serial number and activation code from the password envelope.
Step 4:Plug the device into the car’s OBD port, turn the ignition with engine off
Step 5:Open the App, Bluetooth will automatically connect with its icon turn into blue.
Step 6:Click the “App Store” and choose to download the models and functions you need. Then start to enjoy the smart diagnosis.


Humzor NexzDAS Pro Function List

https://mega.nz/#F!ZFRW0QjQ!TysPEpuu377HYuMo1DROuA

74 car make in total:

European car makes: √

American car makes: √

Japanese car makes : √

South Korean car makes: √

Chinese car makes: √

Australian car makes: √

Indian car makes (Mahindra, Maruti, Tata): √

Malaysian car makes (Produa, Proton, Perodua): √


For examples:

Humzor NexzDAS Pro Mahindra v17.04 Function List

https://mega.nz/#!BcJwjCrI!Q0K0q6SCeU7Au0C3TmLIH9TtS9tkMXzm836HvFlyvbQ


Humzor NexzDAS Pro Maruti v18.01 Function List

https://mega.nz/#!tIRiFQLZ!EiSrFB8JA1AEjjsy-6mkG0fN5Zk_yNV3qJXnDkVKn5o


Humzor NexzDAS Pro Tata V10.00 Function List

https://mega.nz/#!ZQYgQYyQ!WcOHVl6QWNSLxV379qSTLaV92zhZQpbAg0XH1vrY9gA


Humzor NexzDAS Pro Produa V18.2 Function List

https://mega.nz/#!0JRAFIaA!O9quq7Vc4kqod-rqXnKsA03qpcCIfc4FJU9Z3lmBP4s


Humzor NexzDAS Pro Proton v12.0 Function List

https://mega.nz/#!0RJgQQ5D!CG8s34EllS81cZ08Jdn-H1KOcVfopJ5hfi9X6LIZtZY


Humzor NexzDAS Pro Perodua V18.20 Function List

https://mega.nz/#!ocICUaJT!qDylfOI5p7laNTlJ5vMD6h7u7uXHjeoMCCfiUuhHRVc


Humzor NexzDAS Pro vs. LAUNCH Easydiag 3.0 Plus vs. Autel MaxiAP AP200 vs. XTOOL Anyscan A30

Device NexzDAS Pro EasyDiag 3.0 Plus Autel AP200 Xtool Anyscan A30
Image Humzor NexzDAS Pro-01 EasyDiag 3.0-02 autel-ap200-03 xtool-anyscan-a30-04
Software All Free 2 car brands for free  $50 for 1 car brand $99.95 for 3 car brands $149.9 for 5 car brands 1 car brand free $15.99 (Android) /$21.99 (IOS) for 12-month for one more model Free
OS Android so far Android /IOS Android /IOS Android /IOS
System Coverage Full system Four system Full system Full system
Vehicle Coverage Over 70 Over 50 Over 60 Over 50
Complete OBD2 Yes Yes Yes Yes
Resetting Service 9 $50 for one 7 5
IMMO Yes No Yes No
Software Upgrade Lifetime Free Update One year free, $29.95 for each software One year using permission Free Update
Warranty Limited 2 years Limited 1 year Limited 1 year Limited 1 year


That’s all.

Thanks.

www.uobdii.com

Top 5 Car Diagnostic Tools for Perodua and Proton

$
0
0

Recommend top 5 brands car diagnostic tools for Perodua and Proton, range from $159 to $1,050, from a pocket device to a large tablet, from suitable the individual user to the workshop.

They are Humzor NexzDAS Pro, VPECKER E4 Malaysia Version, Xtool A80, Launch X431 PRO3 / V+ Foxwell GT60 Plus. Let’s go for the details one by one in the following parts.


Top 1:

Humzor NexzDAS Pro Android Version

best-car-diagnostic-tool-for-perodua-proton-01

*Running with Android Tablet (IOS is not okay so far)

Price: $159


Humzor NexzDAS Pro Bluetooth with 10″ tablet

best-car-diagnostic-tool-for-perodua-proton-02

*Comes with one 10″ tablet, can also run with your Android phone after downloading the software from the official site.

Price: $239


The above two optional versions share the same function list:

Humzor NexzDAS Pro Proton v12.0 Function List

Humzor NexzDAS Pro Perodua V18.20 Function List


Humzor NexzDAS Pro Pros:

-> Cheapest

-> Allow the user to download any car brand by yourself.


Humzor NexzDAS Pro Cons:

Running with one phone that means it will occupy the mobile phone memory.


Top 2: VPECKER E4 Malaysia Version V8.3

best-car-diag

Price: $999

-> One dedicated Malaysia car diagnostic tool.

-> 8 inch touch screen tablet (Android)

-> Multi-language available (English as default)

-> Diagnosis performance: √

-> Maintenance functions (coding/resetting/programming etc): √

-> One key update/logging/test report/feedback/function list via WIFI.


To read: VPECKER E4 Perodua Function List V14.1

√Up to 2018 /2019 year (depends on the Perodua car models)

√Read trouble codes

√Clear trouble codes

√Data list

√Active test

√Special Functions (it may vary by models, types, years)


To read: VPECKER E4 Proton Function List V13.2

√Up to 2018 /2019 year ( depends on the Proton car model and system)

√Read trouble codes

√Clear trouble codes

√Data list

√Active test

√Special Functions (More special functions than Perodua. It may vary by models, types, years)


Top 3: Xtool A80 Full system diagnostic tool

best-car-diagnostic-tool-for-perodua-proton-04

Price: 799USD


To read: Xtool A80 Proton V8.11 Function List


To read: Xtool A80 Perodua Function List


ECU information: √

Read Codes: √

Erase codes: √

Live data: √

Actuators: √

Special Function: √

***For Actuators and Special Functions, it may vary by makes, models, types, years, thus only the available ones will be shown.


Xtool A80 pros:

All-system diagnosis for a wide range of car makes √

Key programming √

Odometer adjustment √

Special functions √

*For newest and comprehensive Xtool A80 coverage, visit the official site:

http://www.xtooltech.com/EN/ProductView/A80.html


Xtool A80 Cons:

Not suitable for the DIYer those who are only searching for Proton and Perodua car diagnostic tool.


Top 4: Launch X431 PRO3 / V+:

best-car-diagnostic-tool-for-perodua-proton-05

Price: $1,049

Malaysia Perodua car diagnosis √

Malaysia Proton car diagnosis √


you can check supported car details here:

http://qcar.x431.com/newqcar/?lan=zh&pdtTypeId=2&menuIndex=3

best-car-diagnostic-tool-for-perodua-proton-06 best-car-diagnostic-tool-for-perodua-proton-07


Launch X431 PRO3 / V+ Pros:

A decent professional diagnostic tool for a workshop.

Has smart operation

Has quick running speed


Launch X431 PRO3 / V+ Cons:

– Far beyond the needs of individual users.

– Far beyond the demand for Malaysian Perodua / Proton vehicle diagnostics.

– Expensive price


Top 5: Foxwell GT60 Plus multi-system diagnostic tablet

best-car-diagnostic-tool-for-perodua-proton-08

Price:$899


Malaysia Perodua car diagnosis √

Malaysia Proton car diagnosis √


Read: Foxwell GT60 Plus Perodua Function List

Read: Foxwell GT60 Plus Proton Function List


Year: (From 2012; Before 2012)

All system diagnosis √

Active Test √

ECU Information √

Erase codes √

IMM_Reset_Memory √

Live data √

Read codes √

Special functions √ (It may vary by models, types, years)


Language: multi-language available


Update: One touch update via WIFI


Foxwell GT60 Plus Pros:

– Cover All makes from Europe, USA, Asia etc.

– Access to all electronic control systems

– A decent professional diagnostic tool for workshop.

– Cheaper price than X431 PRO3.


Foxwell GT60 Plus Cons:

– Far beyond the needs of individual users.

– Far beyond the demand for Malaysian Perodua / Proton vehicle diagnostics.

To be continued…

Thanks.

www.uobdii.com

ODIS Online Programming Service & ODIS CPN User Instruction

$
0
0

uobdii.com is available with ODIS Online Programming Service and ODIS CPN Proxy Geko Access license. Aiming to help the user who has VAS5054A / VAS6154 and ODIS software to perform online coding performance. Read the following parts for a quick “How-to” guide.


To complete VW Audi Skoda Seat online coding job, you need to prepare:

VAS5054A with OKI chip / VAS6154 (support online functions)

ODIS software (support online functions)

ODIS CPN Proxy Geko Access Certificate

ODIS Online Programming Service Account

Car (VW, Audi, Skoda, Seat)

Computer / Laptop (WIN7 32bit / 64bit)

Teamviewer


Step 1: Remote install ODIS CPN Proxy Checker


What is ODIS CPN Proxy Checker?

Is the license for online coding login.

It has a one-month expiration date. After 30 days, it will be outdated.

***Only after installing this license, can you install the ODIS Online Coding Service.

Because ODIS CPN Proxy is necessary installed on ODIS software for ODIS online coding account access.


How to use ODIS Online Geko Account?

  1. Place an order on www.uobdii.com
  2. Contact the online customer service or add skype: UOBD2.COM.
  3. Give us teamviewer id and password.
    4. The engineer will remote install the ODIS CPN Proxy for you.


Step 2: Remote Install ODIS Online Coding Service

A quick “How-to” guide on ODIS Online Programming Service Account:
1. Place an order on www.uobdii.com for ODIS Online Programming Service (1-time service)
2. Contact the online customer service or add skype: UOBD2.COM to process this online coding.
3. Prepare VAS5054A / VAS6154, ODIS software, ODIS CPN Proxy Geko Access Certificate, car, laptop and teamviewer.
4. Give us teamviewer id and password.
5. login server
6. Login server and finish ODIS Online Coding automotive by yourself.

Image 1: ODIS 5.0.6 server login.

odis-cpn-proxy-odis-geko-access-certificate-02

Image 2: ODIS CPN Proxy ODIS Geko Access Certifica


Finally, you can access to any of the following VAG online coding performance:

Software updates with the latest version available.

Coding, adaptations.

remove component protection

Key adjustments and immobilizer

Adjusting new ELV (Steering Wheel Lock)

Activation AppConnect (+ separate license acquisition)

Deblocking new computers (mechatronic dsg, airbag components, etc.)

Access GEKO and SVM

Retrofit solution.

All services in the representative.

etc.


Thanks.


www.uobdii.com

How to DIY D+KCAN cable with switch pin 7 & 8 for old & new BMW cars

$
0
0

I modified my D-can cable and installed a switch in order to have it operational with 2006 and earlier models that use the OBDII port. My cable did not come with an adapter… 2/2007 and older vehicles requires the pin 7 and 8 to be bridged to work..3/2007 and later requires pin 7 and 8 to be separate. So for 2 bucks at Radio Shack and about 20 minutes of my time, I have a fully functional cable for both applications!


图片modify-dcan-cable-pin7-8-1

modify-dcan-cable-pin7-8-1 modify-dcan-cable-pin7-8-2


I will post up pics and give you the DIY when I get a chance..Its actually very simple that any average person can do that has access to a drill and a soldering gun.

Tools needed..
1Small philip screwdriver to take the D-can cover off
2Radio Shack micro on/off switch (can be two prongs or three) and some wire 24 guage.
3Soldering gun
4Some type of glue gun or glue adhesive
5Drill bit 5/16 to make hole in the D-can cover

Locate pin 8 which will have a number on the side of the board. One side will have the digit 1 and the other digit 8

Once you locate pin 8, thats the pin we will be using as well as the next one over. Connect each pin 7 and 8 with a separate wire and then use the soldering gun and connect each wire to the micro on/off switch… If you bought a 2 prong on/off switch connect it to each side, but if you bought a switch with three prongs, connect the middle and one of the ends, doesnt matter which one. At the end there will be one prong end not used…Neatly place the wires snug so that the D-can cover can be closed without anything preventing it to make a closed seal and your done. Screw in the 4 philip head screws in their respected holes. Note which postion is on and which is off by some type of label on the outside of the cover…SImple! Note on my first pic, I have a switch with 3 prongs, but I snipped off the 3rd one just to make it easier to solder…


Note: it’s your own risk. if you are not experienced, you’re advised to a decent INPA cable:

http://www.uobdii.com/wholesale/bmw-inpa-k-can-best-quality.html

bmw-inpa-cable-7-8-pin bmw-inpa-cable-pcb-1 bmw-inpa-cable-pcb-2


This K+Dcan cable comes with a switch pin 7 & 8 and FT232RQ chip


on DCAN cars one pin is used for a ethernet connection and the other to the K data line – on K line cars, both pins are connected to K data lines and that creating a switch mode circuit would cost more than the interface is worth. The 2 most sensible options are both hardware-related:-

1.Use an adapter (such as the one sold by One Stop electronics) which internally bridges pins 7 & 8 or…

2.Mount a small switch on the OBD plug end of your adapter, which can bridge (for K line) or separate (for DCAN) the connection between pins 7 & 8.

Vident iEasy310 scanner review on diagnosing Toyota Camry

$
0
0

Vident iEasy310 OBD2 scanner is a easy-to-use OBDII code scanner, that I would like to share some features. I have one Toyota Camry 2012, it has check engine light on, I am going to use Vident iEasy310 to diagnose the problem.


Vident iEasy310 code reader package and outlook:

It has one nice carrying bag, its unit is almost as small as one mobile phone. Its buttons are very easy to use, and the screen is quick to response.

vident-ieasy310-scanner-review-on-diagnosing-toyota-camry-01 vident-ieasy310-scanner-review-on-diagnosing-toyota-camry-02 vident-ieasy310-scanner-review-on-diagnosing-toyota-camry-03


Plug iEasy310 into the OBDII port of Toyota Camry 2012.

The code reader will turn on automatically.

vident-ieasy310-scanner-review-on-diagnosing-toyota-camry-04


Enter Function menu, it has option: OBDII/EOBD, Battery, DTC lookup, Review, Print data, setup.

vident-ieasy310-scanner-review-on-diagnosing-toyota-camry-05


Choose ” OBDII/EOBD”, then press “Enter” to the function menu:

Read codes

Erase codes

Live data

View Freeze Fram

I/M Readiness

On-board Monitor Test

Component Test

Vehicle Information

Modules Present

Unit of Measure

vident-ieasy310-scanner-review-on-diagnosing-toyota-camry-06 vident-ieasy310-scanner-review-on-diagnosing-toyota-camry-07


1.Read codes

vident-ieasy310-scanner-review-on-diagnosing-toyota-camry-08 vident-ieasy310-scanner-review-on-diagnosing-toyota-camry-09


2.Erase codes

vident-ieasy310-scanner-review-on-diagnosing-toyota-camry-11 vident-ieasy310-scanner-review-on-diagnosing-toyota-camry-12


3.Live data:

View data

Record data

Playback data

vident-ieasy310-scanner-review-on-diagnosing-toyota-camry-13 vident-ieasy310-scanner-review-on-diagnosing-toyota-camry-14


Complete data set:

vident-ieasy310-scanner-review-on-diagnosing-toyota-camry-15 vident-ieasy310-scanner-review-on-diagnosing-toyota-camry-16 vident-ieasy310-scanner-review-on-diagnosing-toyota-camry-17


Custom data set

vident-ieasy310-scanner-review-on-diagnosing-toyota-camry-18 vident-ieasy310-scanner-review-on-diagnosing-toyota-camry-19 vident-ieasy310-scanner-review-on-diagnosing-toyota-camry-20 vident-ieasy310-scanner-review-on-diagnosing-toyota-camry-21 vident-ieasy310-scanner-review-on-diagnosing-toyota-camry-22


4.View Freeze Frame.

vident-ieasy310-scanner-review-on-diagnosing-toyota-camry-23 vident-ieasy310-scanner-review-on-diagnosing-toyota-camry-24


5.I /M readiness

vident-ieasy310-scanner-review-on-diagnosing-toyota-camry-25


6.On-board Monitor Test

vident-ieasy310-scanner-review-on-diagnosing-toyota-camry-26


Select Toyota.

vident-ieasy310-scanner-review-on-diagnosing-toyota-camry-27 vident-ieasy310-scanner-review-on-diagnosing-toyota-camry-28 vident-ieasy310-scanner-review-on-diagnosing-toyota-camry-29 vident-ieasy310-scanner-review-on-diagnosing-toyota-camry-30 vident-ieasy310-scanner-review-on-diagnosing-toyota-camry-31 vident-ieasy310-scanner-review-on-diagnosing-toyota-camry-32


7.Component Test

Not support yet.

vident-ieasy310-scanner-review-on-diagnosing-toyota-camry-33


8.Vehicle information.

vident-ieasy310-scanner-review-on-diagnosing-toyota-camry-34


9.Modules Present

vident-ieasy310-scanner-review-on-diagnosing-toyota-camry-35


Next is back to home menu and have an overview of Battery, DTC Lookup, Review, Print Data and Setup.

Vident iEasy310 scanner language available: English, Spanish, Italian, French, German.

vident-ieasy310-scanner-review-on-diagnosing-toyota-camry-38 vident-ieasy310-scanner-review-on-diagnosing-toyota-camry-39 vident-ieasy310-scanner-review-on-diagnosing-toyota-camry-40 vident-ieasy310-scanner-review-on-diagnosing-toyota-camry-41 vident-ieasy310-scanner-review-on-diagnosing-toyota-camry-42 vident-ieasy310-scanner-review-on-diagnosing-toyota-camry-43 vident-ieasy310-scanner-review-on-diagnosing-toyota-camry-44 vident-ieasy310-scanner-review-on-diagnosing-toyota-camry-45 vident-ieasy310-scanner-review-on-diagnosing-toyota-camry-46


Vident iEasy310 is really one portable nice code reader for every DIYer, it can do what you paid (60usd in total).


Thanks.

Autel MaxiIM IM608 program a Keyless to Toyota Camry 2019 success

$
0
0

Tested: Autel MaxiIM IM608 can program a Keyless to Toyota Camry 2019 successfully.


Images mean a lot:

autel-maxiim-im608-program-a-keyless-to-toyota-camry-2019-01 autel-maxiim-im608-program-a-keyless-to-toyota-camry-2019-02 autel-maxiim-im608-program-a-keyless-to-toyota-camry-2019-03 autel-maxiim-im608-program-a-keyless-to-toyota-camry-2019-04 autel-maxiim-im608-program-a-keyless-to-toyota-camry-2019-05 autel-maxiim-im608-program-a-keyless-to-toyota-camry-2019-06 autel-maxiim-im608-program-a-keyless-to-toyota-camry-2019-07


FAQ:

Q: Is it all key lost or add key

A: AKL


Q: You can program used keys?

A: yes used key

Q: need unlock?

A: I did not unlock

Q: Hitag Aes 4A?

A: I did not even check

Q: Don’t need to unlock used key?

A: yes


Reliable source of Autel MaxiIM IM608:

http://www.uobdii.com/wholesale/autel-maxiim-im608.html

Original quality

Reasonable price

24-hours after-sale service.


Best 2019 Christmas gifts: Xhorse VVDI2 and VVDI MB on Sale

$
0
0

For a Xhorse VVDI2 / VVDI MB loyal customer, nothing is more happy than saving money and receiving gifts at Christmas 2019. Before Christmas, Xhorse dealer (uobdii.com) prepare some gift: 96bit 48 calculation activation, MBQ activation, FEM activation and VV-03 VAG ID48.


Xhorse VVDI2 Full advanced version comes with every software activated:

VK-01 transponder programmer

Toyota H software activation

VP-01 Porsche IMMO data tool

VJ-01 Passthru J2534

VV-04 VAG ID48-96 bit

VV-03 VAG ID48

VB-03 FEM

VV-05 MQB

VPSA-01 PSA

Christmas-Promotion-for-Loyal-Customer


How to get free activation service and save money from promotion 1 – 3?

Promotion 1.
VVDI2 loyal customer wants to buy VVDI MB Tool
Required The Serial Number of VVDI2 Advanced Version
Gifts VVDI 2 can obtain the following activation service for free:

l  96bit 48 calculation activation

l  MQB activation

l  FEM activation

l  VV-03 VAG ID48


Sale Price $1100  (Was $2000 ,SAVE up to $900)
Shipping Fee Free by DHL


Promotion 2.
VVDI MB loyal customer wants to buy VVDI2 Advanced Version
 

Optional


The Serial Number of VVDI MB Tool

Gifts VVDI 2 can obtain the following activation service for free:

l  96bit 48 calculation activation

l  MQB activation

l  FEM activation

l  VV-03 VAG ID48


Sale Price $ 1599  (Was 2250$, save up to 651$)
Shipping Fee Free by DHL


Promotion 3.
Buy VVDI MB + VVDI2 Advanced Version
Required VVDI2 Advanced Version +VVDI MB TOOL Powerful Package
Gifts VVDI 2 can obtain the following activation service for free:

l  96bit 48 calculation activation

l  MQB activation

l  FEM activation

l  VV-03 VAG ID48


Sale Price 2699$  (was 4250$, save up to 1551$)
Shipping Fee Free by DHL


Xhorse VVDI2 & VVDI MB Christmas Sale all rights reserved by www.uobdii.com

How many methods to program BMW CAS 3++ key successfully?

$
0
0

Thanks to DK members who are talking about how to safely program CAS 3++ key. The poster consider they are very helpful and would like to share their using experience and options in this article.

How many methods to program BMW CAS 3++ key successfully

1.Use AVDI to program CAS 3++ key

Normally we get these and then remove and backup on bench before downgrading and programming a key through OBD with AVDI with 13.5v charger etc.


What are the disadvantages in this method?

Obviously don’t like downgrading as potential issues and also removes the security aspect on the car.


2.Use Tango to program CAS 3++ key

If we talking about spare key then of course read eeprom on bench is enough (working key required to decrypt ISN). If all keys lost still need downgrade or need cas eeprom + ISN from DME.

Tango always prompt to write new eeprom to CAS after key programming but you dont have to do it, unless you program new key on already used position.


Problem:

I tried this today with a working key and it doesn’t work. Old key works fine, but the new one just doesn’t bring the dash on? In the end i downgraded CAS & then programmed through OBD and worked fine (obviously having a backup first.

I’ve tried it on 3 cars though so don’t think it’s my files, cause I always verify the read with VVDI prog & Tango detects it as a cas3++. It must be my keys.

Solution: I do duplicates the same way, but I use Xhorse VVDI2 programmer.


3.What is the best way of preventing the risk of CAS3++ Istap failure when programming key via OBD only? Using xhorse vvdi2 only.

Suggestions from Xhorse engineer & whom have done many VVDI2 CAS3++:

1) Continuous 13 volts with a voltage stabilizer.

2) Voltage  it’s one thing you need to consider.

3) Voltage… I done lots off them no problems

4) The voltage drop can be the reason it fails.

5) Voltage is the biggest thing. Best way to do it is on the bench to be safe.

6)  The best way to prevent an issue with the downgrade is to not do it via OBD. Or pull the CAS out and read/save the eeprom prior…. It takes 5-10 minutes to do with some practice. Read CAS with programmer .. make key .. put all back ..job done ..

7) Make backup eeprom and flash via vvdi prog programer and than do downgrade or what ever you want

Youtube search: “how to read CAS dump by VVDI PROG”

So if you need to do with VVDI2 via OBD. Go and get a battery stabilizer. It will work.

The best way is to backup eeprom and write key on bench.


4.Use CGDI BMW programmer to program CAS 3++ key

It is possible to bypass the downgrade by reading the flash and eeprom on the bench and then loading into tango programmer and programming key through that.

It’s how I used to do 9389115 before it was doable by obd. I used CGDI BMW not Tango to write the key, though. Once downgraded, you can always reflash in a couple of minutes.


5.Program CAS 3++ key without downgrading:

You can read eeprom on cas3+ or cas3/ista-p, then use programmer to make key with eeprom file. that’s how I do keys when I don’t downgrade. I don’t write back to CAS, I choose new key position.


Thanks


www.uobdii.com

(Solved) ACDP programmed a new key to 2016 Rang Rover Sport but car NOT started

$
0
0

ACDP programmed a new key to 2016 Rang Rover Sport. It said, “programmed a new key successfully”, but when KVM is installed to the car. The didn’t work.


Solution:

Pls go to “Add key” in ACDP software and then “Step 1 : read eeprom/dflash data”.

Then save new key id and the compare it with that in the key list.

If it doens’t work, pls check if the latest data with the old key id or not. If yes, you’re advised to program a new key again.

acdp-rangerover-add-key-1 acdp-rangerover-add-key-2


Tech support from http://www.uobdii.com/

How to use Benz C6 and Xenrtry to do DPF Regeneration by Yourself

$
0
0

It is very expensive to repair Mercedes Benz,take DPF regeneration as example,it will cost you near $1000 for it on dealer.Some many DIY user will choose to do this operaiton.Here UOBD2 will show you guide on how to use OEM device to perform Mercede Benz DPF regeneration by yourself?


How does DPF Regeneration work?

DPF Regeneration menu lets you perform the DPF cleaning to clear the blockage through

continuous burning of the particulates captured in the DPF filter. Which will avoid the filter being blocked by ash, then the owner has to replace the new diesel particulate filter (worth 1000usd -200usd)


How to use Benz C6 and Xenrtry 09/2019 to do DPF Regeneration?

What You Need:

New VXDIAG Multi Diagnostic Tool for Benz With V2019.7 Software HDD

or

Mercedes Benz C6 OEM DoIP Xentry Diagnosis VCI Multiplexer with V2019.9 Software HDD No Need Activation


With this machine, just follow the on-screen instruction to do, soon DPF regeneration will be completed. After complete, all the data will be low value in green color.

benz-c6-done-dpf-regeneration-01 benz-c6-done-dpf-regeneration-02 benz-c6-done-dpf-regeneration-03 benz-c6-done-dpf-regeneration-04 benz-c6-done-dpf-regeneration-05 benz-c6-done-dpf-regeneration-06 benz-c6-done-dpf-regeneration-07


For your information, what I used is BEZN C6 OEM DOIP VCI + Xentry 09/2019 software, they are made by Allscanner VXDIAG Company.

I have no VXDIAG C6 MB Star C6, so I have no idea if it is working DPF too, although the Allscanner Engineer claim yes.

Mercedes Benz C6 OEM DoIP Xentry Diagnosis VCI Multiplexer with V2019.9 Software HDD No Need Activation

That’s all.

Thanks

How does Galletto v54 read in bootmode on EDC15P ECU’s?

$
0
0

This is a quick guide on how to use Galletto v54 to read in bootmode on EDC15P ECU’s. I hope some of you can use this too, as there are only guides for this with MPPS.
It appears however, that it’s not possible to write the ECU in bootmode using this feature. I have at least not had any luck with it. Feel free to correct me if I’m wrong.
Credits to @ nps1994 (DK member)

Step 1: Open the ECU.
I did this carefully with a screwdriver.

Step 2: Locate the 29f400 chip.
This is where the flash is stored.

Step 3: Fire up FGtech and go to Tools Boot Mode > Siemens-Infineon C167 > Bosch ME7 – 1 Micro – Flash 400 Boot Mode.

Step 4: Connect the ECU like this without putting on power yet (On my pictures I have made an EDC15 to OBD adapter, but basically the same):

boot-reading-of-edc15-with-galletto-v54-01


Step 5: Press Read ECU now follow the instructions (Put ground on pin 24 of the flash > Apply power > Remove ground after approx. 5 seconds)

All gone well Galletto 4 should now read the flash.

I have attached some pictures for more detailed instruction.
Hope this can help somebody!

boot-reading-of-edc15-with-galletto-v54-02 boot-reading-of-edc15-with-galletto-v54-03 boot-reading-of-edc15-with-galletto-v54-04


Thanks


www.uobdii.com

Viewing all 3253 articles
Browse latest View live


Latest Images

<script src="https://jsc.adskeeper.com/r/s/rssing.com.1596347.js" async> </script>